Author: shankarshruthi

  • Coconut Vegetable Stew

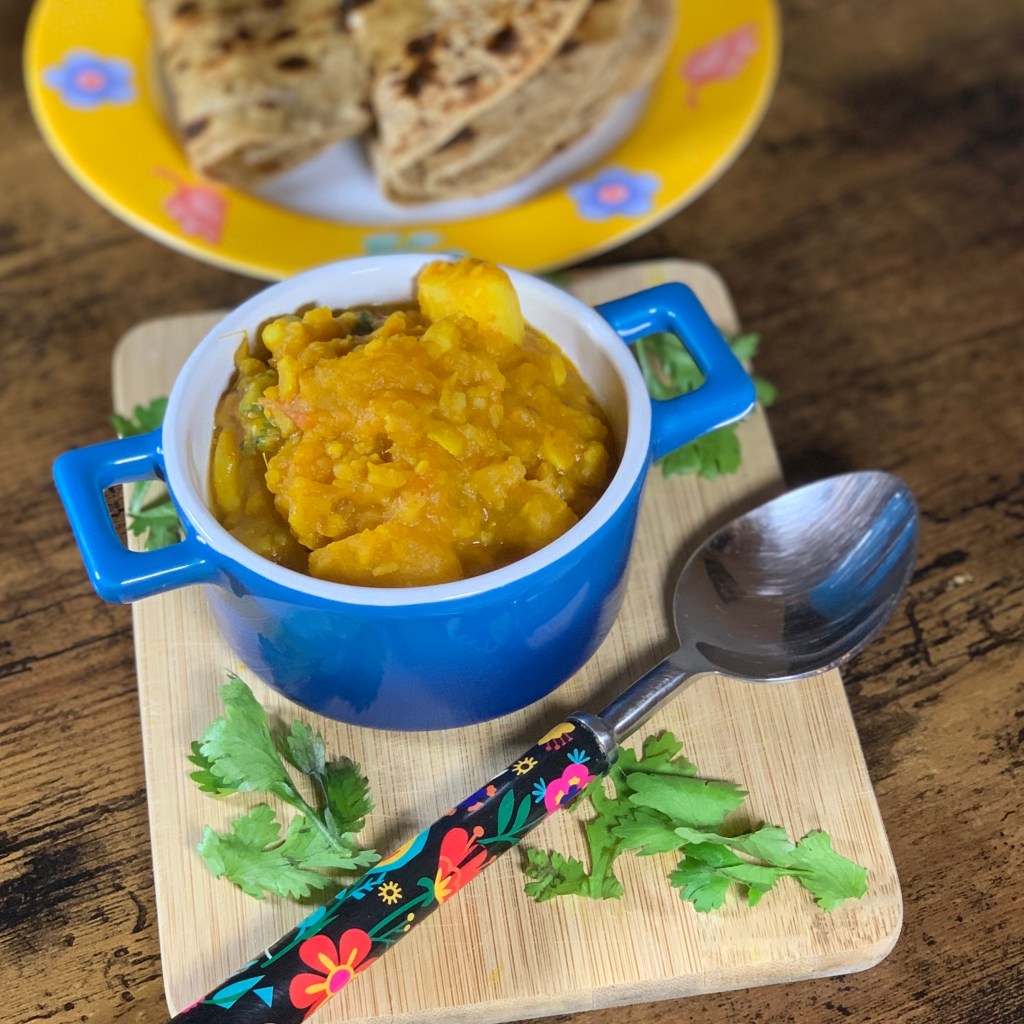
    They say that “variety is the spice of life”. So, if you are bored of the regular Rasam, Sambhar and Dals, this stew will be a nice change to your regular menu. It is creamy and hearty with warm aromatic spices, and can be paired with rice, roti, dosa or aapam.


    While this type of a Coconut Stew originates from the southern Indian state of Kerala, it has found many variations across India, mainly in the use of spices, but using the same coconut milk base. In Kerala, fresh coconut milk is presumably used. However, here in the US, I have had to resort to canned Coconut milk. Not my preferred choice, but it is not all that bad. It does the job.

    This stew can be customized with your choice of spices and vegetables, and it comes together in less than 30 minutes. Its a one-pot meal for a quick weeknight dinner.

    Prep time15 minutes
    Cook time20 minutes
    Serves2-3

    Ingredients

    Vegetables

    • Potatoes – 2, small cubes (Approx. 1 cup)
    • Green Beans – 1 inch pieces (Approx. 2 cups)
    • Carrots – 1 inch matchstick pieces (Approx. 2 cups)
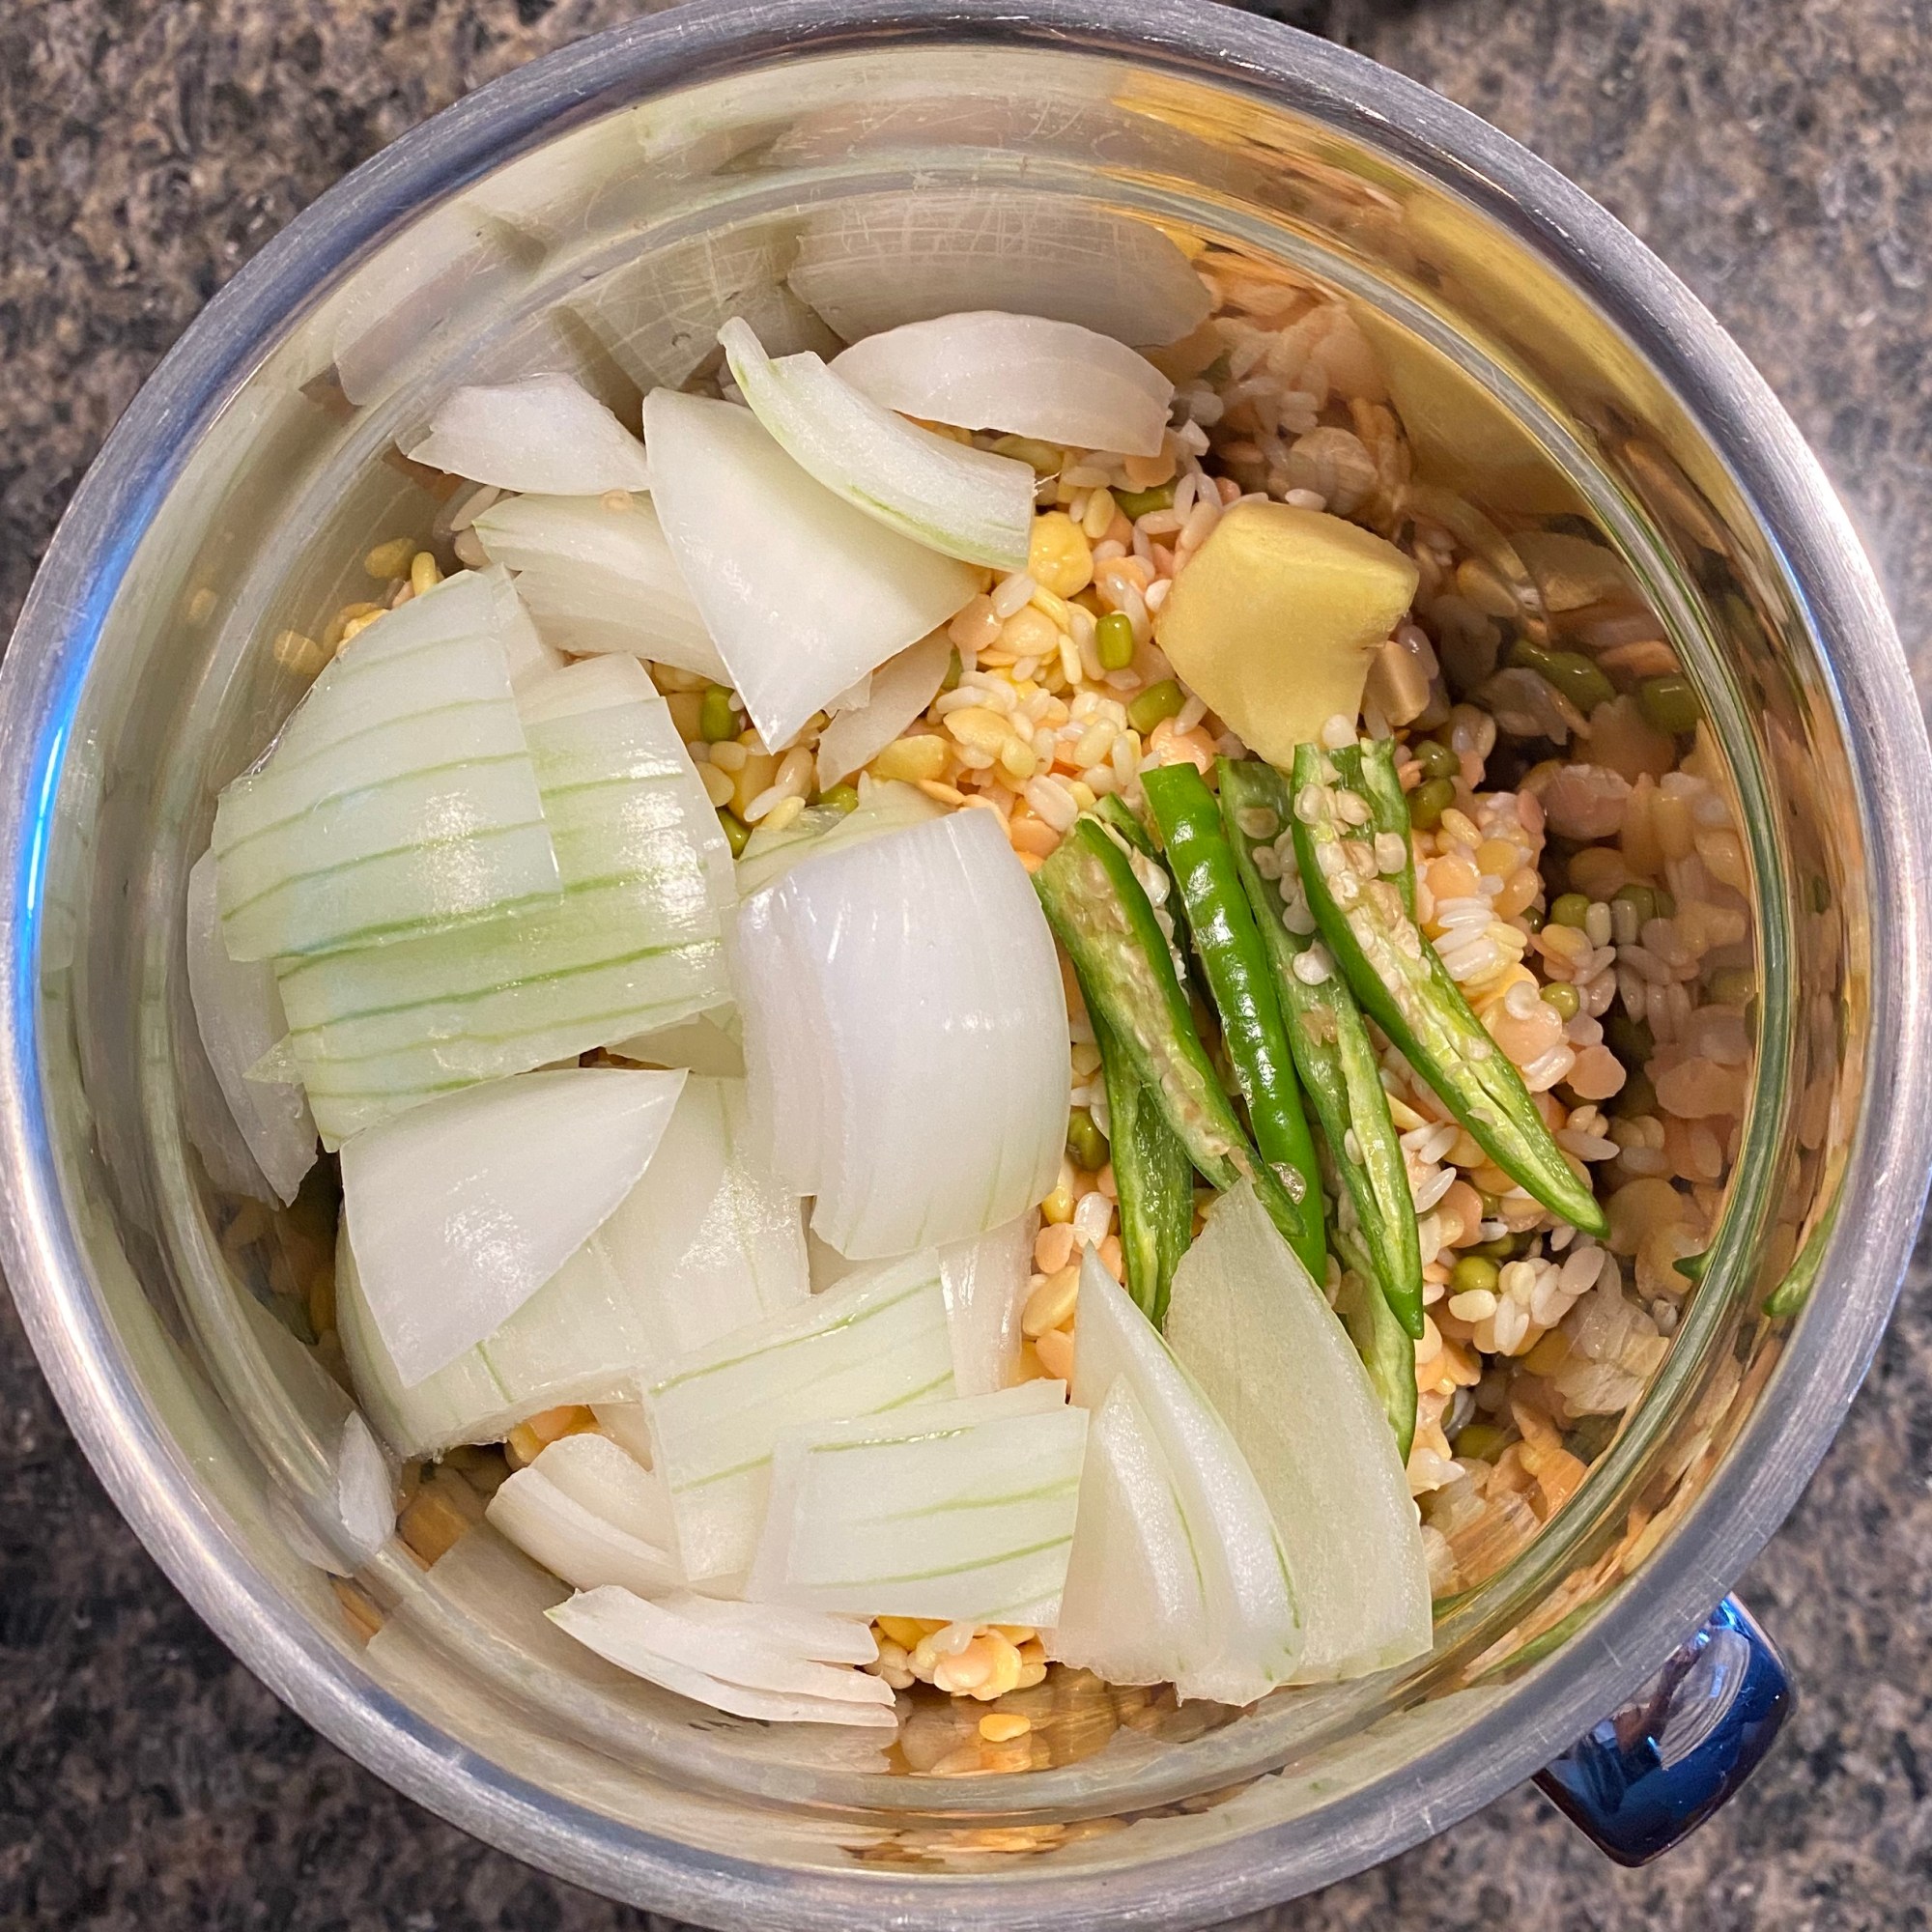
    • Onions – Sliced, 1 cup
    • Green Peas – 1 cup

    Spices, Flavors and Herbs

    • Green Chillies – 2-3, slit (Adjust as per spice preference)
    • Ginger – Finely chopped, 1 tbsp
    • Garlic – Finely chopped, 1 tbsp
    • Bay Leaf – 1
    • Cloves – 2
    • Green Cardamom – 2 pods (Or 1/4 tsp Cardamom Powder)
    • Cinnamon – 1/4 tsp (1 small stick)

    Dairy/Non-Dairy

    • Coconut Milk – 1 can (Unsweetened, low-fat)

    Oils

    • Cooking Oil – 2-3 tbsp

    Method

    1. Turn on Instant Pot to saute mode for 10 minutes. Add oil
    2. Once the display reads hot, add all the bay leaf, cinnamon, cardamom and cloves
    3. Once the spices are aromatic, add the onions, garlic, ginger and green chillies. Saute until the onions are cooked through and are translucent and the ginger and garlic have lightly browned
    4. Add all the vegetables and mix well
    5. Split the can of coconut milk into 2 halves. To one half, add 1 cup of water and dilute it. Keep the other half aside
    6. Add the diluted half to the vegetable and spice mixture
    7. Mix well. Set the Instant Pot to pressure cook mode (high pressure) and set the timer to 5 minutes. This step is to cook the vegetables in the coconut milk so that all the flavors amalgamate
    8. Once the pressure cooking is done, release the pressure and open the lid. Once again, set the Instant Pot to saute mode for 5 minutes
    9. Add the remaining thicker half of the coconut milk. Simmer for 5 minutes
    10. Transfer the stew to a serving bowl and serve piping hot with rice, roti, dosa or aapam

    **If using a pressure cooker, for step 7, pressure cook for 1-2 whistles max.


    You can also follow me on Instagram to be up-to-date with what is cooking my kitchen. If you like this recipe, do share your comments below. Don’t forget to post your version on Instagram using #foodformyloveblog.

  • Tomato Chutney

    It would be hard to find an Indian household without a chutney or pickle. Every region, every state and every household have their own secret recipes, some often passed down through generations. This Tomato Chutney has not been passed down through the generations, but has certainly been passed to me by my mum and it has a very special place in my heart.


    The memory of the aroma of this chutney cooking downstairs in the kitchen is fresh in my mind. There was always something different about this chutney, a distinct flavor that I could never figure out what it was, and frankly, until recently, I had bothered to find out. I just know that the chutney tasted incredible. That distinct flavor comes from the secret ingredient that my mum has used, drum roll………rasam powder. I would have never guessed, but it works.

    I have grown up eating this chutney with roti, rice dosas and even idlis. In fact, when I used to go off to college after every summer or winter holidays, my mum used to pack me a lot of food, some of them in 4 months supply, like theplas and podis. One of the items was this chutney that she used to pack in a spill-proof manner to travel half way across the world. Any every time I ate theplas, I would eat it with this chutney and would miss being at home. That’s how far thus chutney has traveled.

    I tried making this chutney for the first time and it turned out great. But there was just something missing, I guess its mum’s touch. My mother-in-law also makes a tomato chutney, but her recipe uses different spices and the chutney is more fine and pasty instead of a chunky one. As I said, each household has its own variation of a chutney. But this one, you’ve got to try it.

    Prep time5 minutes
    Cook time15 minutes
    Serves4-6

    Ingredients

    Vegetables

    • Onion – 1, medium, diced
    • Tomatoes – 3, medium, diced

    Spices, Flavors and Herbs

    • Garlic – 1 1/2 tbsp, finely chopped
    • Rasam Powder – 1 tbsp
    • Jaggery Powder – 1 tbsp (If unavailable use sugar)
    • Mustard Seeds – 1 tsp
    • Salt – As per taste

    Oils

    • Cooking Oil – 1 tbsp

    Method

    1. Heat a pan. To this add, onions and tomatoes
    2. Add salt, jaggery powder and mix. Close the lid. Cook the onions and tomatoes for 5 minutes on medium-high heat
    3. Open the lid and cook for 5 minutes until most of the water evaporates
    4. Add rasam powder. Mix well and cook for 3-5 minutes with the lid open
    5. In the meanwhile, prepare the tadka (tempering). For this, add oil to a small pan
    6. Once the oil has heated, add mustard seeds. Once they crackle, add the chopped garlic. Once the garlic browns, add the tadka to the chutney
    7. Mix well. Serve immediately with roti, rice or dosas. The chutney can be stored in an air-tight container for approx. 30 days in the refrigerator for upto 3 months in the freezer

    ** Pair this chutney with Adai (A mixed lentil Dosa). Get the recipe here.


    You can also follow me on Instagram to be up-to-date with what is cooking my kitchen. If you like this recipe, do share your comments below. Don’t forget to post your version on Instagram using #foodformyloveblog.

  • Adai

    Dosa (Lentil Crepes) is the quintessential, and a staple, south Indian breakfast. All south Indians, and all Indians for that matter have grown up eating Dosas. For me, it was just one of those things that was always at home. Don’t have anything else to eat, let’s make a Dosa. Need a snack? Let’s make Dosa. Quick breakfast, let’s make Dosa. But, when I moved away from home, making Dosa became a far fetched dream, simply because of the process involved in preparing, fermenting and grinding the batter. It only took 2 years of video calls with my mum to perfect the batter.

    And then, I found the recipe to this Adai in my mum’s recipe book (which I stole :)). I had heard of Adai, and although it is more common in a Tamilian household, food has broken all boundaries and barriers. So presumably my mum got the original recipe from one of her friends and then gave it her own twist. And it is just great. Now having tried it, I wonder why it has not made its way to a single south Indian restaurant menu. I think it can compete just as well with a Dosa or an Utthapam.


    Adai falls perfectly in the category of multigrain foods and better yet, a home prepared version. Adai is a Dosa prepared using batter made from a variety of lentils. The key is to use equal parts of as many lentils as rice. The best part is, there is no fermentation involved and you really cannot go wrong with it. What I like about it is its high nutrition content. The protein and fiber from the mix of all the lentils is just perfect, just like eating a mixed dal. Furthermore, the recipe is vegan and gluten-free. The lentils, spices and herbs that are added to the batter can be customized to your preferences.


    Now, to be clear, Adai is different from an Adai Dosa. While the former involves just soaking the lentils and grinding it into a batter, the latter involves a short fermentation for the batter. Adai can be served with a variety of condiments such as chutneys, podis, saagu or even avial. Some households even serve it with honey or butter. I served the Adai with my favorite Tomato Chutney that is also my mum’s recipe. Get the recipe here. Any which way, Adai is a must-try scrumptious and high-protein dish.

    Prep time10-12 hours
    Cook time15-20 minutes
    Serves6-8 people/20 Adais

    Ingredients

    Grains and Lentils

    • Rice – 1/2 cup
    • Green Moong Dal – 1/2 cup
    • Masoor Dal (Red Lentils) – 1/2 cup
    • Yellow Moong Dal (Yellow Petite Lentils) – 1/2 cup
    • Toor Dal (Pigeon Peas) – 1/2 cup
    • Chana Dal (Split Baby Chickpeas) – 1/2 cup
    • Urad Dal (Black Gram) – 1/2 cup

    Vegetables

    • Onion – 1 small, chopped

    Spices, Flavors and Herbs

    • Ginger – 1 inch piece
    • Green Chillies – 3, slit (Adjust as per spice preference)
    • Cilantro – A handful (Optional)

    Oils

    • Cooking Oil – A few tbsp for cooking the Adai

    Ingredient notes

    • Add 1/2 cup Quinoa or Oats for added nutrition
    • Add a handful of Moringa, Fenugreek (Methi) or blanched Spinach for a green Adai and added nutrition
    • Add any other spices like Fennel (Saumph) or Cumin (Jeera) seeds

    Method

    1. Place all the lentils and grains in a bowl. Wash under cold running water until the water is clear. Add water and soak overnight (Approx. 10-12 hours)
    2. The following morning, drain the water and add the soaked lentils and grains to a blender
    3. To the blender, add the ginger, onions and green chillies
    4. Blend without adding any water. Use a spatula to clean the sides of the blender jar to make sure there are no lumps
    5. Then add 1/2 cup water to further blend into a smooth batter
    6. Transfer the batter to a bowl and set aside for 1-2 hours
    7. Heat a non-stick pan (Don’t add oil as the batter will not spread. Trust me, experience speaks!)
    8. Pour one ladle of the batter on the pan and spread it into a nice circle. Pour a tbsp of oil around the Adai. Cook for 2 minutes on medium-high heat
    9. Flip the Adai and cook for another 2 minutes on medium-high heat
    10. Transfer to a plate and serve hot Adais with choice of condiments ๐Ÿ™‚

    You can also follow me on Instagram to be up-to-date with what is cooking my kitchen. If you like this recipe, do share your comments below. Don’t forget to post your version on Instagram using #foodformyloveblog.

  • Sweet Potato and Quinoa Sliders

    Mini-burger or slider? What should I call it? Do I dare call this mini-burger a slider? Why not, right?

    On that note, ever had a tasty AND healthy slider? If not, then try this one. Protein rich Quinoa with complex carbs from the Sweet Potato mixed with warm spices and grilled to perfection to be layered with fresh toppings between slider buns. Boom, you got yourself a tasty AND healthy slider.


    Sliders (or burgers) are not something that are common in our household. I am not sure why. So, this was an attempt to introduce a healthy version at home. I think slider patties are a great way to hide veggies, lentils and grains to feed those who don’t like them. As long as the texture and flavor are on point, I don’t think anyone would question what you did to make such delicious sliders (wink, wink!)

    For this slider, the ingredients for the patties are few in number and are readily available. and the whole recipe comes together very quickly. Even for the “not so skilled” with making slider patties at home, this is a great first time recipe.

    Now, shaping the patties can seem like a daunting task, but, guess what, this is not a competition. So, just chill out, get a shape to it and throw it on that grill. Only your eyes care about the shape, everyone else like your mouth and stomach are only concerned with the taste.

    I used a stove-top grill that I bought at IKEA for $10. And I swear, it is one of THE BEST kitchen buys I have ever made. Since I don’t do outdoor space for a grill, this grill does the job for times when I need it, like now. A splash of oil on both sides of the patty and butter for the buns. The sizzle when you throw them on the grill is going to make your mouth water.

    My favorite part about this slider is the toppings that I get to load it with, which are totally one’s choice. Here the layers are: bottom bun, patty, avocado mash, sliced onions, jalapenos and top bun. That first bite is an explosion of flavors that will make this whole process worthwhile. Try it! ๐Ÿ™‚

    Prep time25 minutes
    Cook time15 minutes
    Serves3-4 (Approx. 10 sliders)

    Ingredients

    Vegetables

    • Sweet Potatoes – 2, medium, large cubes
    • Carrots – 1, small, shredded
    • Yellow Onion – 1, small, finely chopped
    • Red Onion – A few slices

    Fruit

    • Avocado – 1, mashed

    Grains

    • Quinoa – 1 cup, uncooked

    Spices, Flavors and Herbs

    • Garlic – 3 cloves, finely chopped
    • Ginger – 1 1-inch piece, finely chopped
    • Cilantro – A handful, finely chopped
    • Jalapeno – 1, thinly sliced
    • Red Chilli Powder – 1 1/2 tsp
    • Coriander Powder – 1 tsp
    • Cumin Powder – 1 tsp
    • Ground Black Pepper – 1/2 tsp
    • Salt – As per taste

    Oils

    • Cooking Oil – 3-4 tbsp

    Method

    1. Cook quinoa as per the package instructions
    2. In the meanwhile, place the large cubes of sweet potato in a microwave safe container. Add a few splashes of water. Cover with a paper towel. Microwave for 3-5 minutes until the sweet potatoes are soft and mashable
    3. In a bowl, add all ingredients. Using your hands, mix them well. If the mixture is very wet, add 1-2 tbsps of chickpea flour or breadcrumbs. Mix until the mixture is thick and malleable
    4. Take a drop of oil, rub it over the palm of your hands, take a small portion of the patty mixture and shape it. This way, the mixture will not stick to your hand. Repeat until all the patties are formed
    5. Heat the grill plan or a regular pan
    6. Drizzle some oil on the pan, place 2-3 patties and enjoy the sound of that sizzle. Cook until one side is nicely browned and flip until the other side is browned
    7. On the same pan, lightly toast the buns
    8. To assemble, place a patty on the bottom bun. Spread a generous amount of mashed avocado on the patty. On this place some sliced red onions and jalapenos and close with the top bun. Feel free to add a squeeze of lemon before closing with the top bun. Dig in!

    **For any leftover patties, store them in airtight container by placing a parchment paper between each pattie and in a freezer for 1-2 weeks.


    You can also follow me on Instagram to be up-to-date with what is cooking my kitchen. If you like this recipe, do share your comments below. Don’t forget to post your version on Instagram using #foodformyloveblog.

  • Spinach Majjige Huli

    Yoghurt and greens. This recipe has everything that I love and everything that my husband does not. Yet, he ate it, not once, but twice. So, I am going to take the win.

    This recipe is yet another good and very interesting way to incorporate greens into your diet. Unfortunately it is not vegan because of the use of yoghurt. If you try this recipe with plant based yoghurt, I would love to know how to turns out. Now, on to the the recipe.


    Majjige Huli is a popular dish from the Southern Indian state of Karnataka. Growing up, it was a favorite at my parent’s place. Majjige Huli, when translated backwards means “Sour (Huli) Buttermilk (Majjige)“. Traditionally, the recipe is made with sour buttermilk and uses different types of vegetables. There is a boiled version (where the buttermilk is boiled to reduce its sourness, which would make it similar to the North Indian version of this called Kadhi). But this is a “raw” version because buttermilk (NOT RAW) is used but not boiled. Therefore, it is called a Hasi Majjige Huli (Hasi = Raw in Kannada). But, since I did not have buttermilk at home, I made do with yoghurt. Furthermore, Spinach is used in this recipe. But traditionally, vegetables such as Cucumber, Bottle Gourd, Green Plantains, Bell Peppers etc. are used in the preparation of the boiled version of this curry.

    The recipe has a distinct flavor due to the use of both raw and crackled mustard seeds along with its coconut and yoghurt base. It is definitely an acquired taste and therefore should be adjusted as per individual taste preferences. Anyone with any skill level can prepare this recipe in under 20 minutes. The curry is served with rice and is usually a second accompaniment along with rasam or sambhar.

    With good probiotics from yoghurt or buttermilk and vitamins and minerals from the greens, it is nutritious and cooling on the body. Definitely worth a try.

    Prep time10 minutes
    Cook time5
    Serves2

    Ingredients

    Vegetables

    • Spinach – 2-3 cups, roughly chopped

    Dairy

    • Greek Yoghurt – 2 tbsps

    Masala Paste

    • Mustard Seeds – 1.5 tsp
    • Green Chillies – 2
    • Cilantro – 1 handful
    • Turmeric – 1/2 tsp
    • Salt – As per taste
    • Fresh Coconut – 1/4 cup

    Oils

    • Cooking oil – 2 tsps

    Method

    1. Heat oil in a pan. Add 1/2 tsp mustard seeds. Once the mustard seeds crackle, add the chopped spinach. Saute for 1-2 minutes until the spinach has lightly wilted. Take it off the heat and allow it to cool
    2. In the meanwhile, to prepare the paste, add coconut, cilantro, green chillies, remaining mustard seeds and turmeric into a blending jar. Add 1/2 cup water and blend into a smooth paste
    3. To the blended paste, add yoghurt, salt, 1/2 cup water and blend into a smooth paste
    4. In a bowl, add the cooled sauteed spinach and the blended masala paste. Mix well to break up any spinach lumps
    5. Serve over warm rice and enjoy!

    Serving suggestion

    • Feel free to add a tadka (tempering) on the top. For the tadka, add some mustard seeds to hot oil. Allow it to crackle before adding some hing and curry leaves. Fry for 30 seconds and add to the Majjige Huli

    You can also follow me on Instagram to be up-to-date with what is cooking my kitchen. If you like this recipe, do share your comments below. Don’t forget to post your version on Instagram using #foodformyloveblog.

    Rating: 1 out of 5.
  • Baked Breakfast Apple Crisp

    “There are times when breakfast seems the one thing worth getting up for”

    – Peter Dr Vries

    I live by the fact that breakfast is the most important meal of the day. And this important meal sets the tone for the rest of the day. So it is very important that it is not only healthy, but delicious and enjoyable too.

    Indian households rarely eat sweet items for breakfast, at least not sweet items solely. They are almost always accompanied with a savory main breakfast item. But, for a lot of us working folks, who have very little time (or skill!) for a morning breakfast but still need a tasty and nutritious breakfast, this is the one for you.


    This Breakfast Apple Crisp comes together in about 30 minutes. It has the goodness of crisp Apples and nutritious Oats, together with warm spices like Ginger, Cinnamon and Nutmeg. It is like dessert for breakfast, but healthy ๐Ÿ™‚

    All you have to do is wake up in the morning, put it all together and put it in the oven before you go shower and get ready for work. When you get out of the shower, the house is going to smell so sweet and warm and the breakfast will be ready to eat or to be packed in a box to eat at your desk. This can even be prepared for the week and stored in an air-tight container. Just warm before use to enjoy the ooey-gooeyness.

    This is a sweet, nutritious and filling breakfast that allows you to control the amount of added sugars. This is definitely a great change from the regular cereal and overnight oats. Enjoy it with a cup of morning coffee and you will be set for a great day of work.

    Prep time5 minutes
    Cook time25 minutes
    Serves2

    Ingredients

    Fruits

    • Apple – 1, chopped into bite sized pieces

    Grains and Flour

    • Quick Rolled Oats – 3/4 cup
    • All Purpose Flour – 2 tbsp

    Spices and Flavors

    • Cinnamon – 1 tsp
    • Sugar – 1 tbsp (I used white sugar. Feel free to use packed brown sugar)
    • Honey – 1 tbsp
    • Vanilla Extract – 1/4 tsp

    Oils/Butter

    • Oil – 2 tbsp

    Ingredient notes

    • I have used Honeycrisp Apples because they are sweet and crispy, and they maintain their crispiness even after baking (And because they are my favorite variety). You can use any other variety of your choice, except Green Granny Smith Apples, simply because they have a sharper, tart flavor which is not desired for this recipe
    • I have used regular white sugar. Feel free to use brown sugar or even try powdered jaggery
    • You can replace oil with the same quantity of melted butter

    Method

    1. First preheat the oven to 375F (Approx. 190C)
    2. Then, make the oats crumble. For this, add oats, 1/2 tsp cinnamon, sugar and 1 tbsp flour to a mixing bowl. Mix well and set aside
    3. To another mixing bowl, add the chopped apples, honey, 1/2 tsp cinnamon and 1 tbsp flour. Mix well to coat the apples with the rest of the ingredients
    4. If making individual servings, take 2 separate ramekins or take 1 baking dish. Coat the surface with oil or melted butter
    5. Place a spoonful of the oat crumble at the bottom of the baking dish. Add a few spoonfuls of the apple mixture. Top with the remainder of the oat crumble
    6. Bake at 375F for 20-25 minutes (Timing is dependent on the oven)
    7. Once baked, remove from the oven
    8. Drizzle with honey. Optionally, add toasted nuts or a dollop of Greek yogurt and enjoy!

    You can also follow me on Instagram to be up-to-date with what is cooking my kitchen. If you like this recipe, do share your comments below. Don’t forget to post your version on Instagram using #foodformyloveblog.

  • Green Mango Salad

    Crunchy, sour, spicy and tangy – Enough said about this salad. Time to dive right in and experience the explosions of flavors.


    Prep time15 minutes
    Cook timeN/A
    Serves2

    Ingredients

    Fruits and Vegetables

    • Green Mangoes – 2, chopped into cubes or shredded, julienned or whatever shape you fancy
    • Carrots – 1, shredded
    • Large English Cucumber – 1/2, chopped into cubes or julienned
    • Red Onions – 1 small, thinly sliced

    Spices, Flavors and Herbs

    • Salt – As per taste
    • Ground Black Pepper – 1 tsp
    • Chaat Masala – 1.5 tsp
    • Green Chillies – 1, finely chopped (Optional)
    • Cilantro – A handful

    Nuts and Seeds

    • Roasted Peanut Splits (Unsalted) – 1/4 cup

    Method

    1. Add all the fruits and vegetables into a mixing bowl
    2. Add all the spices, flavors and herbs to the bowl. Mix well
    3. Place the mixed salad in the refigerator and chill it for 30 minutes prior to serving
    4. Garnish with roasted peanut splits and cilantro and enjoy the salad a meal side

    Serving Suggestion

    • Serve as a salsa with pita bread/chips or crackers. Just chop up the vegetables and fruits into much smaller pieces. Use the same spices and mix in a similar manner

    You can also follow me on Instagram to be up-to-date with what is cooking my kitchen. If you like this recipe, do share your comments below. Don’t forget to post your version on Instagram using #foodformyloveblog.

  • Watermelon Salad

    Do you know what is a fun way to eat fruits? To put them into a salad. No, not a regular leaf or grain salad, but a fun refreshing, tangy, sweet and spicy salad. Like this one. Try it. It will instantly cool you down this summer.


    Prep time15 minutes
    Cook timeN/A
    Serves2

    Ingredients

    Fruits and Vegetables

    • Watermelon – 4 cups, cut into small cubes
    • Large English Cucumber – 1/2, cut into small cubes or julienned
    • Red Onions – 1 small, sliced (Optional)

    Spices, Flavors and Herbs

    • Chaat Masala – 1.5 tsp
    • Salt – A pinch
    • Black Pepper – 1 tsp
    • Lime Juice – 2 tbsp
    • Mint Leaves – 2 tbsp, roughly chopped

    Nuts and Seeds

    • Roasted Peanut Splits (Unsalted) – 1/4 cup

    Method

    1. Mix all fruits, vegetables, spices and herbs in a bowl (except the roasted peanut splits)
    2. Place the mixed salad in the refrigerator to chill for 30 minutes
    3. Garnish with roasted peanut splits and enjoy the chilled salad

    Serving Suggestion

    • Serve the chilled salad as meal side salad, as an appetizer or as a snack salad
    • Serve as a “watermelon salsa” with pita bread/chips or crackers

    You can also follow me on Instagram to be up-to-date with what is cooking my kitchen. If you like this recipe, do share your comments below. Don’t forget to post your version on Instagram using #foodformyloveblog.

  • Pumpkin and Chana Dal Curry

    If I have not already mentioned it, let me do so now. Pumpkin is my favorite vegetable and my husband’s not so favorite. So I don’t cook a lot of Pumpkin, but this curry hit it out of the park with the husband. So that’s a win for me.


    Given its sweetness, Pumpkin lends itself not only to desserts but it can add that a nice sweet flavor to an otherwise spicy or tangy recipe. The only thing to be careful about it which type of Pumpkin you pick and how much cooking it requires. I am not Pumpkin expert but I know there are several different varieties available on the market. The one used in this recipe is the typical orange Pumpkin that is found at Indian grocery stores in the US. But an acorn squash or even a Butternut Squash works. Just be sure not to pick out a carving Pumpkin (if you are making this recipe during the Halloween season). Grocery stores usually have descriptions listed for carving Pumpkins versus eating Pumpkins. So it should be relatively straightforward to pick one. The nice thing about these is that they are sold in already cut pieces. They do cook quickly and become a mush, so keeping a careful eye out for it will result in the right texture. Although Pumpkins are in abundance during the fall or autumn seasons, they are usually available at Indian grocery stores year around.

    I never gave it much thought but Pumpkins are actually quite nutritious. Their bright orange color comes from the Beta Carotene in them, which is a beneficial anti-oxidant. Pumpkins are also packed with vitamins that boost immunity. So all in all, it is an unassuming vegetable with some decent health benefits.

    This recipe is another one pot curry that is simple and flavorful. It is an under 30 minute curry that be served with rice or roti. So it is perfect for anyone looking for easy, no-brainer type, nutritious recipes.


    Video Recipe

    Prep time10 minutes
    Cook time20 minutes
    Serves4 (2 meals for 2)

    Ingredients

    Vegetables

    • Pumpkin – 3 cups of cubed pieces
    • Potato – 1 medium, cubed
    • Yellow Onion – 1 medium, diced
    • Tomato – 1 large, diced

    Legumes

    • Chana Dal (Split Chickpeas) – 3/4 cup, washed and soaked

    Spices & Herbs

    • Jeera (Cumin Seeds) – 1 tsp
    • Bay leaves – 2
    • Cloves – 2
    • Green Chilies – 2, slit
    • Haldi (Ground Turmeric) – 1 tsp
    • Red Chilli Powder – 1 tsp
    • Coriander Powder – 1 tsp
    • Salt as per taste
    • Ginger – 1 tbsp chopped
    • Cilantro – A handful (for garnish)

    Oils

    • Cooking Oil – 2 tbsp

    Method

    1. Set Instant Pot to saute mode
    2. Add oil to the pot. Once the display shows hot, add the jeera, bay leaves and clove
    3. Once the 3 spices have cooked and become aromatic, add the onions and cook them for 2-3 minutes until they are translucent
    4. Add the ginger, green chilies and cook for 1 minute
    5. Add all the spices and cook for 1-2 minutes. Add a splash of water to de-glaze the pot. Add salt and continue cook
    6. Add the tomatoes. Cook the mixture for 1-2 minutes until all the spices, onions and tomatoes are cooked well and oil begins to release on the sides of the mixture
    7. Add the potatoes, pumpkin and chana dal
    8. Add 2-3 cups of water (depending on the desired consistency of the curry)
    9. Close the lid and move the pressure valve to sealed position
    10. Cancel the saute mode. Select the pressure cook mode and set the time to 15 minutes
    11. After the cooking time is complete, allow for manual pressure release for about 5 minutes before opening the pressure valve
    12. Open the lid, add cilantro and mix
    13. Transfer the curry to a serving bowl. enjoy the nutritious curry with rice or rotis

    You can also follow me on Instagram to be up-to-date with what is cooking my kitchen. If you like this recipe, do share your comments below. Don’t forget to post your version on Instagram using #foodformyloveblog.

  • Lentil and Cashew Dip

    One can never have enough dips. There are mild, medium and spicy salsas. Then there is Guacamole. There is even a hundred flavors of Hummus. There are fruit dips too. And a ton other. But what about lentil dips? If that does not sound good to you, try this recipe and I guarantee that it will change your mind.


    I am writing this post during a time that we will all remember for the rest of our lives. The unprecendented time of COVID-19. To say the least, this has been an emotional roller coaster for all of us. Our life has been upended with working from home, home schooling children, working with minimal groceries etc. But it has also been a time of gratitude and lots of home food to feed one and all. And this brings me back to the dip.

    With so many of us being at home, food and snacking varieties are needed to keep us all sane, healthy and satiated. And this dip checks all those 3 boxes. In my case, I am not much of a snacker, but my husband definitely needs his evening snack. I would much rather prepare a new variety for him everyday instead of him eating sugary, fatty cookies. This dip is so easy to prepare that even he can do it, unsupervised!

    With brown lentils and cashews, the dip is a powerhouse of nutrition, and is incredibly flavorful. What more does one want from a dip? ๐Ÿ™‚ This recipe was born because I got tired of Guacamole and Hummus. I really needed something different from a texture and flavor standpoint.


    This recipe uses brown lentils. In general, lentils are amazing sources of plant-based protein and fiber. And this recipe gives you another way to eat lentils, other than the regular dal-chawal. This recipe also uses cashews, which also have great protein content along with beneficial mono-unsaturated fats and several beneficial minerals.

    The best thing about this recipe is that using the same base, you can alter the flavor using different spices, herbs or other additives like seeds. Apart from the cook time for the lentils, this recipe comes together in 10 minutes.

    Serve it with pita bread, crackers, chips or veggie sticks for your next evening snack or pre-prepare it as a portable appetizer dip for a party. This recipe will not disappoint, I promise ๐Ÿ™‚

    Prep time10 minutes
    Cook time15 minutes
    Serves2 cups

    Ingredients

    Legumes

    • Brown Lentils – 1/2 cup, uncooked

    Nuts and Seeds

    • Roasted Cashews – 10-12 (Unsalted)

    Spices and Herbs

    • Cilantro – A handful
    • Red Pepper Flakes – 1 tsp
    • Fresh Ginger – 2 inch piece, grated or finely chopped
    • Garlic – 1/4 tsp (optional)
    • Salt – A pinch

    Oils

    • Olive Oil – 2 tsbp for grinding + 2 tbsp for garnish drizzle

    Ingredient notes

    • The brown lentils can be substituted with green lentils
    • Use any herb of your choice
    • Add any other spice of your choice for additional flavor

    Method

    1. Wash the brown lentils thoroughly. Add 1 1/2 cups of water. Place in Instant Pot. Close the lid and the move the pressure valve to sealed position. Select the pressure cook mode and set the time for 12 minutes. Once done, allow the pressure to naturally release before unsealing the pressure valve. Allow the cooked lentils to cool prior to using. You can cook the lentils in a pressure cooker too for 2-3 whistles
    2. Once the lentils have cooled, add all the ingredients to a blender. Blend until you achieve the desired consistency. My preference is a chunky dip, so I did not blend for smoothness, but feel free to blend until you achieve a smooth consistency. Make sure to add a little more olive oil to achieve the smoothness
    3. Transfer the dip to a serving bowl. Either chill or drizzle with olive oil and serve immediately

    You can also follow me on Instagram to be up-to-date with what is cooking in my kitchen. If you like this recipe, do share your comments below. Don’t forget to post your version on Instagram using #foodformyloveblog.