Category: Lunch/Dinner

  • Sindhi Sai Bhaji

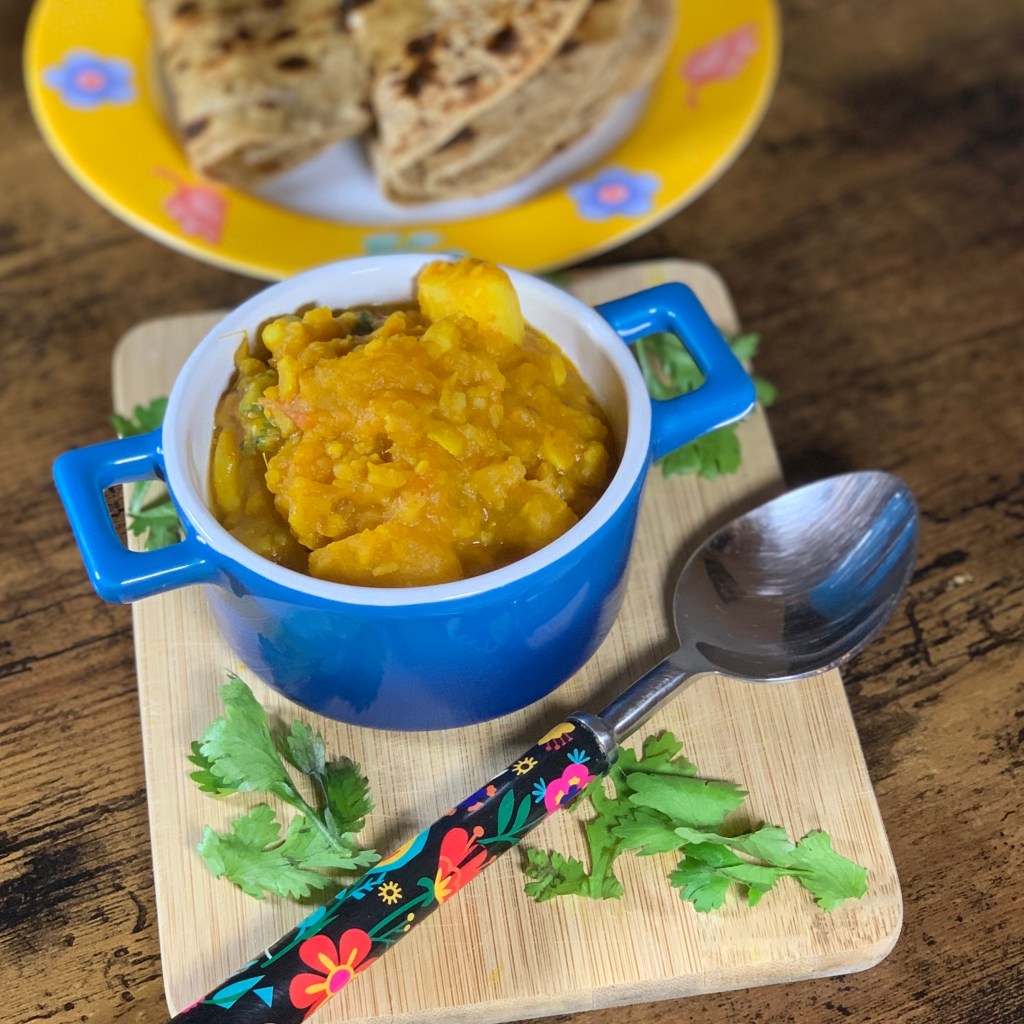
    There is not much to be said about this recipe, other than it is a must a try. This is literally the best way to get your dose of vegetables and greens all in one go.

    When translated from Sindhi to English, Sai means Green and Bhaji means vegetables. It is a staple curry in households from India and Pakistan. The health benefits of this beautiful green curry come from the combined benefits of vegetables such as:

    • Lauki (Bottle Gourd)
    • Baingan (Eggplant)
    • Aloo (Potato)
    • Gajar (Carrot)
    • Tomato
    • Methi (Fenugreek)
    • Palak (Spinach)

    The veggies act as a source of several vitamins and minerals such as vitamin A and C, and potassium, calcium and iron. Why go for supplements when a simple one-pot curry can give you such an incredible does of nutrition! Better still, the overall curry is so low on calories that you can eat it bowls and bowls of it, completely guilt-free 🙂


    binary comment

    Let’s take a second to appreciate the simplicity of this curry. And that simplicity comes from the use of simple spices and flavors like green chilies, ginger and garlic and nothing too heavy. It is a perfectly simple amalgamation of spicy and tangy flavors.


    binary comment

    This recipe is one of those that can be prepared on a Sunday night and can be enjoyed through the week.

    Prep time8 hours
    Cook time25 minutes
    Serves3-4

    Ingredients

    Vegetables

    • Lauki (Bottlegourd) – 1 small, diced
    • Baingan (Eggplant) – 2 medium, diced
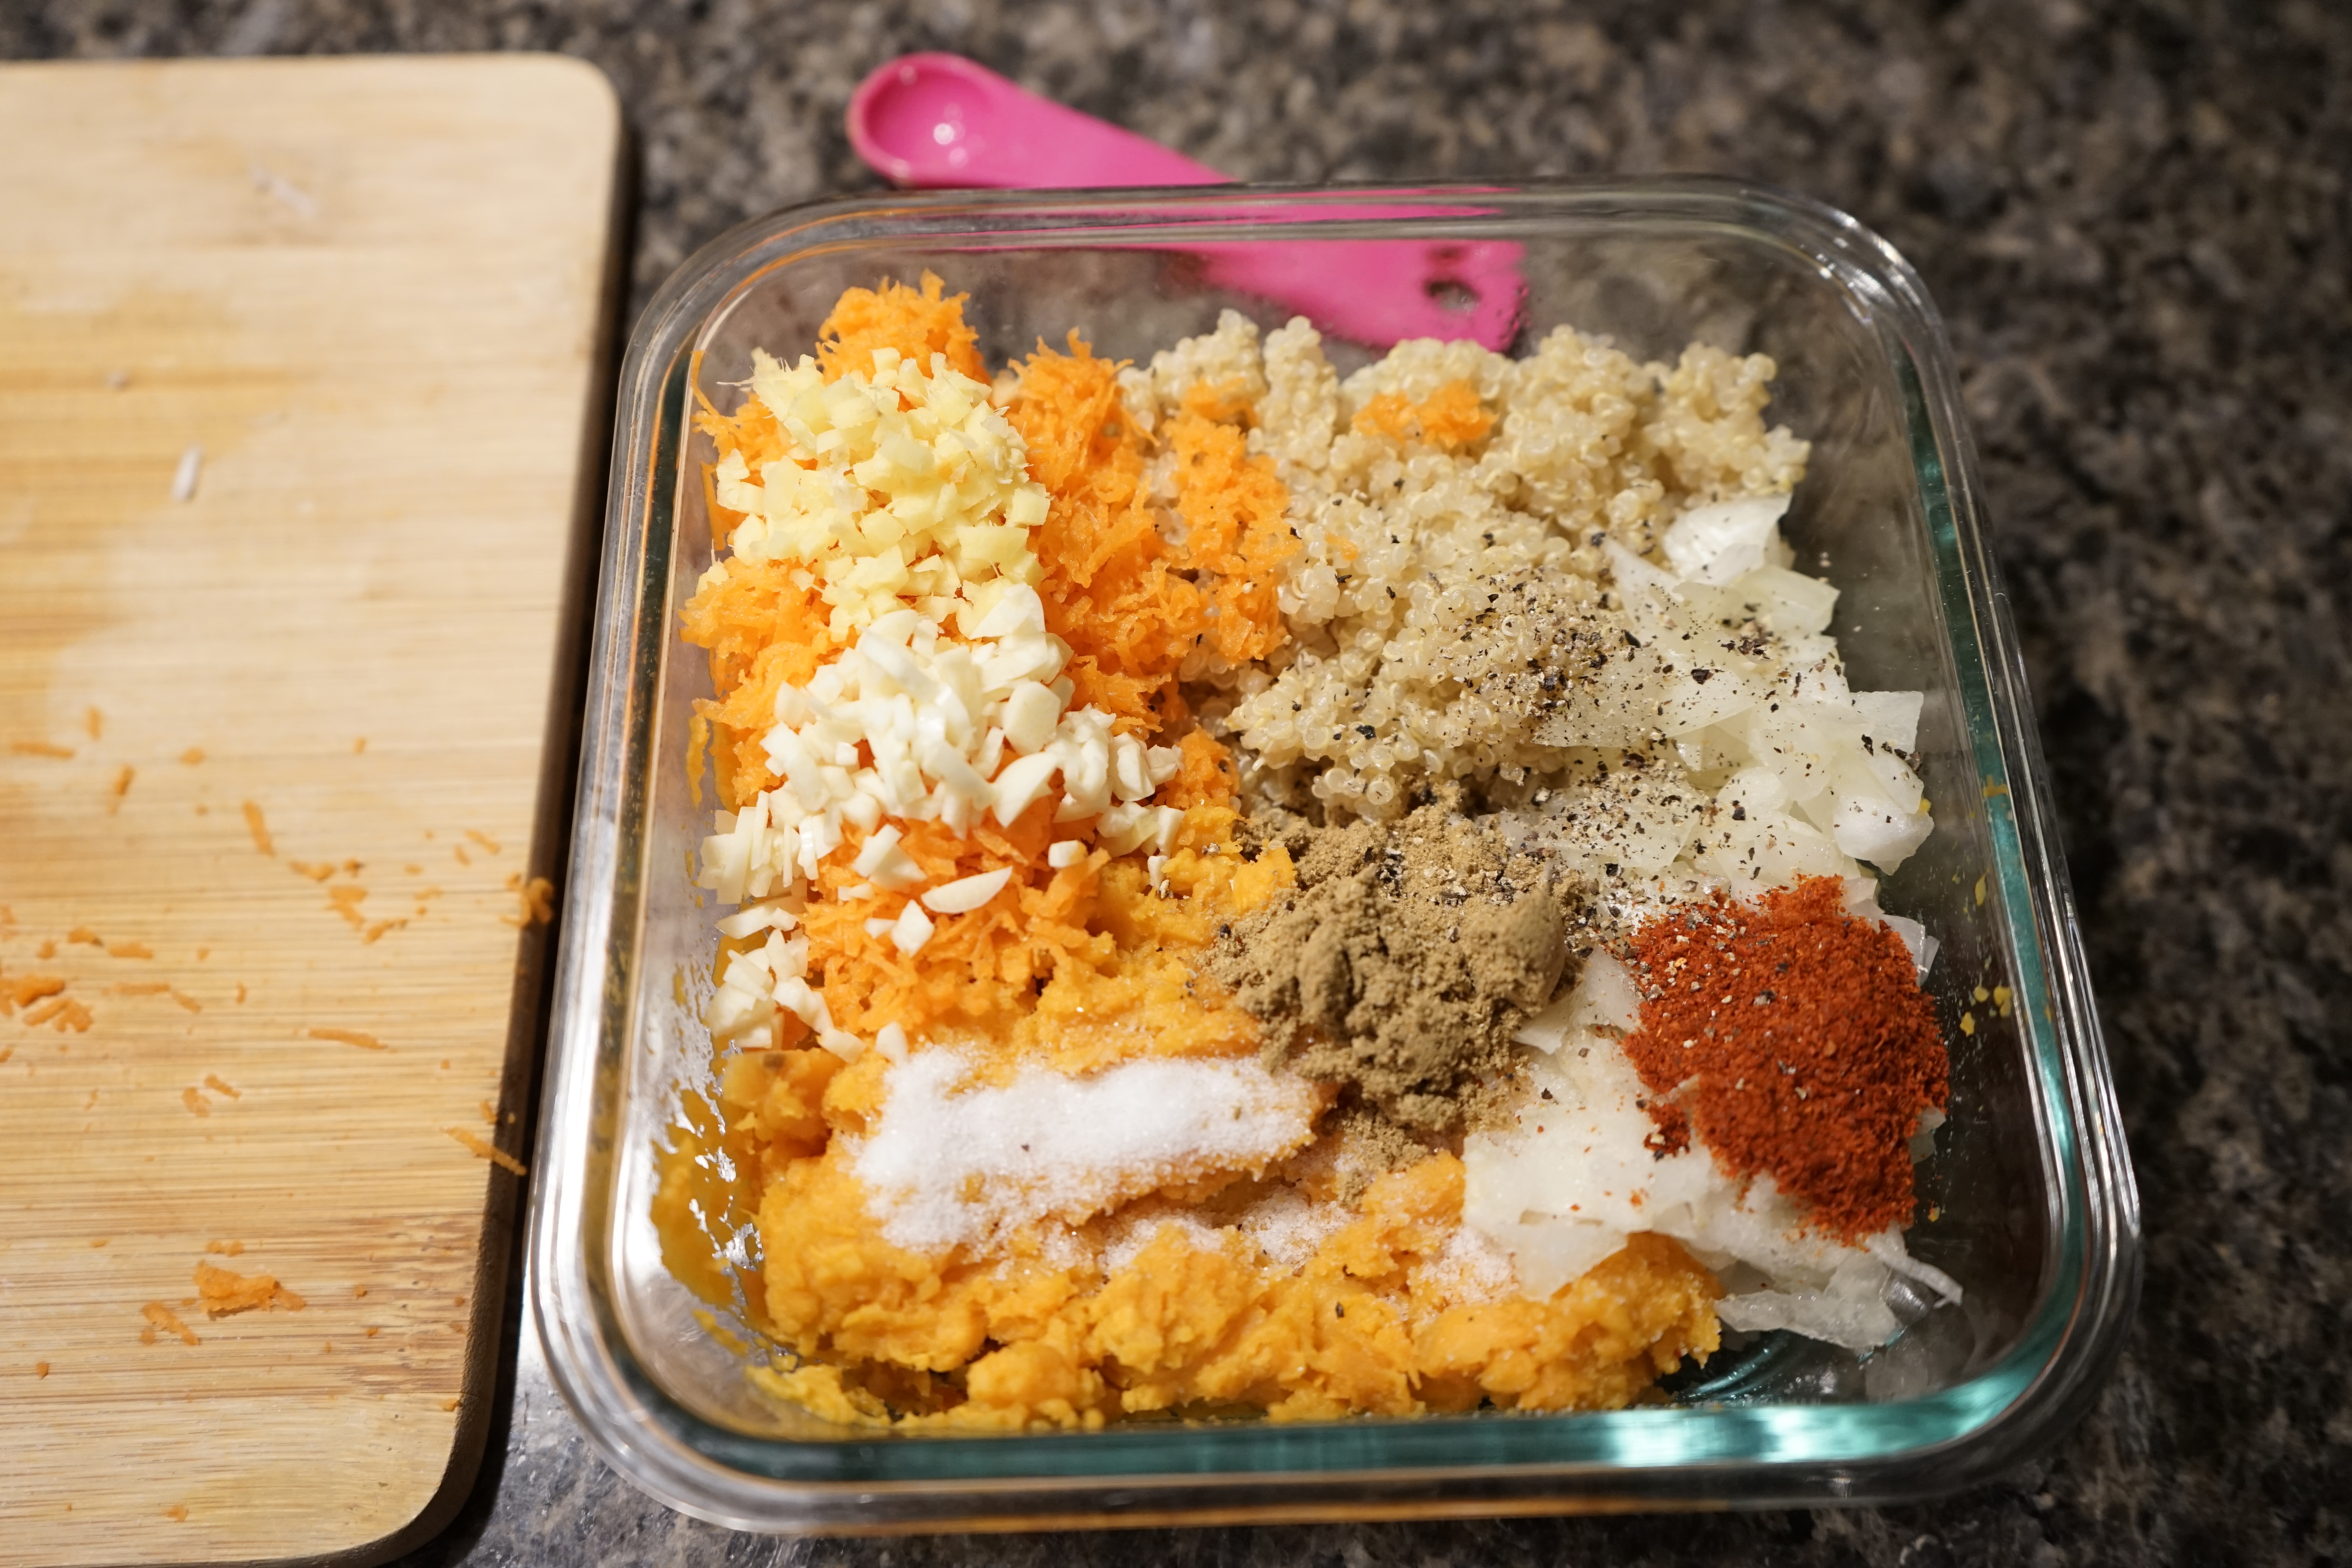
    • Gajar (Carrot) – 1 large, chopped
    • Aloo (Potato) – 3-4 small, diced
    • Methi Leaves (Fenugreek) – 1 bunch (thoroughly cleaned and separated) [Approx. 2 cups]
    • Palak (Spinach) – 1 small packet [Approx. 2 tightly packed cups)
    • Tomato – 1-2 small, chopped
    • Onion – 1 large, chopped

    Lentils

    • Chana Dal (Split Chickpeas) – 1 cup, dry

    Spices and Flavors

    • Jeera Seeds (Cumin) – 1 tsp
    • Methi Seeds (Fenugreek) – 1 tsp
    • Haldi (Ground Turmeric) – 1 tsp
    • Red Chili Powder – 1 tsp
    • Green Chilies – 1 tbsp, crushed
    • Ginger – 1 tbsp, crushed
    • Garlic – 1 tbsp, crushed
    • Tamarind juice or concentrate – 1 tbsp
    • Salt as per taste

    Cooking oils

    • Oil – 2 tbsp

    Ingredient notes

    • In this recipe, I have used the long Chinese Eggplant because it is not seedy. You could also use the mini purple Indian Eggplants. I would not reccomend the Globe Eggplant because it has a meatier texture
    • If fresh Methi leaves are not available at the Indian store, you can find frozen methi in the frozen vegetables aisle. Follow the thawing instructions on pack to use in this curry

    Method

    1. Soak chana dal for 6-8 hours
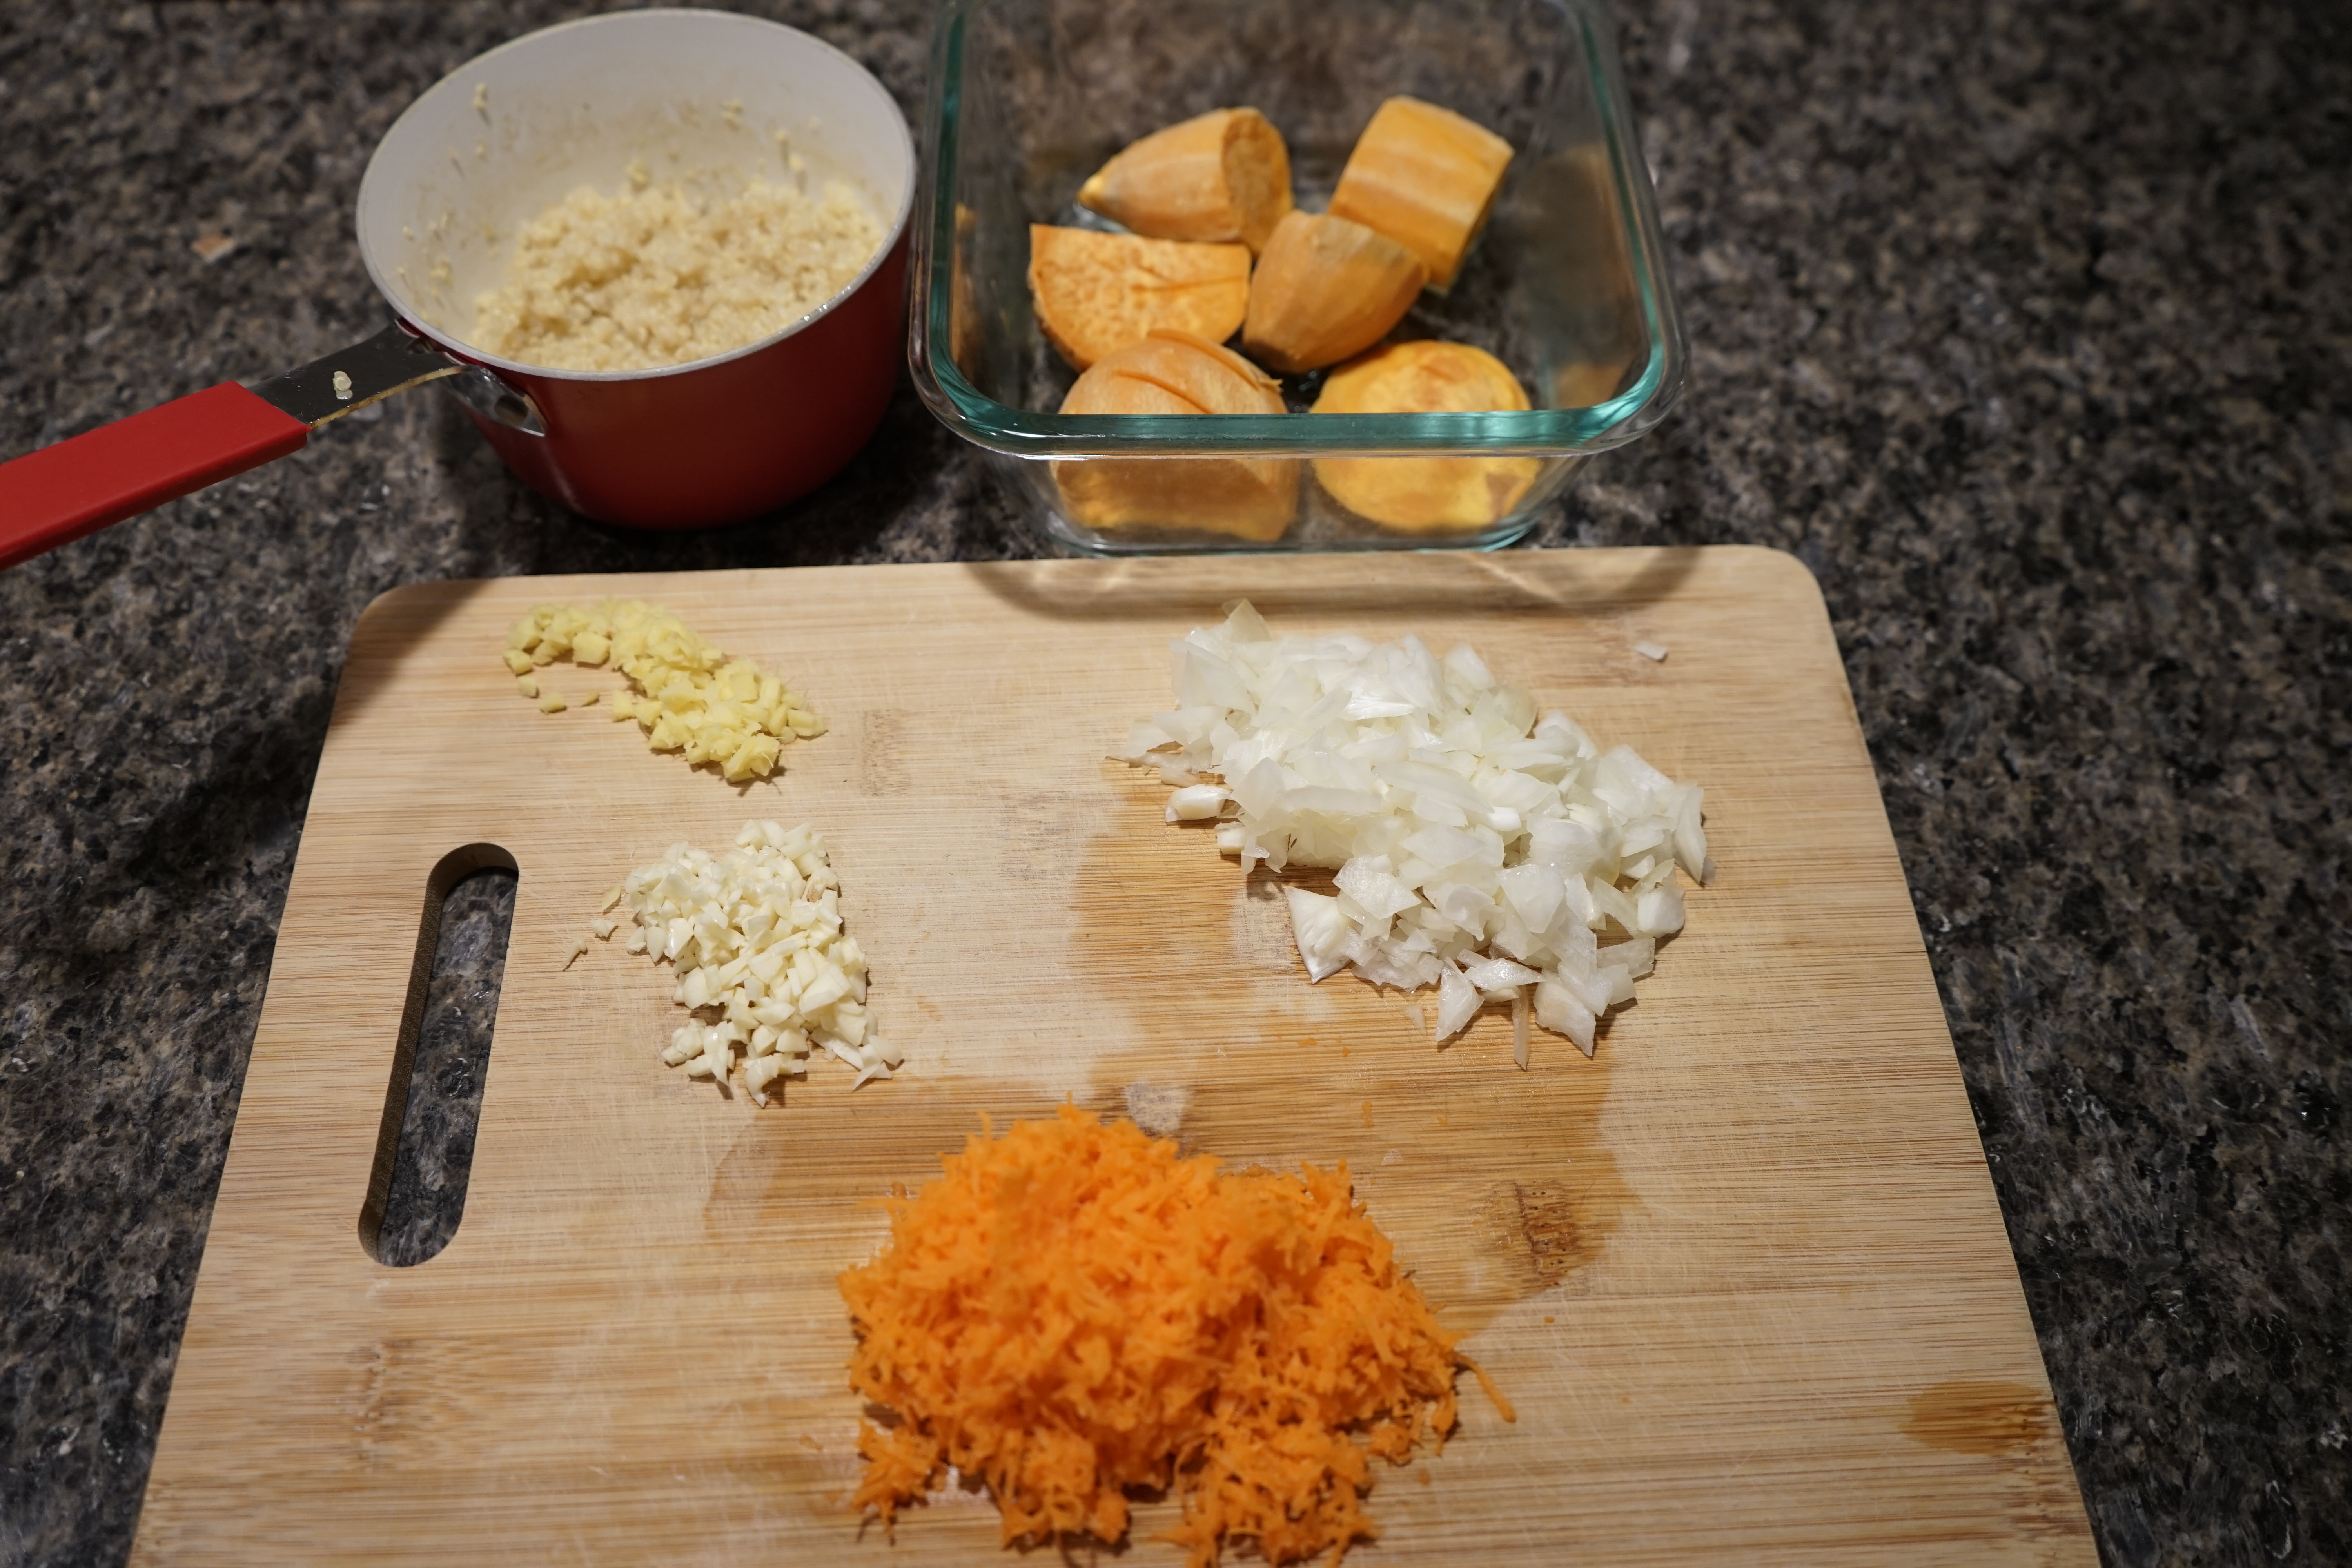
    2. Thoroughly clean all the veggies, chop them and set them aside
    3. Set the Instant Pot to sauté mode
    4. Once the pan is hot, add oil. To this add jeera and methi seeds
    5. Once it splutters, add the crushed green chilies, ginger and garlic. Fry well until the spices bloom and all the flavors are aromatic
    6. Next, add the haldi and red chili powder. Mix well again until the spices have cooked
    7. Add chopped onions and tomatoes. Mix well until they are well coated with the spice mixture
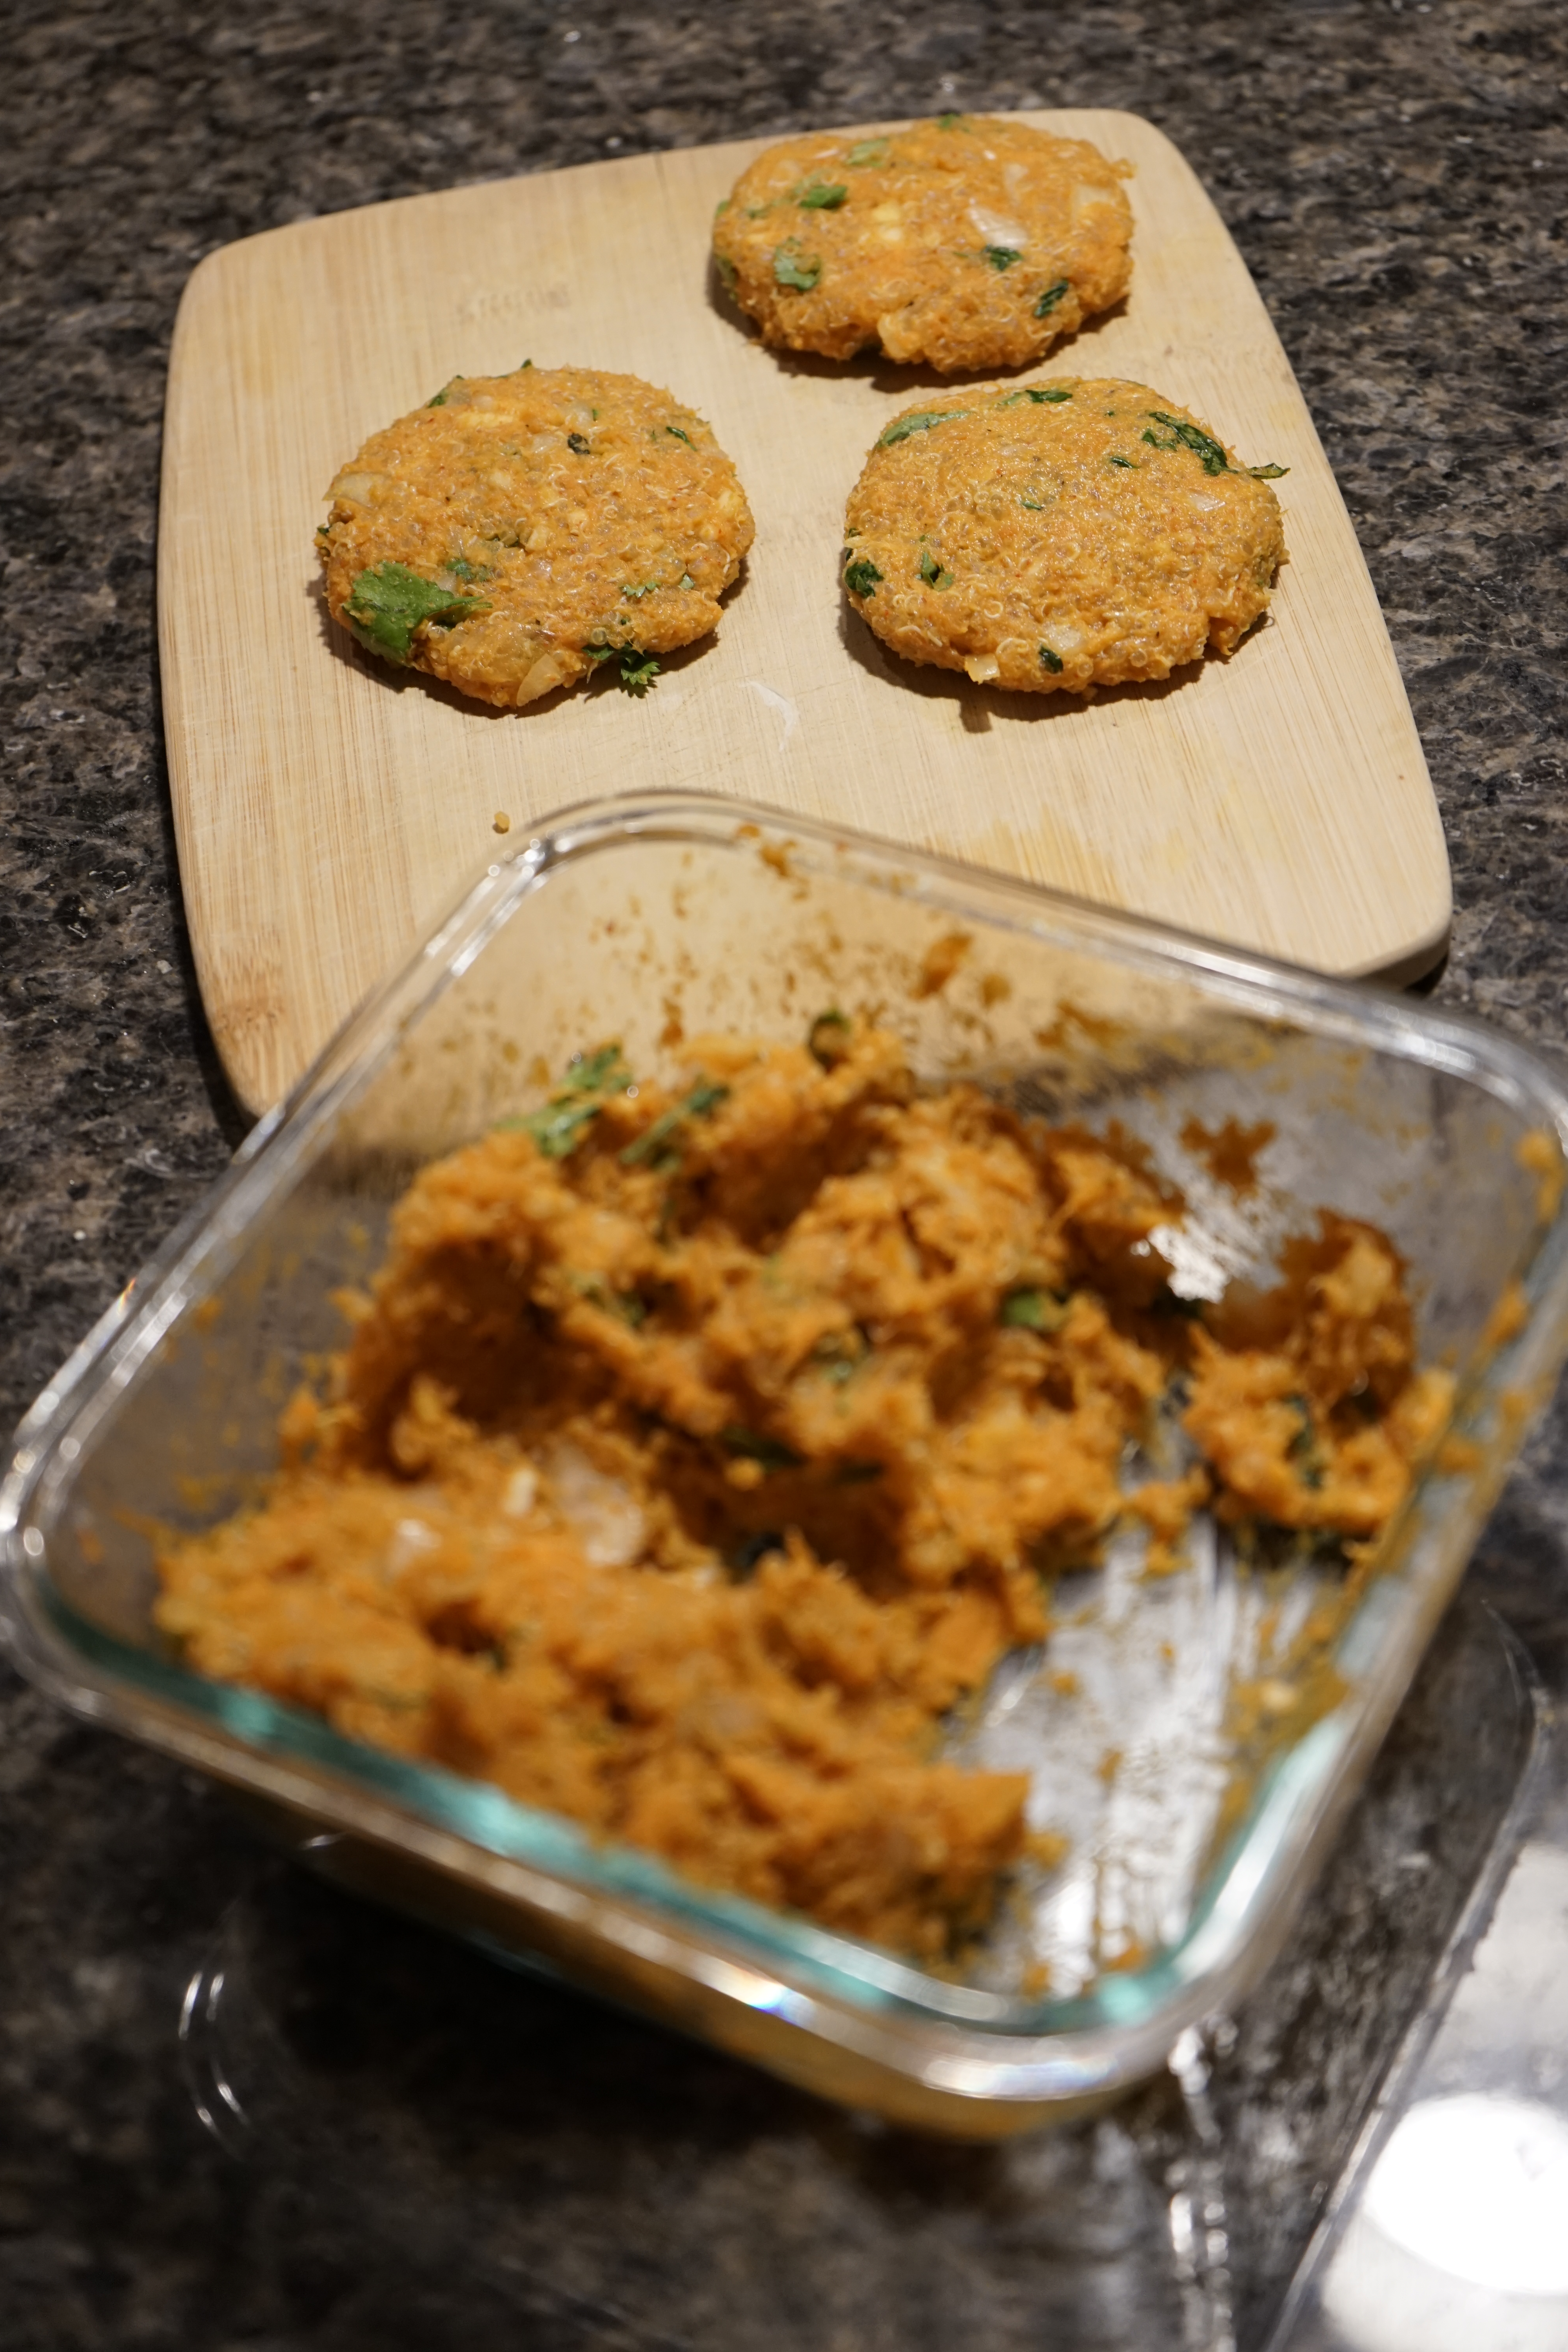
    8. Next, add the chopped veggies and mix well. Follow this with the methi leaves, palak and chana dal
    9. Add 2-3 cups water
    10. Add salt as per taste
    11. Add the tamarind juice or concentrate
    12. Close the Instant Pot lid and pressure cook on high for 20-25 minutes
    13. Once the pressure cooking is done, allow for natural release of the steam before opening the vent and the lid
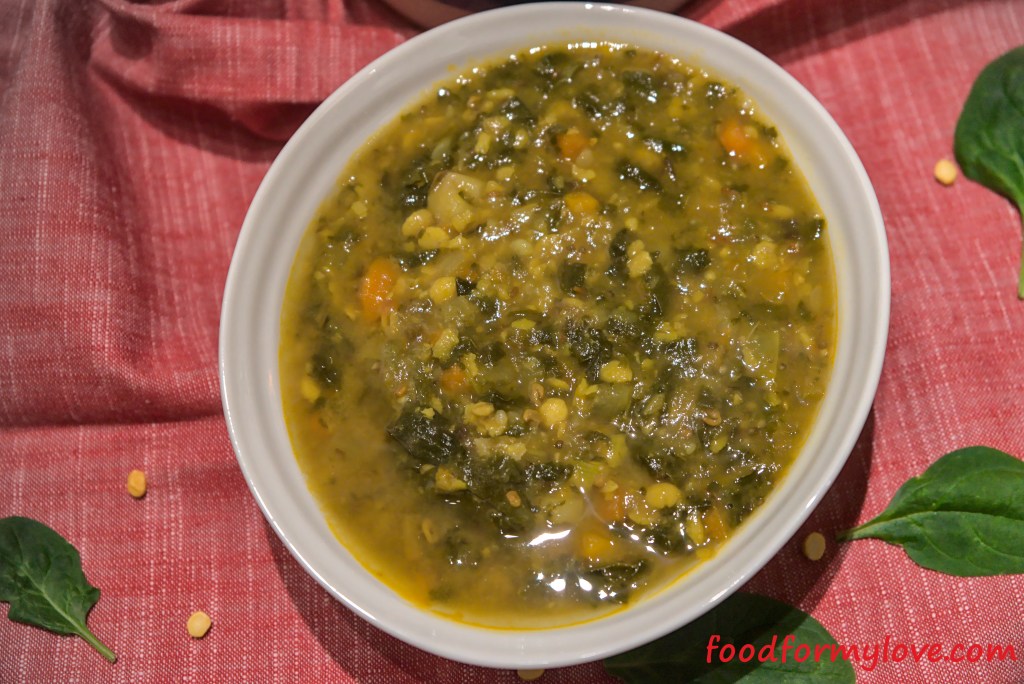
    14. Once the lid is open, use a hand masher or hand blender to mash the curry to get to a semi-thick consistency
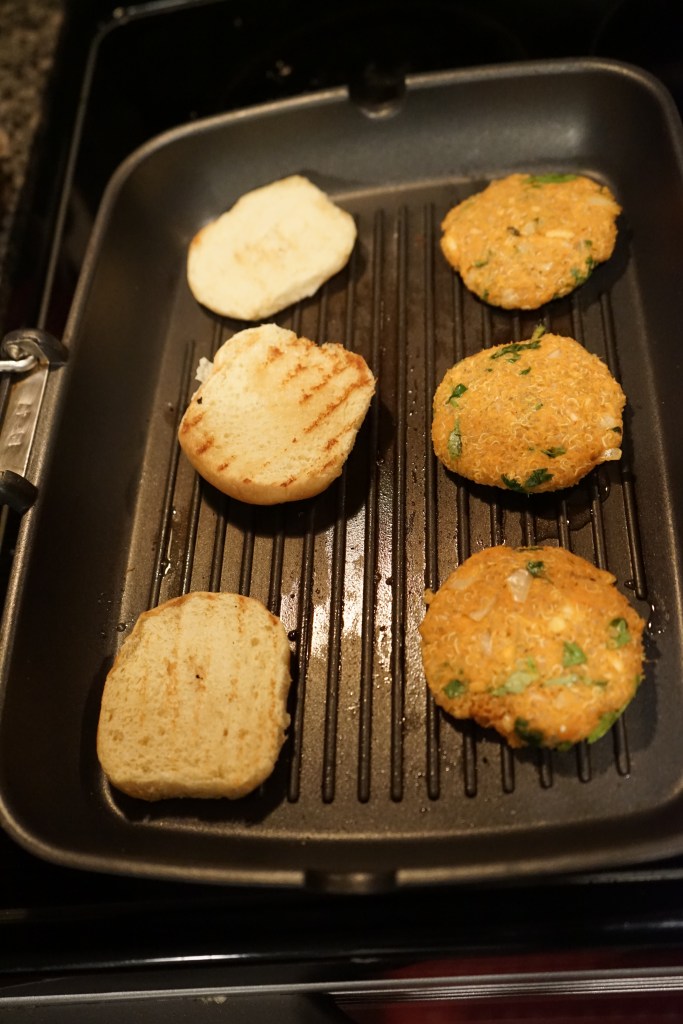
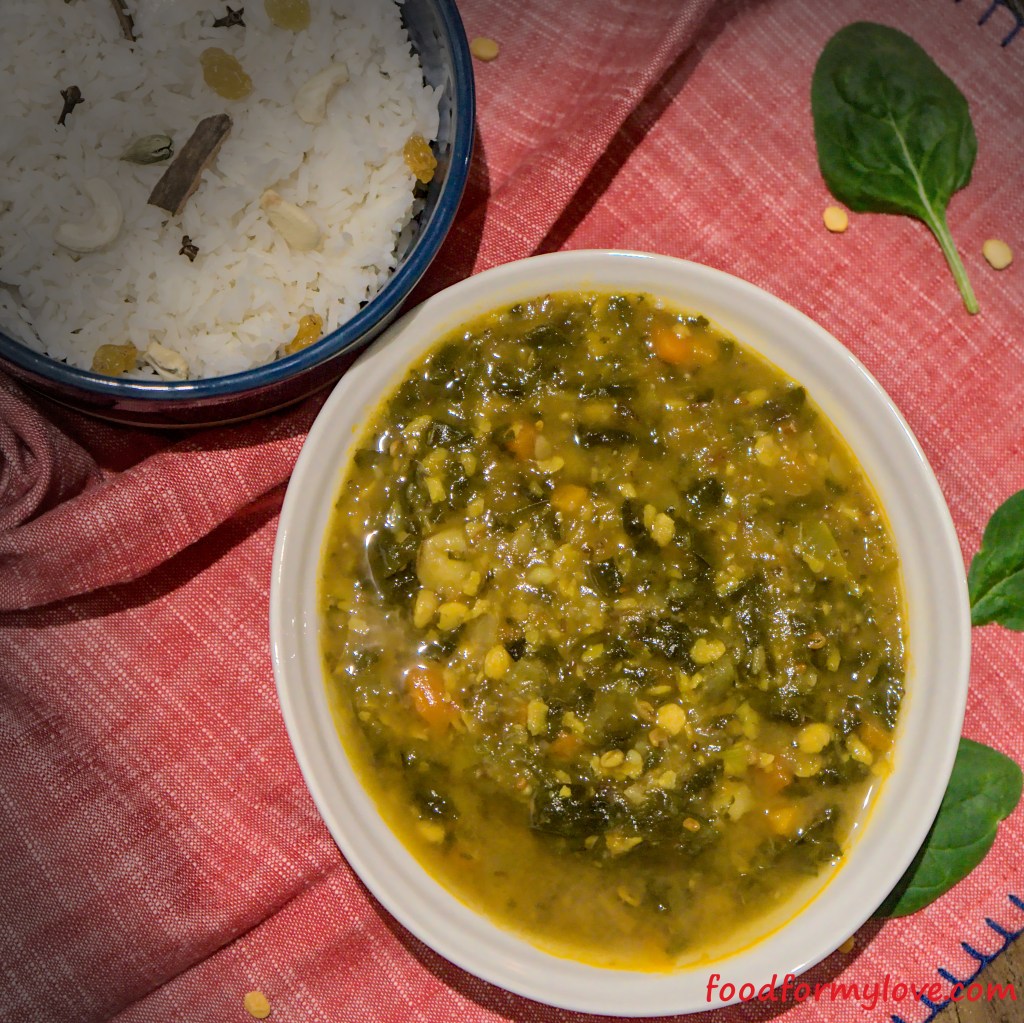
    15. Pour into a bowl and serve it piping hot with a simple pulao or with rotis

    You can also follow me on Instagram to be up-to-date with what is cooking my kitchen. If you like this recipe, do share your comments below. Don’t forget to post your version on Instagram using #foodformyloveblog.

  • Sweet Potato and Black Bean Quesadilla

    As a vegetarian, I often have to find fun and creative ways to achieve a balanced nutrition. This is normally important, but is more important in our household because of my husband’s active lifestyle through playing intensive Squash sessions and running more recently. Having joined him on his running sessions, I have realized how important a balanced nutrition is important to keep the metabolism active and to supplement the workout sessions.

    So, I always keep Sweet Potatoes and Black Beans in my pantry. One has complex carbohydrates and the other is packed with protein and fiber. I am always looking for different ways to use both these items. What better way than mashing them together and using it as a stuffing for a delicious Quesadilla?


    Sweet Potatoes cook very quickly and take up any flavor that you add to them, so that works great. Black beans from a can just need to be mixed in and mashed. So for a quick weeknight dinner, this is a great option. The spices can be modified to your liking, but for something like this, I like to keep it simple, yet lip-smacking with the Tex-Mex flavors.


    Now, the part that I struggle with is finding healthy Tortillas to make the Quesadilla. There are too many flour and corn ones out there with little to no health benefit. But, I was able to find a Sprouted Whole Wheat Tortilla with Spinach at a Sprouts Farmers Market. The light green colored tortilla is not only tasty and healthy but is also pleasing to the eye.


    Of course, like any Quesadilla, I served this one up with some Avocado sauce (similar to a chutney, and is not Guacamole). I was going for the same concept as eating a Kathi Roll dipped in Chutney, but here we will dip the Quesadilla dipped in the Avocado Sauce.

    In just 30 minutes, you can put together a weeknight dinner which can make for an especially balanced and nutritious meal post a long run. Any leftovers cans be individually wrapped in foil and re-heated to enjoy the following day.

    Prep time10 minutes
    Cook time20 minutes
    Serves2-3

    Ingredients

    Avocado Sauce

    • Avocado – 1 large
    • Garlic – 1 clove
    • Cilantro – A handful
    • Salt – As per taste
    • Lime Juice – From half a lime

    Vegetables

    • Onions – 1 medium, diced
    • Jalapeno – 2, thinly sliced
    • Sweet Potato – 1 large or 2 medium, finely chopped or grated

    Beans

    • Black Beans – 1 15oz can

    Dairy

    • Grated Pepperjack Cheese – 1-2 cups (use any other cheese of choice or omit if vegan)

    Breads

    • Tortilla of choice (8″ size) – 4

    Spices and Flavors

    • Cumin Powder – 1 tsp
    • Coriander Powder – 1 tsp
    • Red Chili Powder – 2 tsp (Adjust as per your taste preference)
    • Salt – As per taste
    • Garlic – 1.5 tsp (Ground) or 3 cloves, finely chopped

    Oils

    • 2 tbsp + some extra to brush on the Quesadilla while cooking

    Method

    1. Warm 2 tbsp oil in a pan on medium-high heat. To this, add the garlic and allow it to lightly brown. To this, add the onions and cook them until they are transluscent
    2. Next, add the sweet potatoes and cook them for 5 minutes until they are slightly tender. At this point, add salt and cook for an additional 5 minutes until they sweet potatoes are completely tender
    3. Add the black beans and mash them in (or mix them in for a chunky texture). Add the seasonings, mix and let it cook for an additional 5 minutes. Take it off the heat and allow it to cool down
    4. In the meanwhile, prepare the avocado sauce by adding all ingredients to a blender to make a creamy sauce. Chill in the refrigerator until it is ready to be served
    5. To prepare the Quesadilla:
      1. Warm a grill plan and brush some oil onto it
      2. Place a tortilla on a flat surface
      3. Start by placing a generous amount of the sweet potato-black bean mixture on one half of the circular tortilla
      4. On this, place some slices of jalapenos
      5. Then add some cheese and fold the other half of the tortilla on top
      6. Carefully place on an oiled grill pan and brush the top with some oil
      7. After 1 minute, the underside of the quesadilla should be golden and crispy with the cheese oozing on the sides. At this point, flip the quesadilla to cook the other side to golden crispiness
      8. Repeat with the other 3 tortillas
    6. Slice the quesadillas into 2 wedges and serve immediately with the cool avocado sauce

    Serving suggestions

    • The quesadilla can be served with a salsa of your choice
    • Replace 1 tsp of chili powder with 1 tsp of smoked paprika for a smoky flavor with the sweet potato-black bean mixture
    • For an extra kick of spice, add some chopped jalapenos to the avocado sauce

    You can also follow me on Instagram to be up-to-date with what is cooking in my kitchen. If you like this recipe, do share your comments below. Don’t forget to post your version on Instagram using #foodformyloveblog

  • Maghmour

    I consider myself a global citizen, especially from a food standpoint. Having lived in and traveled to many countries, food has always been an integral part.

    I grew up in the Middle East, in Kuwait, where I had friends from many different nationalities. And I grew up eating Kuwaiti, Egyptian, Lebanese and many other types of food. To my surprise always, the vegetarian dishes in these cuisines are incredibly delicious.

    One such Lebanese curry is the Maghmour. With my initial research, I found this dish to be quite familiar. I racked my brains to remember where I had tried this and realized that I had tried this at a cute little Middle Eastern restaurant on the campus of Purdue University, where I did my undergrad. For an undergrad away from home for the first time, eating such familiar food (other than Indian food) was comforting. So, I am attempting to replicate the recipe with my own take on it.

    This is a stew like curry that has Eggplants and Chickpeas that is simmered in an incredibly simple and flavorful sauce. Although it is a one-pot meal, it requires a little pre-work to prepare the eggplant. But the end result it absolutely worth it. Barring the pre-work with the Eggplant (which takes about 25 minutes), the dish comes together in 30-35 minutes. The stew like curry can be served with pita bread, couscous or rice.


    For Eggplant lovers like me and my hubby, who want to try something outside of the many Indian style Eggplant recipes, this curry is a great change. It makes for a warm meal like a hug.

    Prep time40 minutes
    Cook time30 minutes
    Serves2-3

    Ingredients

    Vegetables

    • Eggplant – 1 large, cut into 1″ cubes
    • Onion – 1 large, diced
    • Tomato – 2 large, diced

    Spices, Flavors and Herbs

    • Garlic – 3 cloves, finely chopped
    • Mint – 2 tbsp, finely chopped
    • Red Chili Powder – 2 tsp
    • Cinnamon Powder – 1/2 tsp
    • Nutmeg – 1/4 tsp
    • Salt to taste
    • Tomato Paste – 1/4 cup

    Beans

    • Chickpeas – 1 can, drained and washed

    Oils

    • Olive Oil – 3-4 tbsp
    • Cooking Oil – 2-3 tbsp

    Method

    1. Pre-heat oven to 375F
    2. Wash 1 large eggplant and cut it into 1″ cubes. Place on a baking tray, drizzle with olive oil and bake for 30 minutes. Broil for the last 10 minutes. Keep an eye on the eggplant as you want a slight char, not burnt eggplant
    3. In the meanwhile, add oil to a pot and heat it
    4. Once the oil is hot, add the onions and cook for 5-10 minutes until they are slightly browned and beginning to caramelize
    5. Add garlic and saute for 1 minute, followed by chopped mint and saute for 1 minute
    6. Add tomatoes and cook them until they are mushy. Then, add tomato paste and mix with the onion-tomato mixture. Add a splash of water to de-glaze the pot
    7. Add all the spices and mix. Add a splash of water to de-glaze the pot. Cook for 1-2 minutes
    8. Add the chickpeas and eggplant. Add water, stir and simmer for 15-20 minutes on medium-high heat, stirring occasionally
    9. Top the eggplant with mint or parsley with onion slices and serve (Optional – You can top it with a dollop of yoghurt)

    You can also follow me on Instagram to be up-to-date with what is cooking my kitchen. If you like this recipe, do share your comments below. Don’t forget to post your version on Instagram using #foodformyloveblog.

  • Bengali Style Pumpkin (Kumro Torkari)

    Pumpkin is one of my favorite vegetables. Its sweetness lends itself to both dessert and savory dishes. And it cooks quickly. And, if I get to eat my favorite vegetable in the form of a different cuisine, regional Indian cuisine in this case, it is definitely something I would explore. So, I tried this quick subzi recipe of a Bengali (Eastern Indian State) style dry Pumpkin curry (also called Kumro Torkari) that is flavored with one of my new favorites spices, Panch Phoran, also an Eastern Indian spice blend.


    Quick side bar on the Panch Phoran. Panch means five and Phoran means spice. This is a 5 spice blend from Eastern India and is used in Bengali, Nepali and Bangladeshi cuisine. The blend contains:

    • Kalonji (Nigella Seeds)
    • Methi (Fenugreek Seeds)
    • Jeera (Cumin Seeds)
    • Sarson (Mustard Seeds)
    • Saunf (Fennel Seeds)

    Each of the above spices has a strong and distinct flavor and they all amalgamate to create a unique flavor for the spice blend. In order for this unique flavor to be diffused through the food, it is always fried in oil or ghee in order for the essential oils of the spices to be released.


    Kumro Torkari (Kumro is Pumpkin and Torkari is subzi/vegetable) is a quick and easy side for rotis or for dal-chawal. It uses a minimal spices and yet is so flavorful. It is the perfect balance of sweet and spicy. Traditionally, this recipe calls for using Pumpkin with skin, but I chose to peel it off.

    Prep time5 minutes
    Cook time20 minutes
    Serves2

    Ingredients

    Vegetables

    • Pumpkin – 2 cups, diced

    Spices, Flavors and Herbs

    • Dried Red Chili – 2
    • Panch Phoran – 1 tbsp
    • Red Chili Powder – 1 tsp
    • Dhania (Coriander) Powder – 1/2 tsp
    • Jeera (Cumin) Powder – 1/2 tsp
    • Salt – As per taste
    • Cilantro – A handful for garnish

    Oils

    • Cooking Oil – 2 tbsp (Mustard Oil is recommended, but is optional)

    Method

    1. Add oil to a pan and heat it
    2. Once the oil has heated, add the panch phoran and dried red chili. Let the spice blend fry in the oil for 30 seconds to 1 minute until the aromas are released
    3. At this point, add the diced pumpkin to the pan. Coat it with the oil and spice blend. Cook it with the lid closed for 10 minutes on medium-high heat and for another 5 minutes with the lid off on medium-high heat (This prevents the pumpkin from turning into a mush and will hold its shape)
    4. After this, add all the masalas and salt. Add a splash of water to de-glaze the pan, mix well and cook for an addition 3-5 minutes. Check constantly to ensure pumpkin pieces are tender. Using a spoon, cut a piece of pumpkin. If it is an easy and clean cut, the pumpkin pieces are cooked through and are not mushy. At this point, take the subzi off the heat
    5. Garnish with cilantro and serve with rotis or dal-chawal

    You can also follow me on Instagram to be up-to-date with what is cooking my kitchen. If you like this recipe, do share your comments below. Don’t forget to post your version on Instagram using #foodformyloveblog.

  • Vegetarian Kothu Roti

    You know how we Indians eat roti/paratha and subzi separately? Or we end up with a leftover rotis or parathas and don’t know what to do with it? Well, let’s take it up a notch by putting the roti/paratha in the subzi and make it a one-pot meal.

    Kothu Roti or Kothu Paratha is a dish that is extremely popular in the southern Indian state of Tamil Nadu and in Sri Lanka, and popular as street food. In the Tamil language, “kothu” means “to chop”. Can you guess why? Because the dish is essentially chopped roti or paratha mixed with vegetables (or meat) and cooked together with spices.


    I was introduced to Kothu Paratha by close friend who took me to a Tamilian restaurant in Atlanta that specializes with this. I instantly feel in love with it. It is a flavorful and aromatic dish that can be customized with vegetables and meat.

    Traditionally, Kothu Paratha, as the name suggests, is prepared with parotta. To be clear, parotta and paratha are not the same. Parotta is made from all purpose flour and is more stretchy and flaky, where as paratha is prepared from whole wheat flour. Rotis are also used, but not the regular whole wheat rotis. The specific rotis used in the traditional Sri Lankan style dish is “Godamba Rotis” which are thin flatbreads made from all purpose. But I had several pre-prepared rotis so I used it in this recipe, hence Kothu Roti.

    There are many additives that can be used to spruce up the Kothu Paratha or Kothu Roti. For instance, I like to scramble an egg in every now and then. Maybe even try some srambled paneer. For non-vegetarians, there are a variety of meat options that can be added as well. In this recipe, I skimmed on the vegetables, but feel free to customize as you like. This dish is usually quite spicy and as such, it is served with a chilled raita.

    Prep time5 minutes
    Cook time15 minutes
    Serves2

    Ingredients

    Vegetables

    • Yellow or Red Onion – 1 cup, finely chopped or sliced
    • Tomato – 1 cup, chopped
    • Green Bell Peppers – 1 cup, chopped

    Spices

    • Saunf (Fennel Seeds Powder) – 1 tbsp (Reduce to 1/2 tbsp if you don’t like the flavor of it)
    • Red Chilli Powder – 1 tsp
    • Turmeric – 1/2 tsp
    • Cumin-Coriander Powder – 1 tsp
    • Garam Masala – 1 tsp (Optional)
    • Salt – As per taste
    • Mustard Seeds – 1 tsp
    • Jeera (Cumin Seeds) – 1 tsp
    • Ginger – 1 tbsp, finely chopped
    • Garlic – 1 tsp, finely chopped
    • Curry Leaves – A handful

    Lentils

    • Urad Dal (Black Gram) – 1 tsp
    • Chana Dal (Split Baby Chickpeas) – 1 tsp

    Bread

    • Roti – 6

    Oils

    • Cooking Oil – 1-2 tbsp

    Ingredient notes

    • Feel free to add other vegetables of your choice
    • For protein, scramble some eggs or paneer (or tofu, if vegan)
    • Customize your spices as per your liking
    • You can also use parathas or frozen rotis or parathas


    Method

    1. Heat oil in a pan. Make sure the heat is medium-high throughout the process
    2. Add mustard seeds. Once they crackle, add jeera, urad dal, chana dal and curry leaves. Saute for 1-2 minutes until the lentils turn slightly brown
    3. Add chopped ginger and garlic. Saute 1-2 minutes until they brown
    4. Add chopped onions. Saute for 3-4 minutes until they turn translucent
    5. Add tomatoes and let them cook down for 3-4 minutes
    6. In the meanwhile, take the pre-prepared rotis and roughly chop them by hand or using a pizza cutter or knife
    7. Once the tomatoes have cooked through, add salt and all the spices (except garam masala). Mix well. Add a splash of water to de-glaze the pan and create a saucy consistency. Let this simmer for 2-3 minutes
    8. Add the green bell peppers and mix. No need to cook them, just let it have a crunchy texture. The optional step at this stage is to add a tsp of garam masala for some extra flavor
    9. Turn the heat to low-medium. Add the chopped rotis and mix well until all the rotis are coated with the spices
    10. Plate it, garnish with cilantro (Maybe even a squueze of lemon juice) and serve with chilled raita

    You can also follow me on Instagram to be up-to-date with what is cooking my kitchen. If you like this recipe, do share your comments below. Don’t forget to post your version on Instagram using #foodformyloveblog.

    Rating: 1 out of 5.
  • Coconut Vegetable Stew

    They say that “variety is the spice of life”. So, if you are bored of the regular Rasam, Sambhar and Dals, this stew will be a nice change to your regular menu. It is creamy and hearty with warm aromatic spices, and can be paired with rice, roti, dosa or aapam.


    While this type of a Coconut Stew originates from the southern Indian state of Kerala, it has found many variations across India, mainly in the use of spices, but using the same coconut milk base. In Kerala, fresh coconut milk is presumably used. However, here in the US, I have had to resort to canned Coconut milk. Not my preferred choice, but it is not all that bad. It does the job.

    This stew can be customized with your choice of spices and vegetables, and it comes together in less than 30 minutes. Its a one-pot meal for a quick weeknight dinner.

    Prep time15 minutes
    Cook time20 minutes
    Serves2-3

    Ingredients

    Vegetables

    • Potatoes – 2, small cubes (Approx. 1 cup)
    • Green Beans – 1 inch pieces (Approx. 2 cups)
    • Carrots – 1 inch matchstick pieces (Approx. 2 cups)
    • Onions – Sliced, 1 cup
    • Green Peas – 1 cup

    Spices, Flavors and Herbs

    • Green Chillies – 2-3, slit (Adjust as per spice preference)
    • Ginger – Finely chopped, 1 tbsp
    • Garlic – Finely chopped, 1 tbsp
    • Bay Leaf – 1
    • Cloves – 2
    • Green Cardamom – 2 pods (Or 1/4 tsp Cardamom Powder)
    • Cinnamon – 1/4 tsp (1 small stick)

    Dairy/Non-Dairy

    • Coconut Milk – 1 can (Unsweetened, low-fat)

    Oils

    • Cooking Oil – 2-3 tbsp

    Method

    1. Turn on Instant Pot to saute mode for 10 minutes. Add oil
    2. Once the display reads hot, add all the bay leaf, cinnamon, cardamom and cloves
    3. Once the spices are aromatic, add the onions, garlic, ginger and green chillies. Saute until the onions are cooked through and are translucent and the ginger and garlic have lightly browned
    4. Add all the vegetables and mix well
    5. Split the can of coconut milk into 2 halves. To one half, add 1 cup of water and dilute it. Keep the other half aside
    6. Add the diluted half to the vegetable and spice mixture
    7. Mix well. Set the Instant Pot to pressure cook mode (high pressure) and set the timer to 5 minutes. This step is to cook the vegetables in the coconut milk so that all the flavors amalgamate
    8. Once the pressure cooking is done, release the pressure and open the lid. Once again, set the Instant Pot to saute mode for 5 minutes
    9. Add the remaining thicker half of the coconut milk. Simmer for 5 minutes
    10. Transfer the stew to a serving bowl and serve piping hot with rice, roti, dosa or aapam

    **If using a pressure cooker, for step 7, pressure cook for 1-2 whistles max.


    You can also follow me on Instagram to be up-to-date with what is cooking my kitchen. If you like this recipe, do share your comments below. Don’t forget to post your version on Instagram using #foodformyloveblog.

  • Sweet Potato and Quinoa Sliders

    Mini-burger or slider? What should I call it? Do I dare call this mini-burger a slider? Why not, right?

    On that note, ever had a tasty AND healthy slider? If not, then try this one. Protein rich Quinoa with complex carbs from the Sweet Potato mixed with warm spices and grilled to perfection to be layered with fresh toppings between slider buns. Boom, you got yourself a tasty AND healthy slider.


    Sliders (or burgers) are not something that are common in our household. I am not sure why. So, this was an attempt to introduce a healthy version at home. I think slider patties are a great way to hide veggies, lentils and grains to feed those who don’t like them. As long as the texture and flavor are on point, I don’t think anyone would question what you did to make such delicious sliders (wink, wink!)

    For this slider, the ingredients for the patties are few in number and are readily available. and the whole recipe comes together very quickly. Even for the “not so skilled” with making slider patties at home, this is a great first time recipe.

    Now, shaping the patties can seem like a daunting task, but, guess what, this is not a competition. So, just chill out, get a shape to it and throw it on that grill. Only your eyes care about the shape, everyone else like your mouth and stomach are only concerned with the taste.

    I used a stove-top grill that I bought at IKEA for $10. And I swear, it is one of THE BEST kitchen buys I have ever made. Since I don’t do outdoor space for a grill, this grill does the job for times when I need it, like now. A splash of oil on both sides of the patty and butter for the buns. The sizzle when you throw them on the grill is going to make your mouth water.

    My favorite part about this slider is the toppings that I get to load it with, which are totally one’s choice. Here the layers are: bottom bun, patty, avocado mash, sliced onions, jalapenos and top bun. That first bite is an explosion of flavors that will make this whole process worthwhile. Try it! 🙂

    Prep time25 minutes
    Cook time15 minutes
    Serves3-4 (Approx. 10 sliders)

    Ingredients

    Vegetables

    • Sweet Potatoes – 2, medium, large cubes
    • Carrots – 1, small, shredded
    • Yellow Onion – 1, small, finely chopped
    • Red Onion – A few slices

    Fruit

    • Avocado – 1, mashed

    Grains

    • Quinoa – 1 cup, uncooked

    Spices, Flavors and Herbs

    • Garlic – 3 cloves, finely chopped
    • Ginger – 1 1-inch piece, finely chopped
    • Cilantro – A handful, finely chopped
    • Jalapeno – 1, thinly sliced
    • Red Chilli Powder – 1 1/2 tsp
    • Coriander Powder – 1 tsp
    • Cumin Powder – 1 tsp
    • Ground Black Pepper – 1/2 tsp
    • Salt – As per taste

    Oils

    • Cooking Oil – 3-4 tbsp

    Method

    1. Cook quinoa as per the package instructions
    2. In the meanwhile, place the large cubes of sweet potato in a microwave safe container. Add a few splashes of water. Cover with a paper towel. Microwave for 3-5 minutes until the sweet potatoes are soft and mashable
    3. In a bowl, add all ingredients. Using your hands, mix them well. If the mixture is very wet, add 1-2 tbsps of chickpea flour or breadcrumbs. Mix until the mixture is thick and malleable
    4. Take a drop of oil, rub it over the palm of your hands, take a small portion of the patty mixture and shape it. This way, the mixture will not stick to your hand. Repeat until all the patties are formed
    5. Heat the grill plan or a regular pan
    6. Drizzle some oil on the pan, place 2-3 patties and enjoy the sound of that sizzle. Cook until one side is nicely browned and flip until the other side is browned
    7. On the same pan, lightly toast the buns
    8. To assemble, place a patty on the bottom bun. Spread a generous amount of mashed avocado on the patty. On this place some sliced red onions and jalapenos and close with the top bun. Feel free to add a squeeze of lemon before closing with the top bun. Dig in!

    **For any leftover patties, store them in airtight container by placing a parchment paper between each pattie and in a freezer for 1-2 weeks.


    You can also follow me on Instagram to be up-to-date with what is cooking my kitchen. If you like this recipe, do share your comments below. Don’t forget to post your version on Instagram using #foodformyloveblog.

  • Spinach Majjige Huli

    Yoghurt and greens. This recipe has everything that I love and everything that my husband does not. Yet, he ate it, not once, but twice. So, I am going to take the win.

    This recipe is yet another good and very interesting way to incorporate greens into your diet. Unfortunately it is not vegan because of the use of yoghurt. If you try this recipe with plant based yoghurt, I would love to know how to turns out. Now, on to the the recipe.


    Majjige Huli is a popular dish from the Southern Indian state of Karnataka. Growing up, it was a favorite at my parent’s place. Majjige Huli, when translated backwards means “Sour (Huli) Buttermilk (Majjige)“. Traditionally, the recipe is made with sour buttermilk and uses different types of vegetables. There is a boiled version (where the buttermilk is boiled to reduce its sourness, which would make it similar to the North Indian version of this called Kadhi). But this is a “raw” version because buttermilk (NOT RAW) is used but not boiled. Therefore, it is called a Hasi Majjige Huli (Hasi = Raw in Kannada). But, since I did not have buttermilk at home, I made do with yoghurt. Furthermore, Spinach is used in this recipe. But traditionally, vegetables such as Cucumber, Bottle Gourd, Green Plantains, Bell Peppers etc. are used in the preparation of the boiled version of this curry.

    The recipe has a distinct flavor due to the use of both raw and crackled mustard seeds along with its coconut and yoghurt base. It is definitely an acquired taste and therefore should be adjusted as per individual taste preferences. Anyone with any skill level can prepare this recipe in under 20 minutes. The curry is served with rice and is usually a second accompaniment along with rasam or sambhar.

    With good probiotics from yoghurt or buttermilk and vitamins and minerals from the greens, it is nutritious and cooling on the body. Definitely worth a try.

    Prep time10 minutes
    Cook time5
    Serves2

    Ingredients

    Vegetables

    • Spinach – 2-3 cups, roughly chopped

    Dairy

    • Greek Yoghurt – 2 tbsps

    Masala Paste

    • Mustard Seeds – 1.5 tsp
    • Green Chillies – 2
    • Cilantro – 1 handful
    • Turmeric – 1/2 tsp
    • Salt – As per taste
    • Fresh Coconut – 1/4 cup

    Oils

    • Cooking oil – 2 tsps

    Method

    1. Heat oil in a pan. Add 1/2 tsp mustard seeds. Once the mustard seeds crackle, add the chopped spinach. Saute for 1-2 minutes until the spinach has lightly wilted. Take it off the heat and allow it to cool
    2. In the meanwhile, to prepare the paste, add coconut, cilantro, green chillies, remaining mustard seeds and turmeric into a blending jar. Add 1/2 cup water and blend into a smooth paste
    3. To the blended paste, add yoghurt, salt, 1/2 cup water and blend into a smooth paste
    4. In a bowl, add the cooled sauteed spinach and the blended masala paste. Mix well to break up any spinach lumps
    5. Serve over warm rice and enjoy!

    Serving suggestion

    • Feel free to add a tadka (tempering) on the top. For the tadka, add some mustard seeds to hot oil. Allow it to crackle before adding some hing and curry leaves. Fry for 30 seconds and add to the Majjige Huli

    You can also follow me on Instagram to be up-to-date with what is cooking my kitchen. If you like this recipe, do share your comments below. Don’t forget to post your version on Instagram using #foodformyloveblog.

    Rating: 1 out of 5.
  • Pumpkin and Chana Dal Curry

    If I have not already mentioned it, let me do so now. Pumpkin is my favorite vegetable and my husband’s not so favorite. So I don’t cook a lot of Pumpkin, but this curry hit it out of the park with the husband. So that’s a win for me.


    Given its sweetness, Pumpkin lends itself not only to desserts but it can add that a nice sweet flavor to an otherwise spicy or tangy recipe. The only thing to be careful about it which type of Pumpkin you pick and how much cooking it requires. I am not Pumpkin expert but I know there are several different varieties available on the market. The one used in this recipe is the typical orange Pumpkin that is found at Indian grocery stores in the US. But an acorn squash or even a Butternut Squash works. Just be sure not to pick out a carving Pumpkin (if you are making this recipe during the Halloween season). Grocery stores usually have descriptions listed for carving Pumpkins versus eating Pumpkins. So it should be relatively straightforward to pick one. The nice thing about these is that they are sold in already cut pieces. They do cook quickly and become a mush, so keeping a careful eye out for it will result in the right texture. Although Pumpkins are in abundance during the fall or autumn seasons, they are usually available at Indian grocery stores year around.

    I never gave it much thought but Pumpkins are actually quite nutritious. Their bright orange color comes from the Beta Carotene in them, which is a beneficial anti-oxidant. Pumpkins are also packed with vitamins that boost immunity. So all in all, it is an unassuming vegetable with some decent health benefits.

    This recipe is another one pot curry that is simple and flavorful. It is an under 30 minute curry that be served with rice or roti. So it is perfect for anyone looking for easy, no-brainer type, nutritious recipes.


    Video Recipe

    Prep time10 minutes
    Cook time20 minutes
    Serves4 (2 meals for 2)

    Ingredients

    Vegetables

    • Pumpkin – 3 cups of cubed pieces
    • Potato – 1 medium, cubed
    • Yellow Onion – 1 medium, diced
    • Tomato – 1 large, diced

    Legumes

    • Chana Dal (Split Chickpeas) – 3/4 cup, washed and soaked

    Spices & Herbs

    • Jeera (Cumin Seeds) – 1 tsp
    • Bay leaves – 2
    • Cloves – 2
    • Green Chilies – 2, slit
    • Haldi (Ground Turmeric) – 1 tsp
    • Red Chilli Powder – 1 tsp
    • Coriander Powder – 1 tsp
    • Salt as per taste
    • Ginger – 1 tbsp chopped
    • Cilantro – A handful (for garnish)

    Oils

    • Cooking Oil – 2 tbsp

    Method

    1. Set Instant Pot to saute mode
    2. Add oil to the pot. Once the display shows hot, add the jeera, bay leaves and clove
    3. Once the 3 spices have cooked and become aromatic, add the onions and cook them for 2-3 minutes until they are translucent
    4. Add the ginger, green chilies and cook for 1 minute
    5. Add all the spices and cook for 1-2 minutes. Add a splash of water to de-glaze the pot. Add salt and continue cook
    6. Add the tomatoes. Cook the mixture for 1-2 minutes until all the spices, onions and tomatoes are cooked well and oil begins to release on the sides of the mixture
    7. Add the potatoes, pumpkin and chana dal
    8. Add 2-3 cups of water (depending on the desired consistency of the curry)
    9. Close the lid and move the pressure valve to sealed position
    10. Cancel the saute mode. Select the pressure cook mode and set the time to 15 minutes
    11. After the cooking time is complete, allow for manual pressure release for about 5 minutes before opening the pressure valve
    12. Open the lid, add cilantro and mix
    13. Transfer the curry to a serving bowl. enjoy the nutritious curry with rice or rotis

    You can also follow me on Instagram to be up-to-date with what is cooking my kitchen. If you like this recipe, do share your comments below. Don’t forget to post your version on Instagram using #foodformyloveblog.

  • Kale and Chickpea Pulao

    This is one of those recipes that is quick, easy and has easily substitute-able ingredients. It has greens, protein and carbs, all in the right balance, along with familiar flavors that will leave you satiated.


    Beans and rice are not just a staple in Latin America, but in many other parts of the world, especially India. Only difference is that in India, the beans (or legumes) are cooked separately in a curry form and is eaten with rice. But time is of the essence for most of us today. So one-pot meals like this one can give us the required nutrition and bring us the comfort at the end of a long day.

    Although I am trying to get my husband to eat less rice and switch over to other grains, he is a true rice lover. So when we are in long distance, this is the kind of recipe for him or anyone in his place. Quick, filling and no-brainer type recipe.


    Prep time5 minutes
    Cook time20 minutes
    Serves2 (for 2 meals)

    Ingredients

    Grains

    • Rice – 2 cups, washed and soaked for 10 minutes

    Legumes

    • Chickpeas – 1 15oz can, drained and rinsed (This is equivalent to 1 1/2 cups)

    Vegetables

    • Shallots – 1 large, diced
    • Kale – 1/2 a bag (chopped) or 1 fresh bunch, roughly chopped
    • Carrots – 1 cup, matchstick or shredded
    • Serrano Pepper – 1, finely chopped

    Spices and Herbs

    • Cumin Seeds – 1 tsp
    • Ground Cinnamon – 1/4 tsp
    • Ginger-Garlic Paste – 1 tsp
    • Ground Turmeric – 1 tsp
    • Ground Coriander Powder – 1 tsp
    • Garam Masala – 1 1/2 tsps
    • Salt – As per taste

    Oils

    • Cooking Oil – 2 tbsps

    Ingredient notes

    • There are different types of Kale available at stores. The one used in this Pulao is Curly Kale. This is the most commonly found Kale and has versatile uses. It is available in bagged format (that is triple washed and chopped) or as a fresh bunch, which you need to thoroughly wash
    • For Chickpeas, if you prefer not to use the canned ones, soak 3/4 cup dried Chickpeas overnight for use in this recipe
    • If you want to skip the Serrano Pepper, add 1 tsp of Paprika or Red Chilli Powder for the sipce

    Method

    1. Turn the Instant Pot to saute mode and set it for 8 minutes
    2. Add oil
    3. Once the pot displays hot, oil is hot. Add the cumin seeds and cinnamon. Let is fry for 30 seconds for the cinnamon to release its essential oils
    4. After this, add the onions, serrano peppers and ginger garlic paste. Saute for 2-3 minutes until the onions are softened and turn slightly translucent
    5. Add the carrots and mix well. Add salt and mix again
    6. Add the chickpeas and mix well
    7. Add the spices and mix well for 2-3 minutes to cook the spices and coat all ingredients with them
    8. Add a splash of water to de-glaze the pot
    9. Add the soaked rice and mix well
    10. To add the Kale, simply place it on the top of the rice mixture. There is no need to mix it as the leaves will wilt into the mixture during the cooking process
    11. Close the lid of the Instant Pot and turn the pressure valve to the sealed position
    12. Cancel the saute mode. Select the pressure cook mode, select 12 minutes and high pressure
    13. Once the cooking is complete, allow the vent to naturally release pressure before moving it to the open position and doing a quick release
    14. Mix, serve and enjoy with a bowl of chilled boondi raita 🙂

    Stove-top Method

    • Follow the same instructions as above, but use a pressure cooker
    • The rice can be cooked for the length of 3-4 whistles
    • Then, switch off the gas and wait for the natural pressure release before lifting the weight and opening the cooker


    Recipe variations

    • Substitute Kale with any other choice of greens such as Spinach or Chard
    • Substitute with choice of legume, such as black beans or Kidney Beans
    • Substitute Rice with any grain of choice. Just remember to adjust the cooking time as per the instructions on the pack of grains

    You can also follow me on Instagram to be up-to-date with what is cooking my kitchen. If you like this recipe, do share your comments below. Don’t forget to post your version on Instagram using #foodformyloveblog.