Crunchy, sour, spicy and tangy – Enough said about this salad. Time to dive right in and experience the explosions of flavors.
Prep time
15 minutes
Cook time
N/A
Serves
2
Ingredients
Fruits and Vegetables
Green Mangoes – 2, chopped into cubes or shredded, julienned or whatever shape you fancy
Carrots – 1, shredded
Large English Cucumber – 1/2, chopped into cubes or julienned
Red Onions – 1 small, thinly sliced
Spices, Flavors and Herbs
Salt – As per taste
Ground Black Pepper – 1 tsp
Chaat Masala – 1.5 tsp
Green Chillies – 1, finely chopped (Optional)
Cilantro – A handful
Nuts and Seeds
Roasted Peanut Splits (Unsalted) – 1/4 cup
Method
Add all the fruits and vegetables into a mixing bowl
Add all the spices, flavors and herbs to the bowl. Mix well
Place the mixed salad in the refigerator and chill it for 30 minutes prior to serving
Garnish with roasted peanut splits and cilantro and enjoy the salad a meal side
Serving Suggestion
Serve as a salsa with pita bread/chips or crackers. Just chop up the vegetables and fruits into much smaller pieces. Use the same spices and mix in a similar manner
You can also follow me on Instagram to be up-to-date with what is cooking my kitchen. If you like this recipe, do share your comments below. Don’t forget to post your version on Instagram using #foodformyloveblog.
Do you know what is a fun way to eat fruits? To put them into a salad. No, not a regular leaf or grain salad, but a fun refreshing, tangy, sweet and spicy salad. Like this one. Try it. It will instantly cool you down this summer.
Prep time
15 minutes
Cook time
N/A
Serves
2
Ingredients
Fruits and Vegetables
Watermelon – 4 cups, cut into small cubes
Large English Cucumber – 1/2, cut into small cubes or julienned
Red Onions – 1 small, sliced (Optional)
Spices, Flavors and Herbs
Chaat Masala – 1.5 tsp
Salt – A pinch
Black Pepper – 1 tsp
Lime Juice – 2 tbsp
Mint Leaves – 2 tbsp, roughly chopped
Nuts and Seeds
Roasted Peanut Splits (Unsalted) – 1/4 cup
Method
Mix all fruits, vegetables, spices and herbs in a bowl (except the roasted peanut splits)
Place the mixed salad in the refrigerator to chill for 30 minutes
Garnish with roasted peanut splits and enjoy the chilled salad
Serving Suggestion
Serve the chilled salad as meal side salad, as an appetizer or as a snack salad
Serve as a “watermelon salsa” with pita bread/chips or crackers
You can also follow me on Instagram to be up-to-date with what is cooking my kitchen. If you like this recipe, do share your comments below. Don’t forget to post your version on Instagram using #foodformyloveblog.
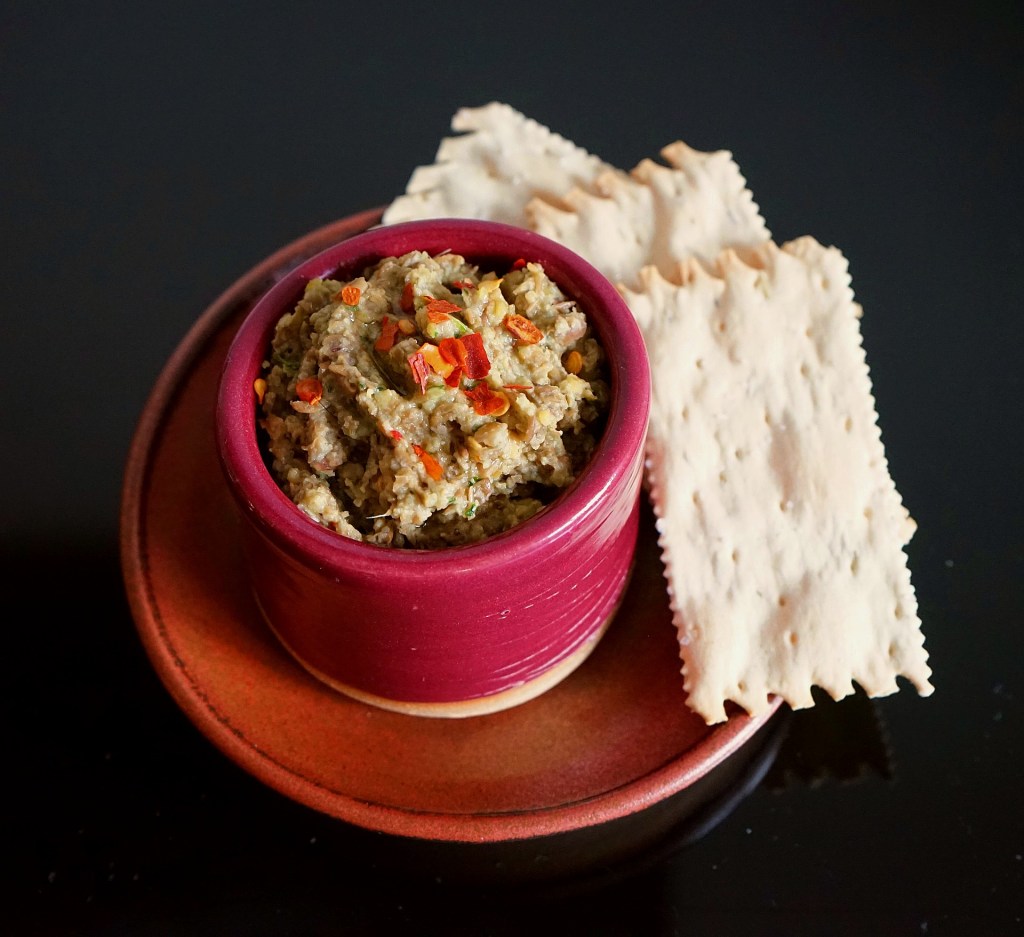
One can never have enough dips. There are mild, medium and spicy salsas. Then there is Guacamole. There is even a hundred flavors of Hummus. There are fruit dips too. And a ton other. But what about lentil dips? If that does not sound good to you, try this recipe and I guarantee that it will change your mind.
I am writing this post during a time that we will all remember for the rest of our lives. The unprecendented time of COVID-19. To say the least, this has been an emotional roller coaster for all of us. Our life has been upended with working from home, home schooling children, working with minimal groceries etc. But it has also been a time of gratitude and lots of home food to feed one and all. And this brings me back to the dip.
With so many of us being at home, food and snacking varieties are needed to keep us all sane, healthy and satiated. And this dip checks all those 3 boxes. In my case, I am not much of a snacker, but my husband definitely needs his evening snack. I would much rather prepare a new variety for him everyday instead of him eating sugary, fatty cookies. This dip is so easy to prepare that even he can do it, unsupervised!
With brown lentils and cashews, the dip is a powerhouse of nutrition, and is incredibly flavorful. What more does one want from a dip? 🙂 This recipe was born because I got tired of Guacamole and Hummus. I really needed something different from a texture and flavor standpoint.
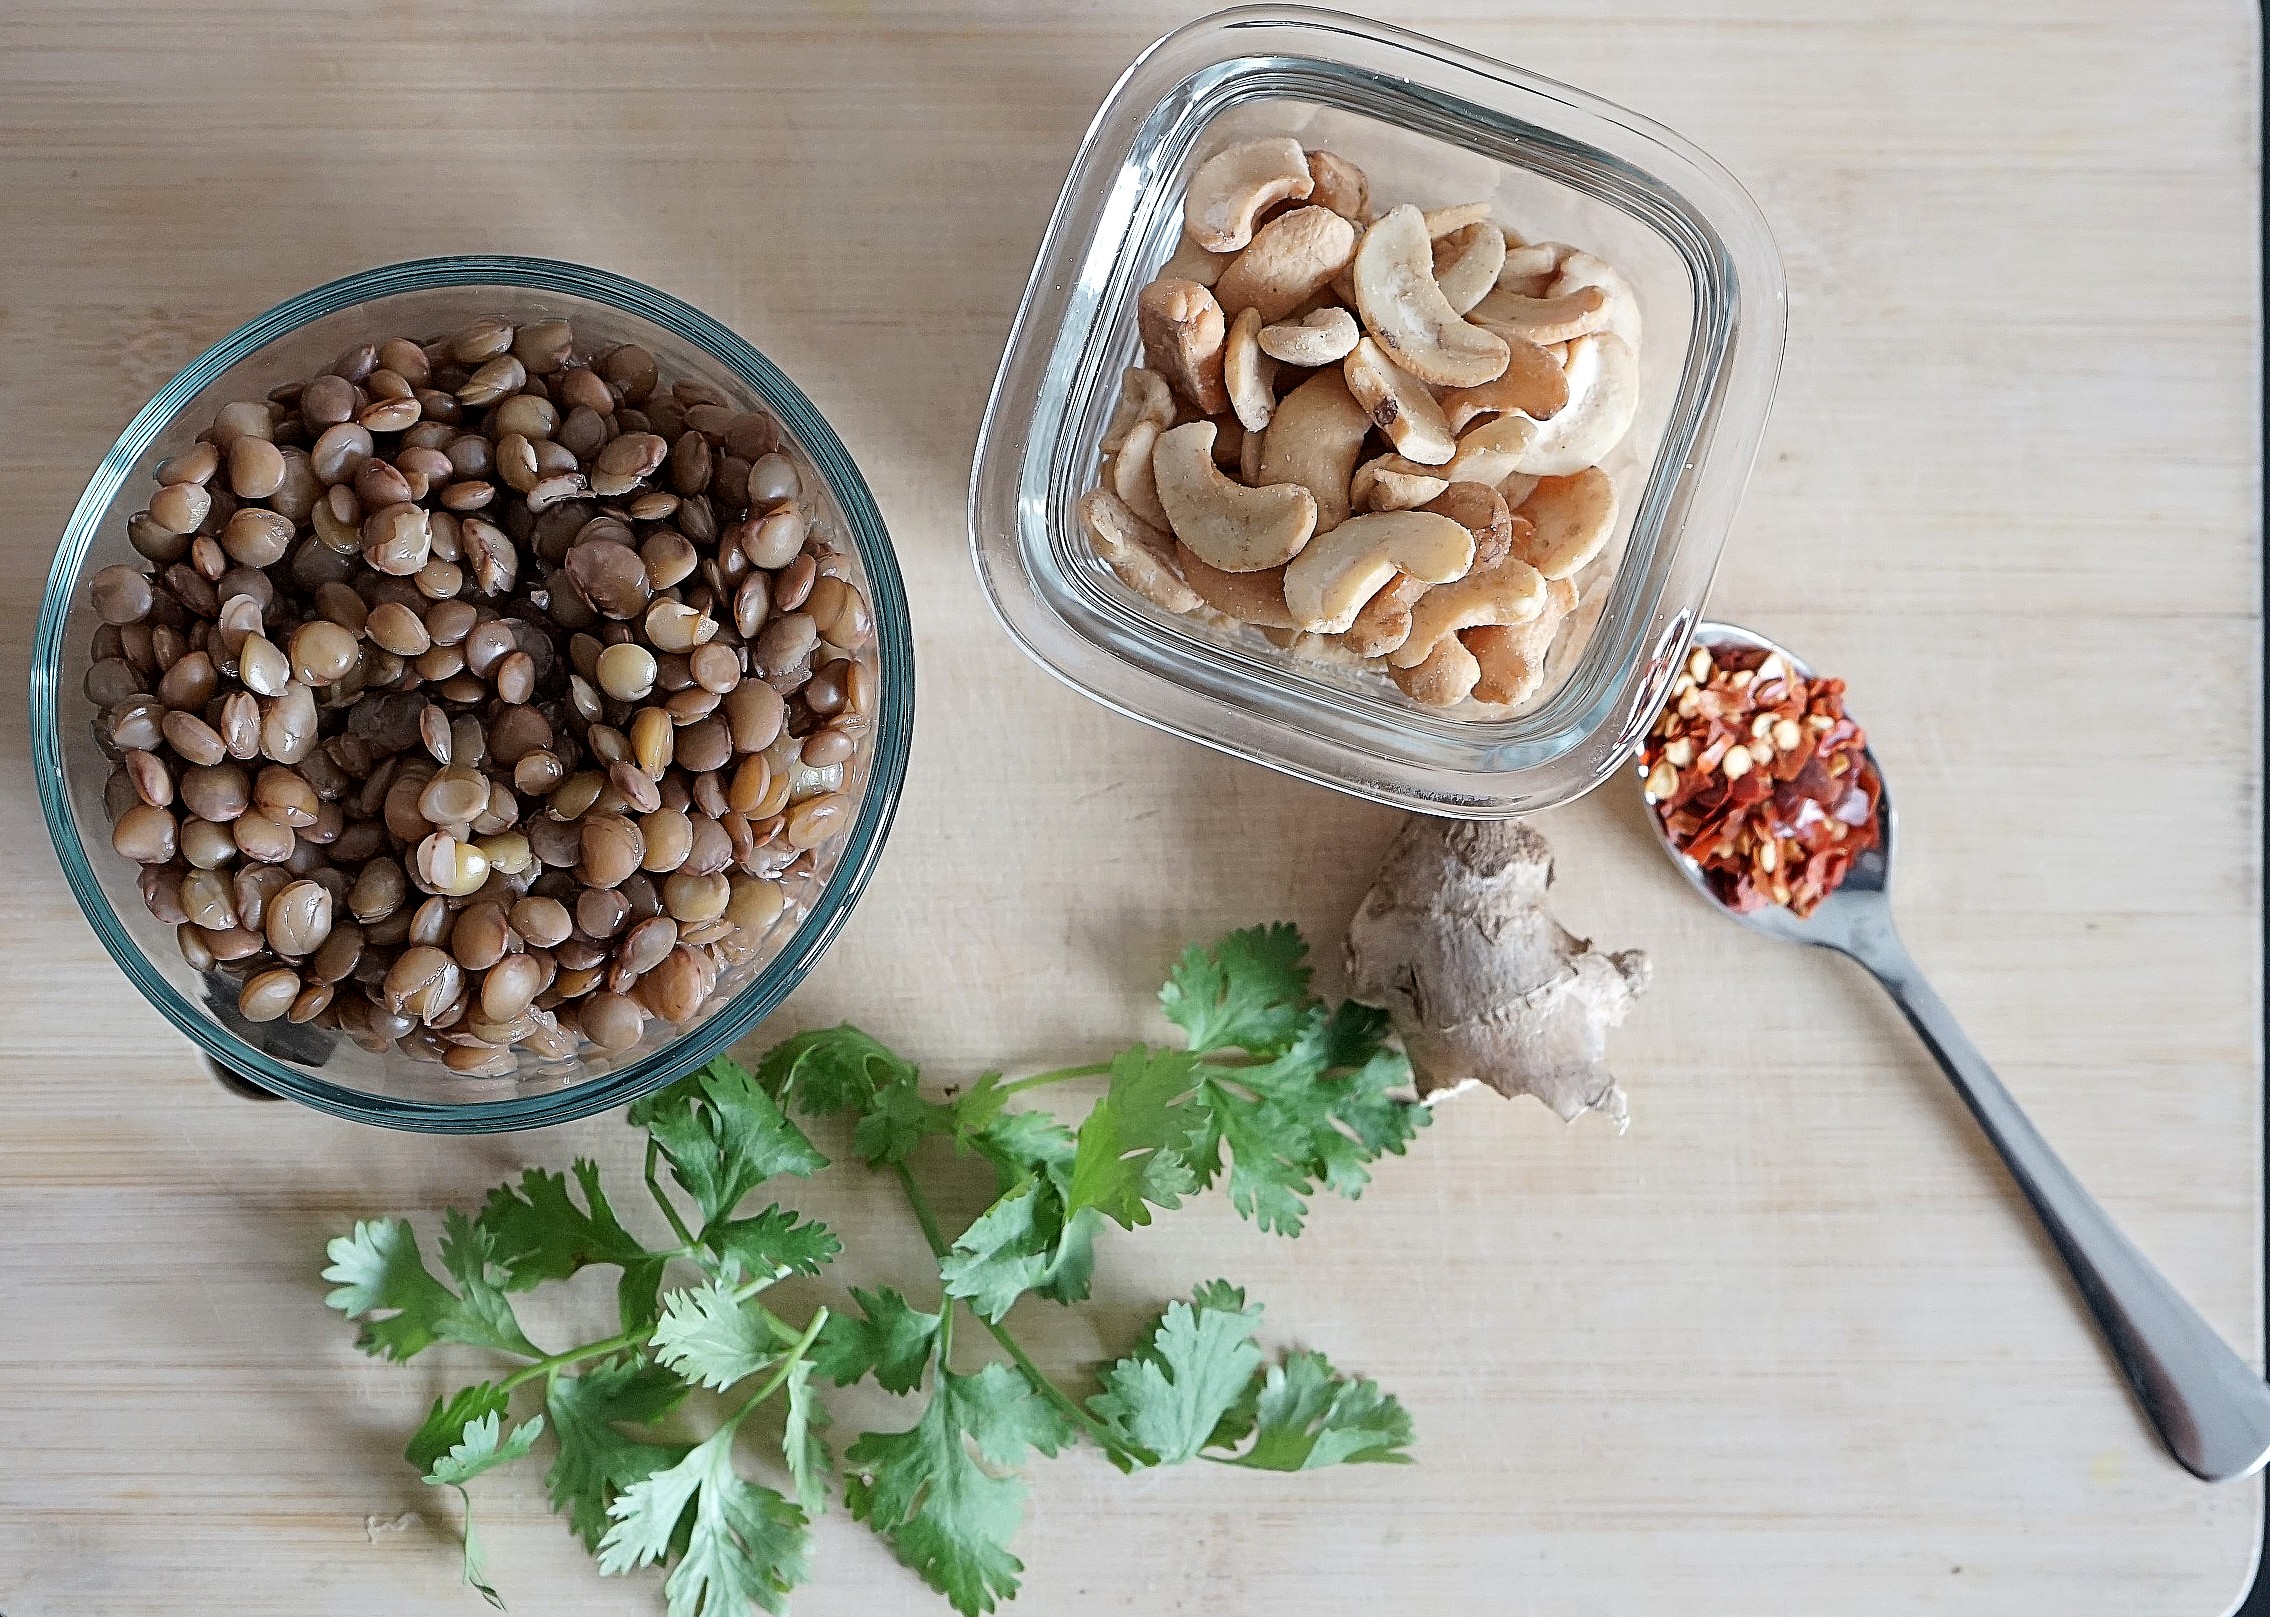
This recipe uses brown lentils. In general, lentils are amazing sources of plant-based protein and fiber. And this recipe gives you another way to eat lentils, other than the regular dal-chawal. This recipe also uses cashews, which also have great protein content along with beneficial mono-unsaturated fats and several beneficial minerals.
The best thing about this recipe is that using the same base, you can alter the flavor using different spices, herbs or other additives like seeds. Apart from the cook time for the lentils, this recipe comes together in 10 minutes.
Serve it with pita bread, crackers, chips or veggie sticks for your next evening snack or pre-prepare it as a portable appetizer dip for a party. This recipe will not disappoint, I promise 🙂
Prep time
10 minutes
Cook time
15 minutes
Serves
2 cups
Ingredients
Legumes
Brown Lentils – 1/2 cup, uncooked
Nuts and Seeds
Roasted Cashews – 10-12 (Unsalted)
Spices and Herbs
Cilantro – A handful
Red Pepper Flakes – 1 tsp
Fresh Ginger – 2 inch piece, grated or finely chopped
Garlic – 1/4 tsp (optional)
Salt – A pinch
Oils
Olive Oil – 2 tsbp for grinding + 2 tbsp for garnish drizzle
Ingredient notes
The brown lentils can be substituted with green lentils
Use any herb of your choice
Add any other spice of your choice for additional flavor
Method
Wash the brown lentils thoroughly. Add 1 1/2 cups of water. Place in Instant Pot. Close the lid and the move the pressure valve to sealed position. Select the pressure cook mode and set the time for 12 minutes. Once done, allow the pressure to naturally release before unsealing the pressure valve. Allow the cooked lentils to cool prior to using. You can cook the lentils in a pressure cooker too for 2-3 whistles
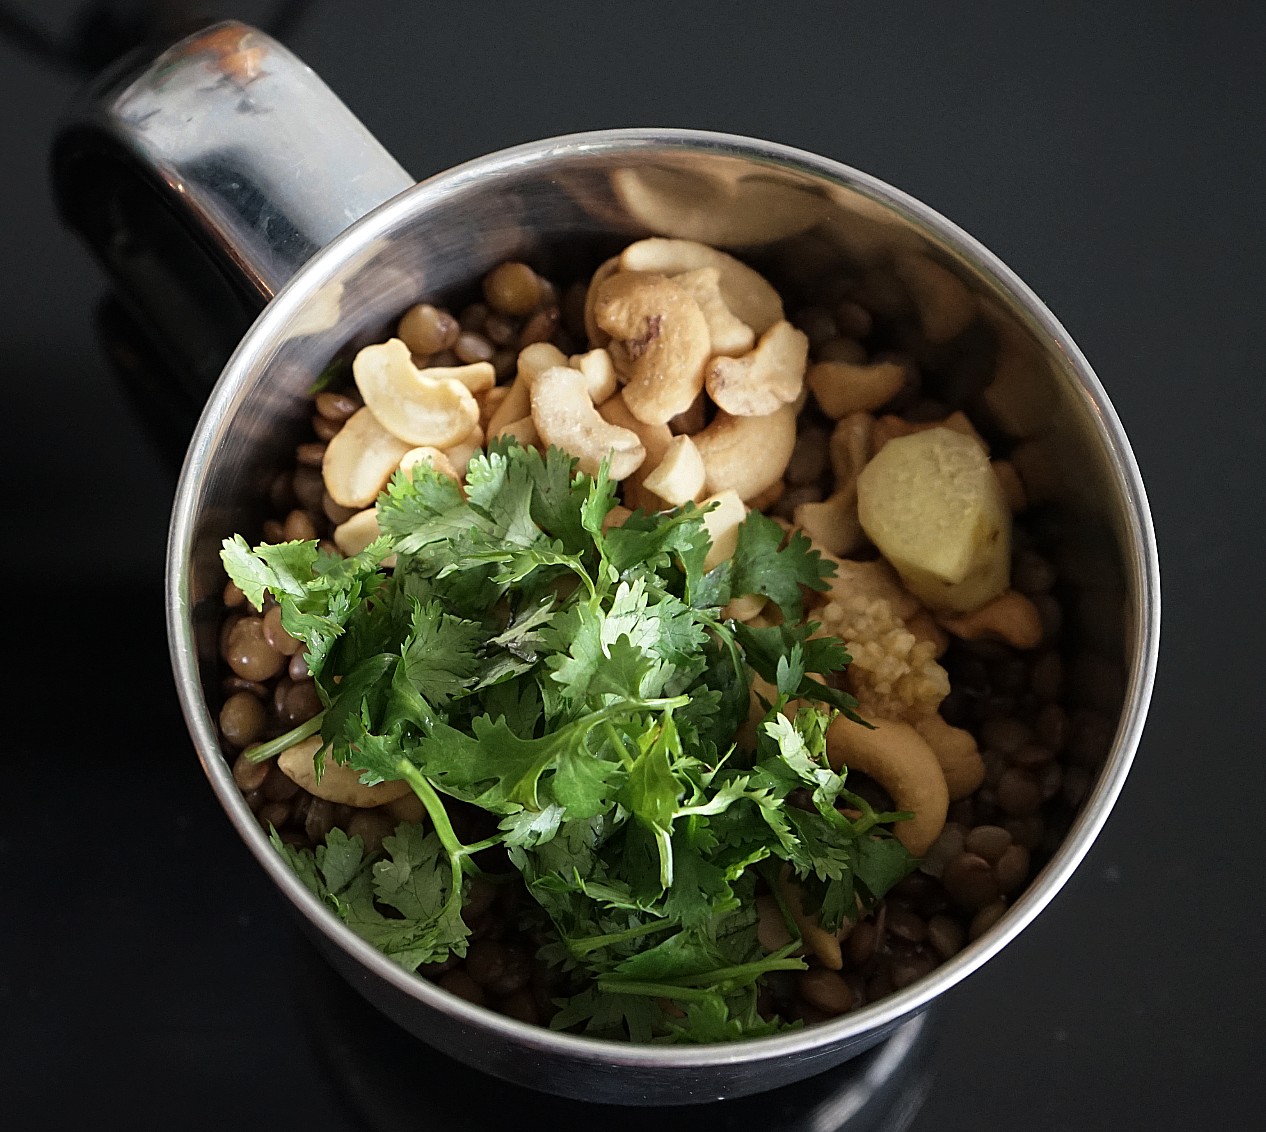
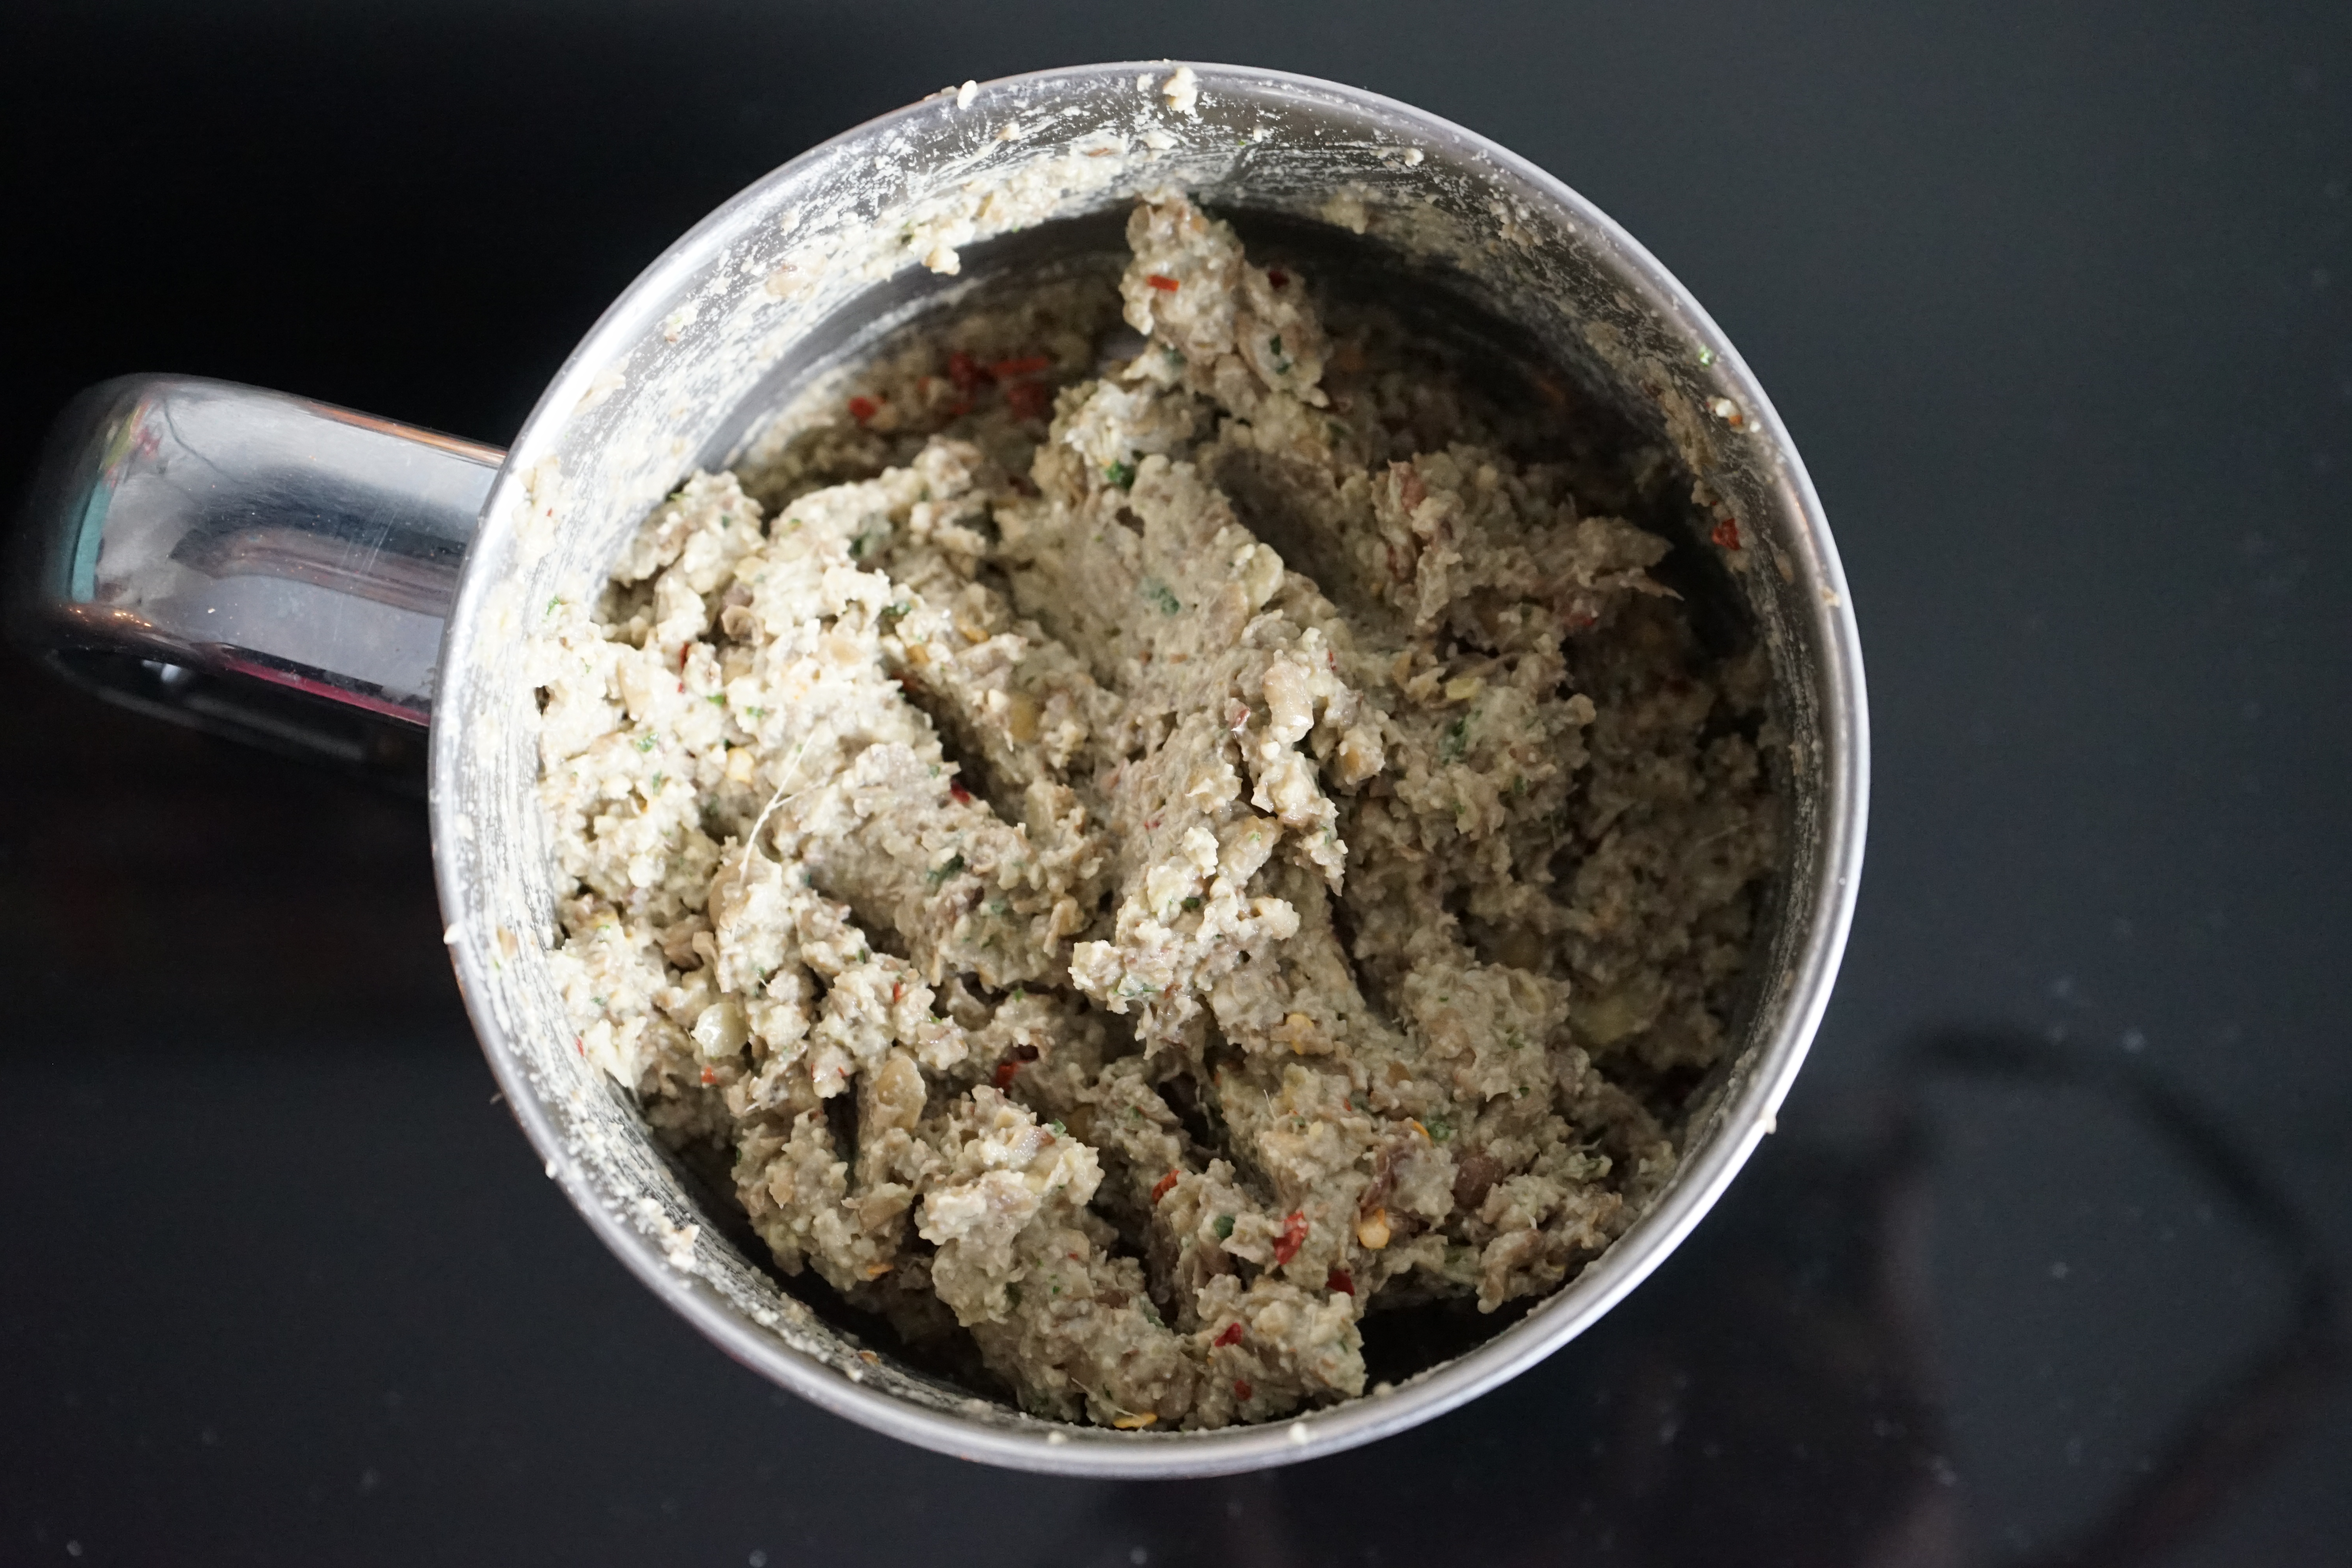
Once the lentils have cooled, add all the ingredients to a blender. Blend until you achieve the desired consistency. My preference is a chunky dip, so I did not blend for smoothness, but feel free to blend until you achieve a smooth consistency. Make sure to add a little more olive oil to achieve the smoothness
Transfer the dip to a serving bowl. Either chill or drizzle with olive oil and serve immediately
You can also follow me on Instagram to be up-to-date with what is cooking in my kitchen. If you like this recipe, do share your comments below. Don’t forget to post your version on Instagram using #foodformyloveblog.
I am a salad junkie, but not the usual lettuce, cucumber and tomato salad. I always like to mix up my salads with interesting combinations of flavors, textures and colors. This salad is another attempt to do so. Not only is it an interesting combination, but the components themselves are all healthy and bring with them a ton of nutrition.
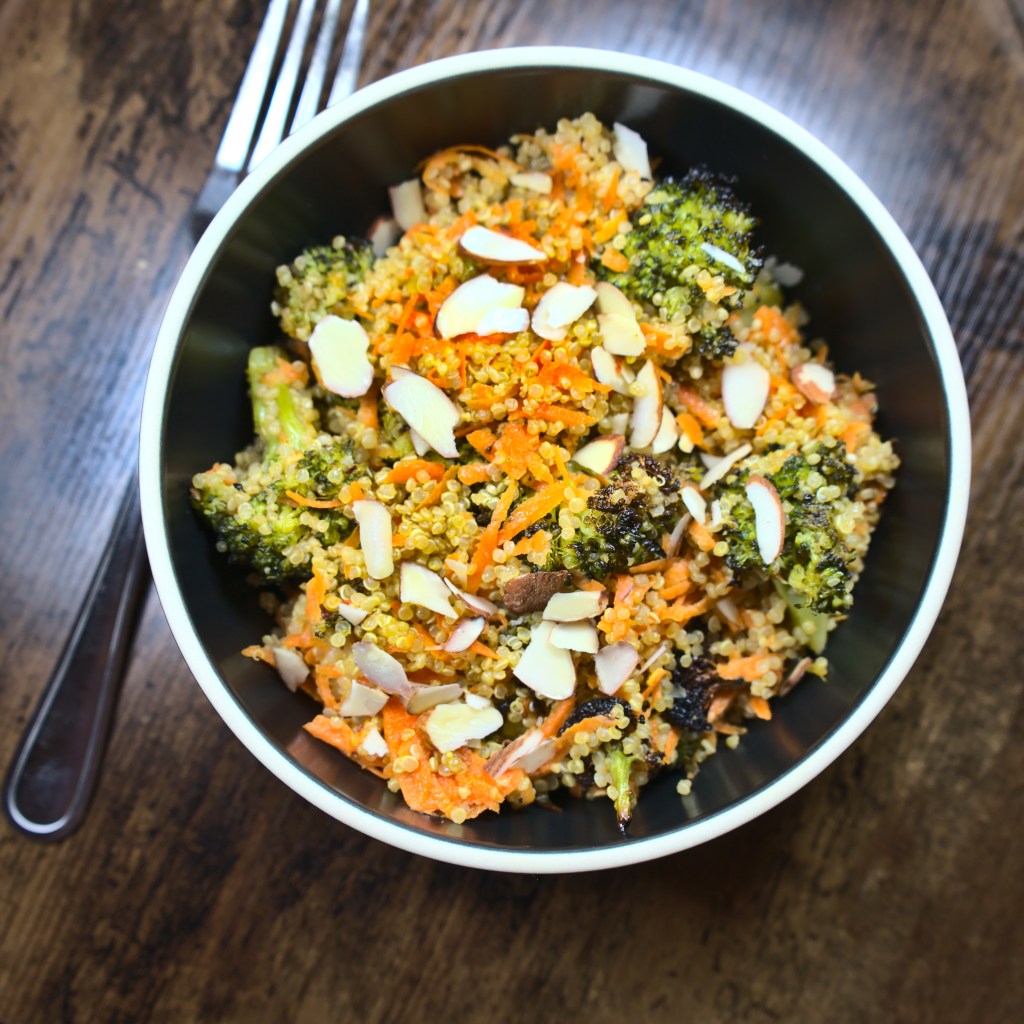
This salad works as a side or as an entree sized one. It can also be a great make-ahead salad or prepared and consumed fresh. I am a big fan of cruciferous vegetables like Broccoli. I particularly enjoy them in a roasted fashion. So, I always have bag of frozen ones in my freezer (although I have used fresh florets here). The combination is great because of the earthy, nutty flavors of the Quinoa together with the charred flavor of the roasted Broccoli and the crispiness of the toasted Almonds. The salad makes for a balanced meal with protein from the Quinoa, vitamins and minerals from the Broccoli and additional nutrients from the Almond.
You are welcome to add additional components to this salad, especially in terms of dressings. but the day I prepared this, I had some leftover store-bought Basil Pesto on hand and it worked great.
Prep time
10 minutes
Cook time
35 minutes
Serves
2
Ingredients
Grains
Quinoa – 1 cup, washed and drained
Vegetables
Broccoli – 2 medium heads cut into florets (Approx. 4-6 cups)
Carrot – 1 fresh, shredded
Spices, Herbs& Dressings
Salt – As per taste
Garlic – 2 tsp or 2 cloves, crushed
Red Chili Flakes – 1 tbsp (Adjust as per your taste)
Basil Pesto – 2 tbsp (Store bought or homemade)
Oils
Olive Oil – 2 tbsp
Nuts
Almonds – A handful, slivered
Method
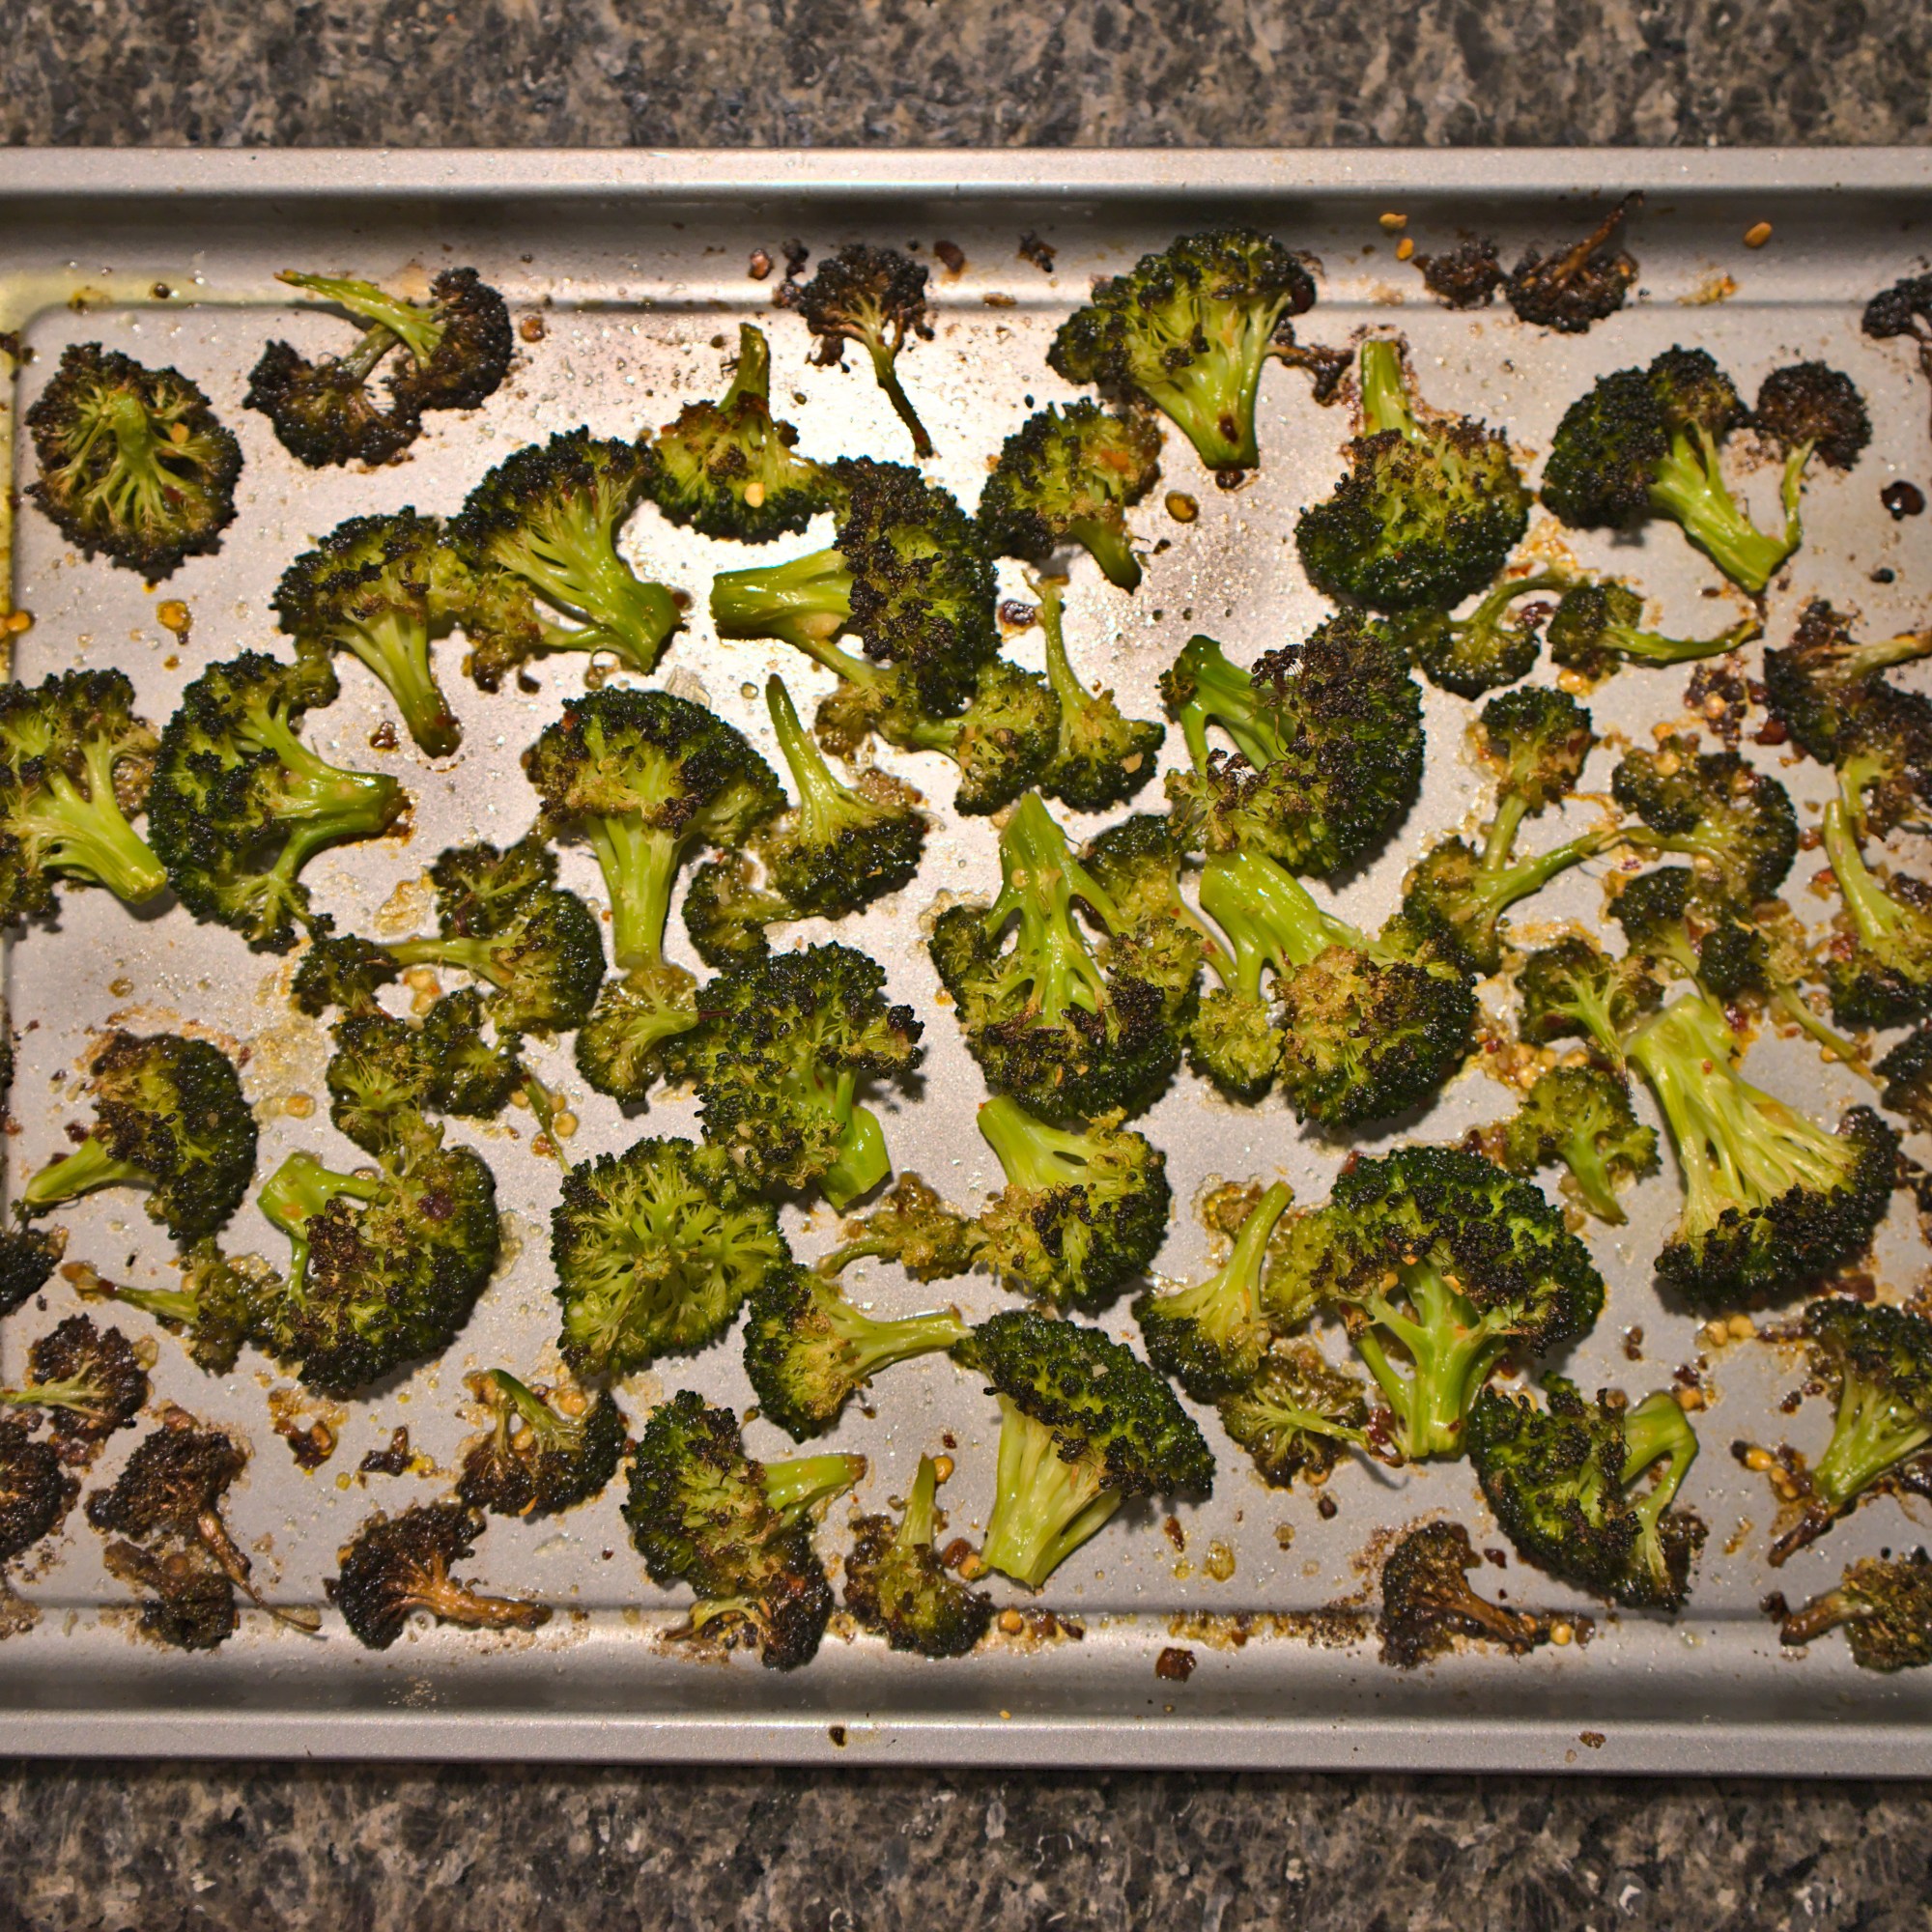
Line a baking tray with parchment paper and preheat the oven to 375F (190C)
Place the broccoli florets in a bowl. To this, add olive oil, garlic, red chilli flakes and salt. Mix well to evenly coat all the florets
Place the florets on the baking tray in a single layer for even roasting
Roast the broccoli at 375F for approx. 30 minutes
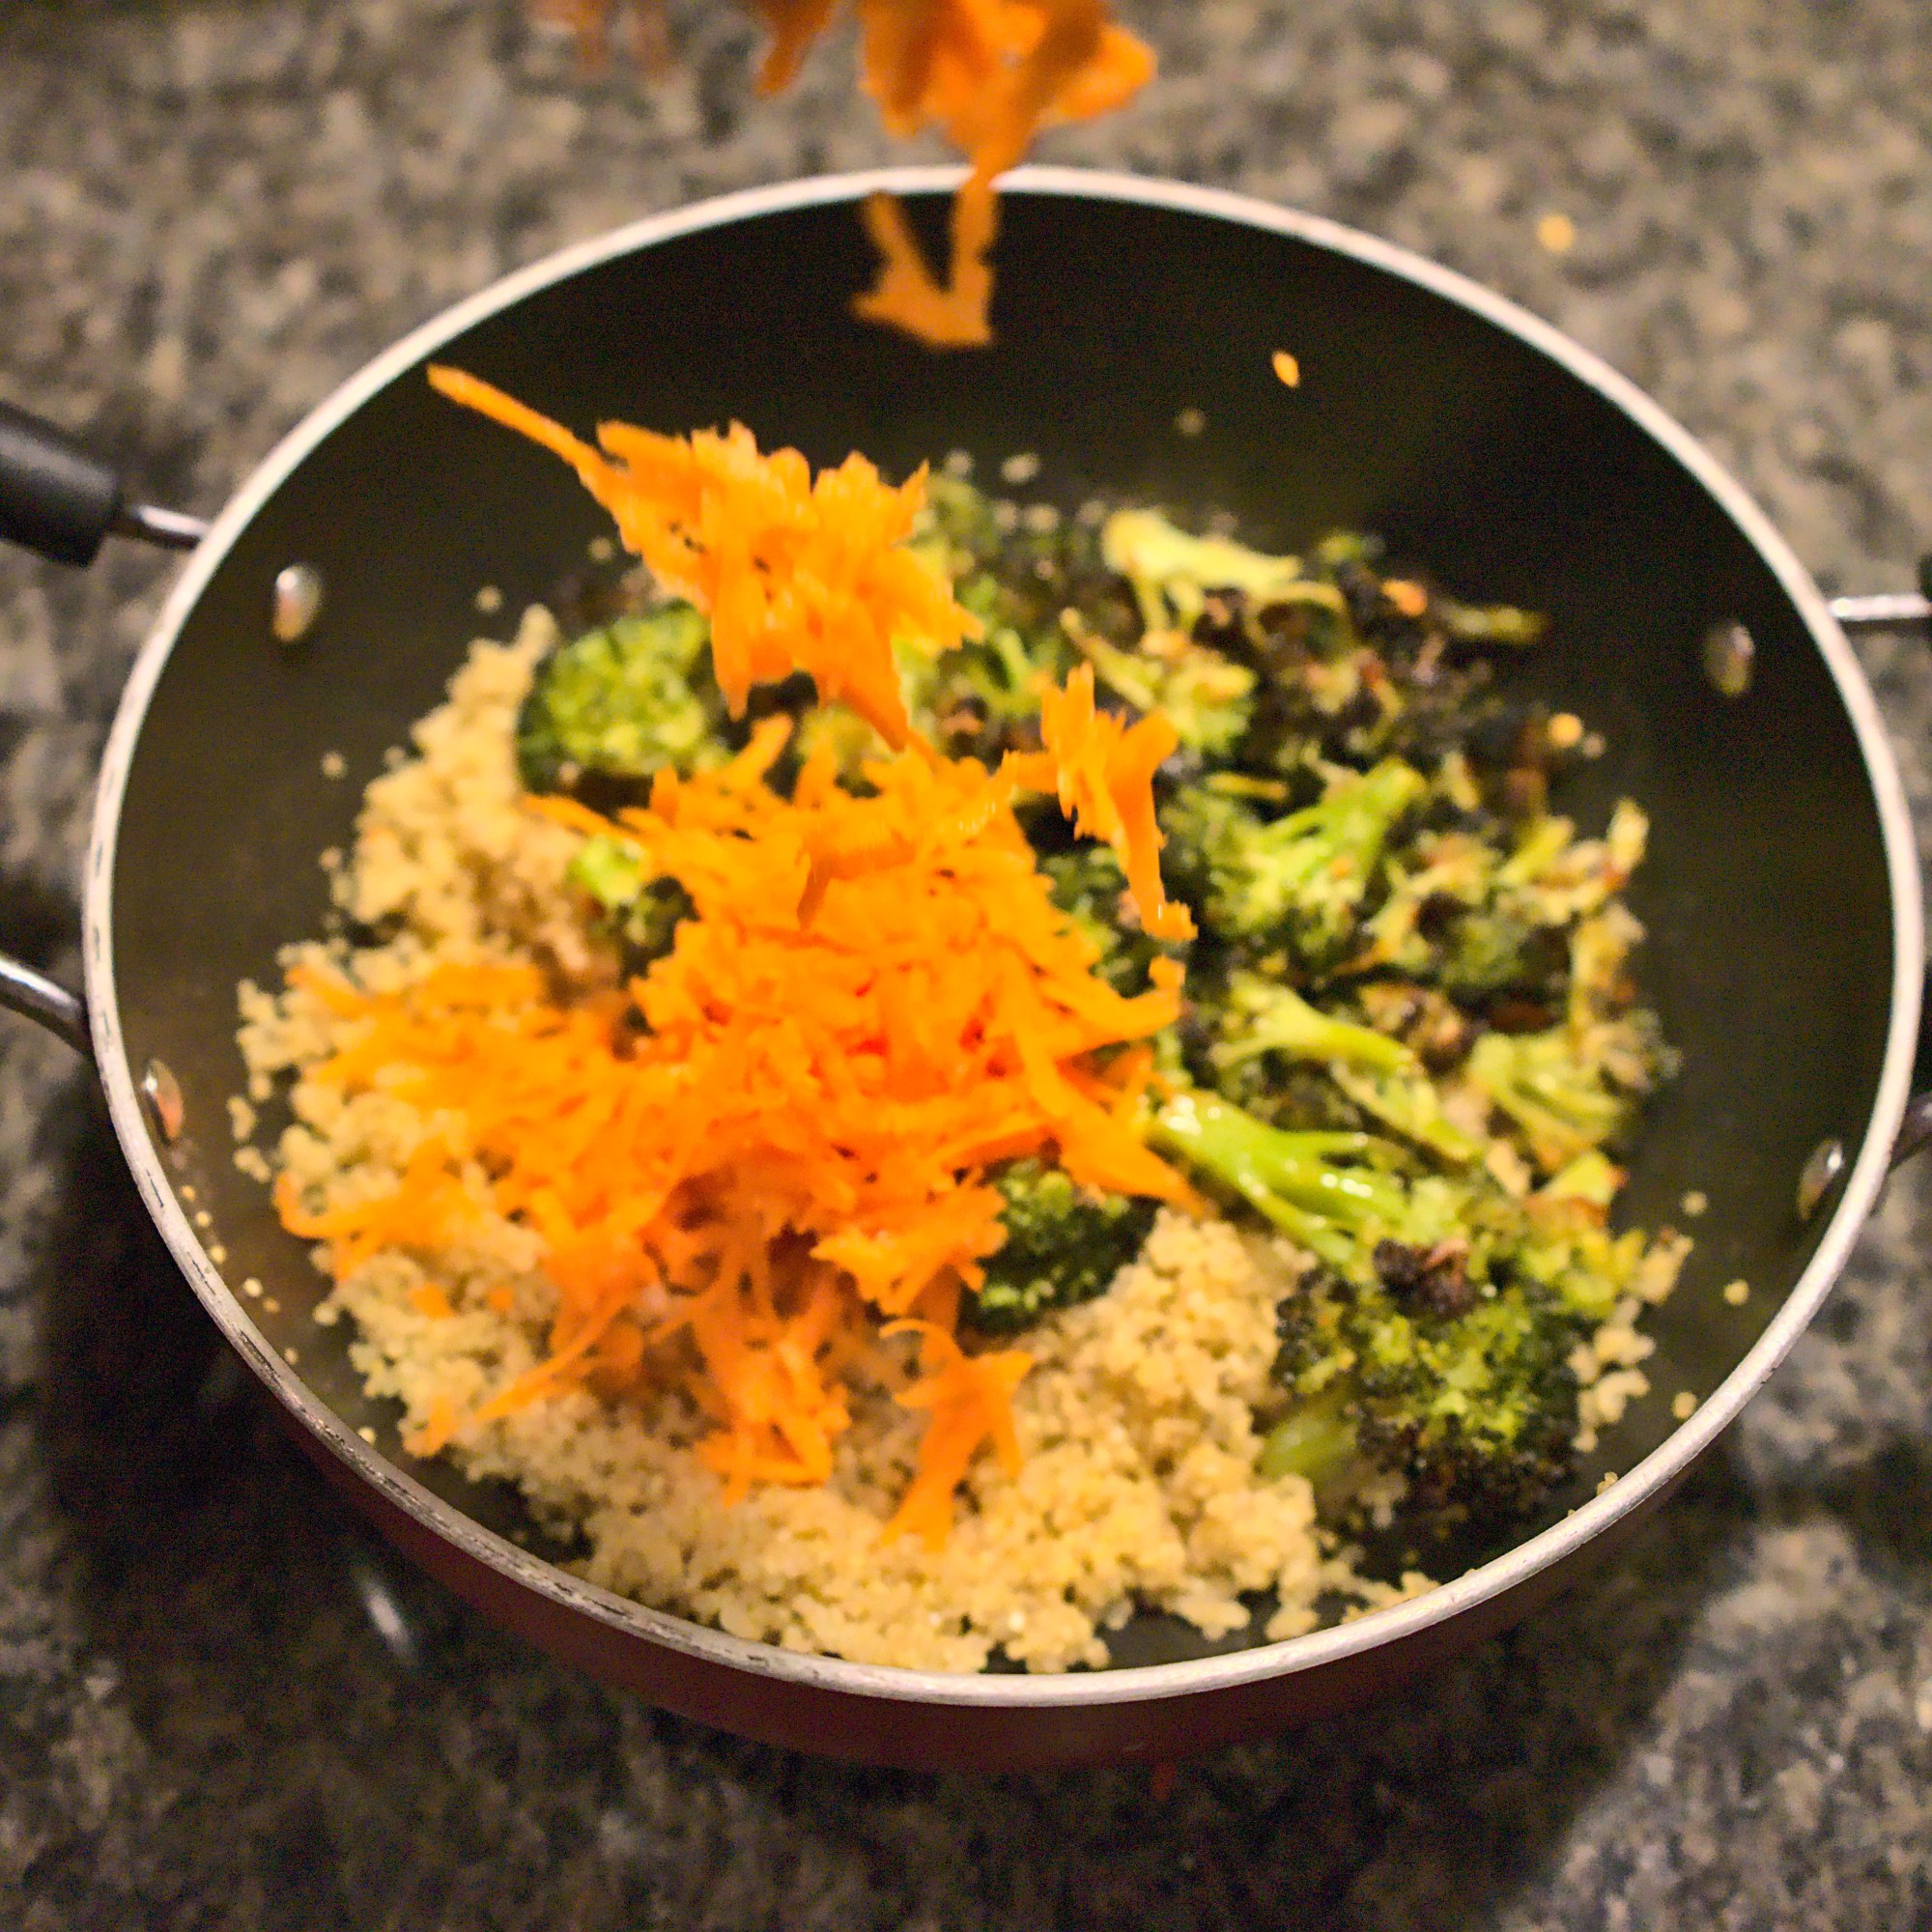
In the meanwhile, cook the quinoa by adding 1.5 cups water to the 1 cup of washed and drained quinoa. Bring the mixture to a boil. Then reduce the heat to medium and cook until the quinoa has absorbed all the water. Take it off the heat, cover a lid and let it rest for 5 minutes. Then, fluff it with a fork and add it a mixing bowl
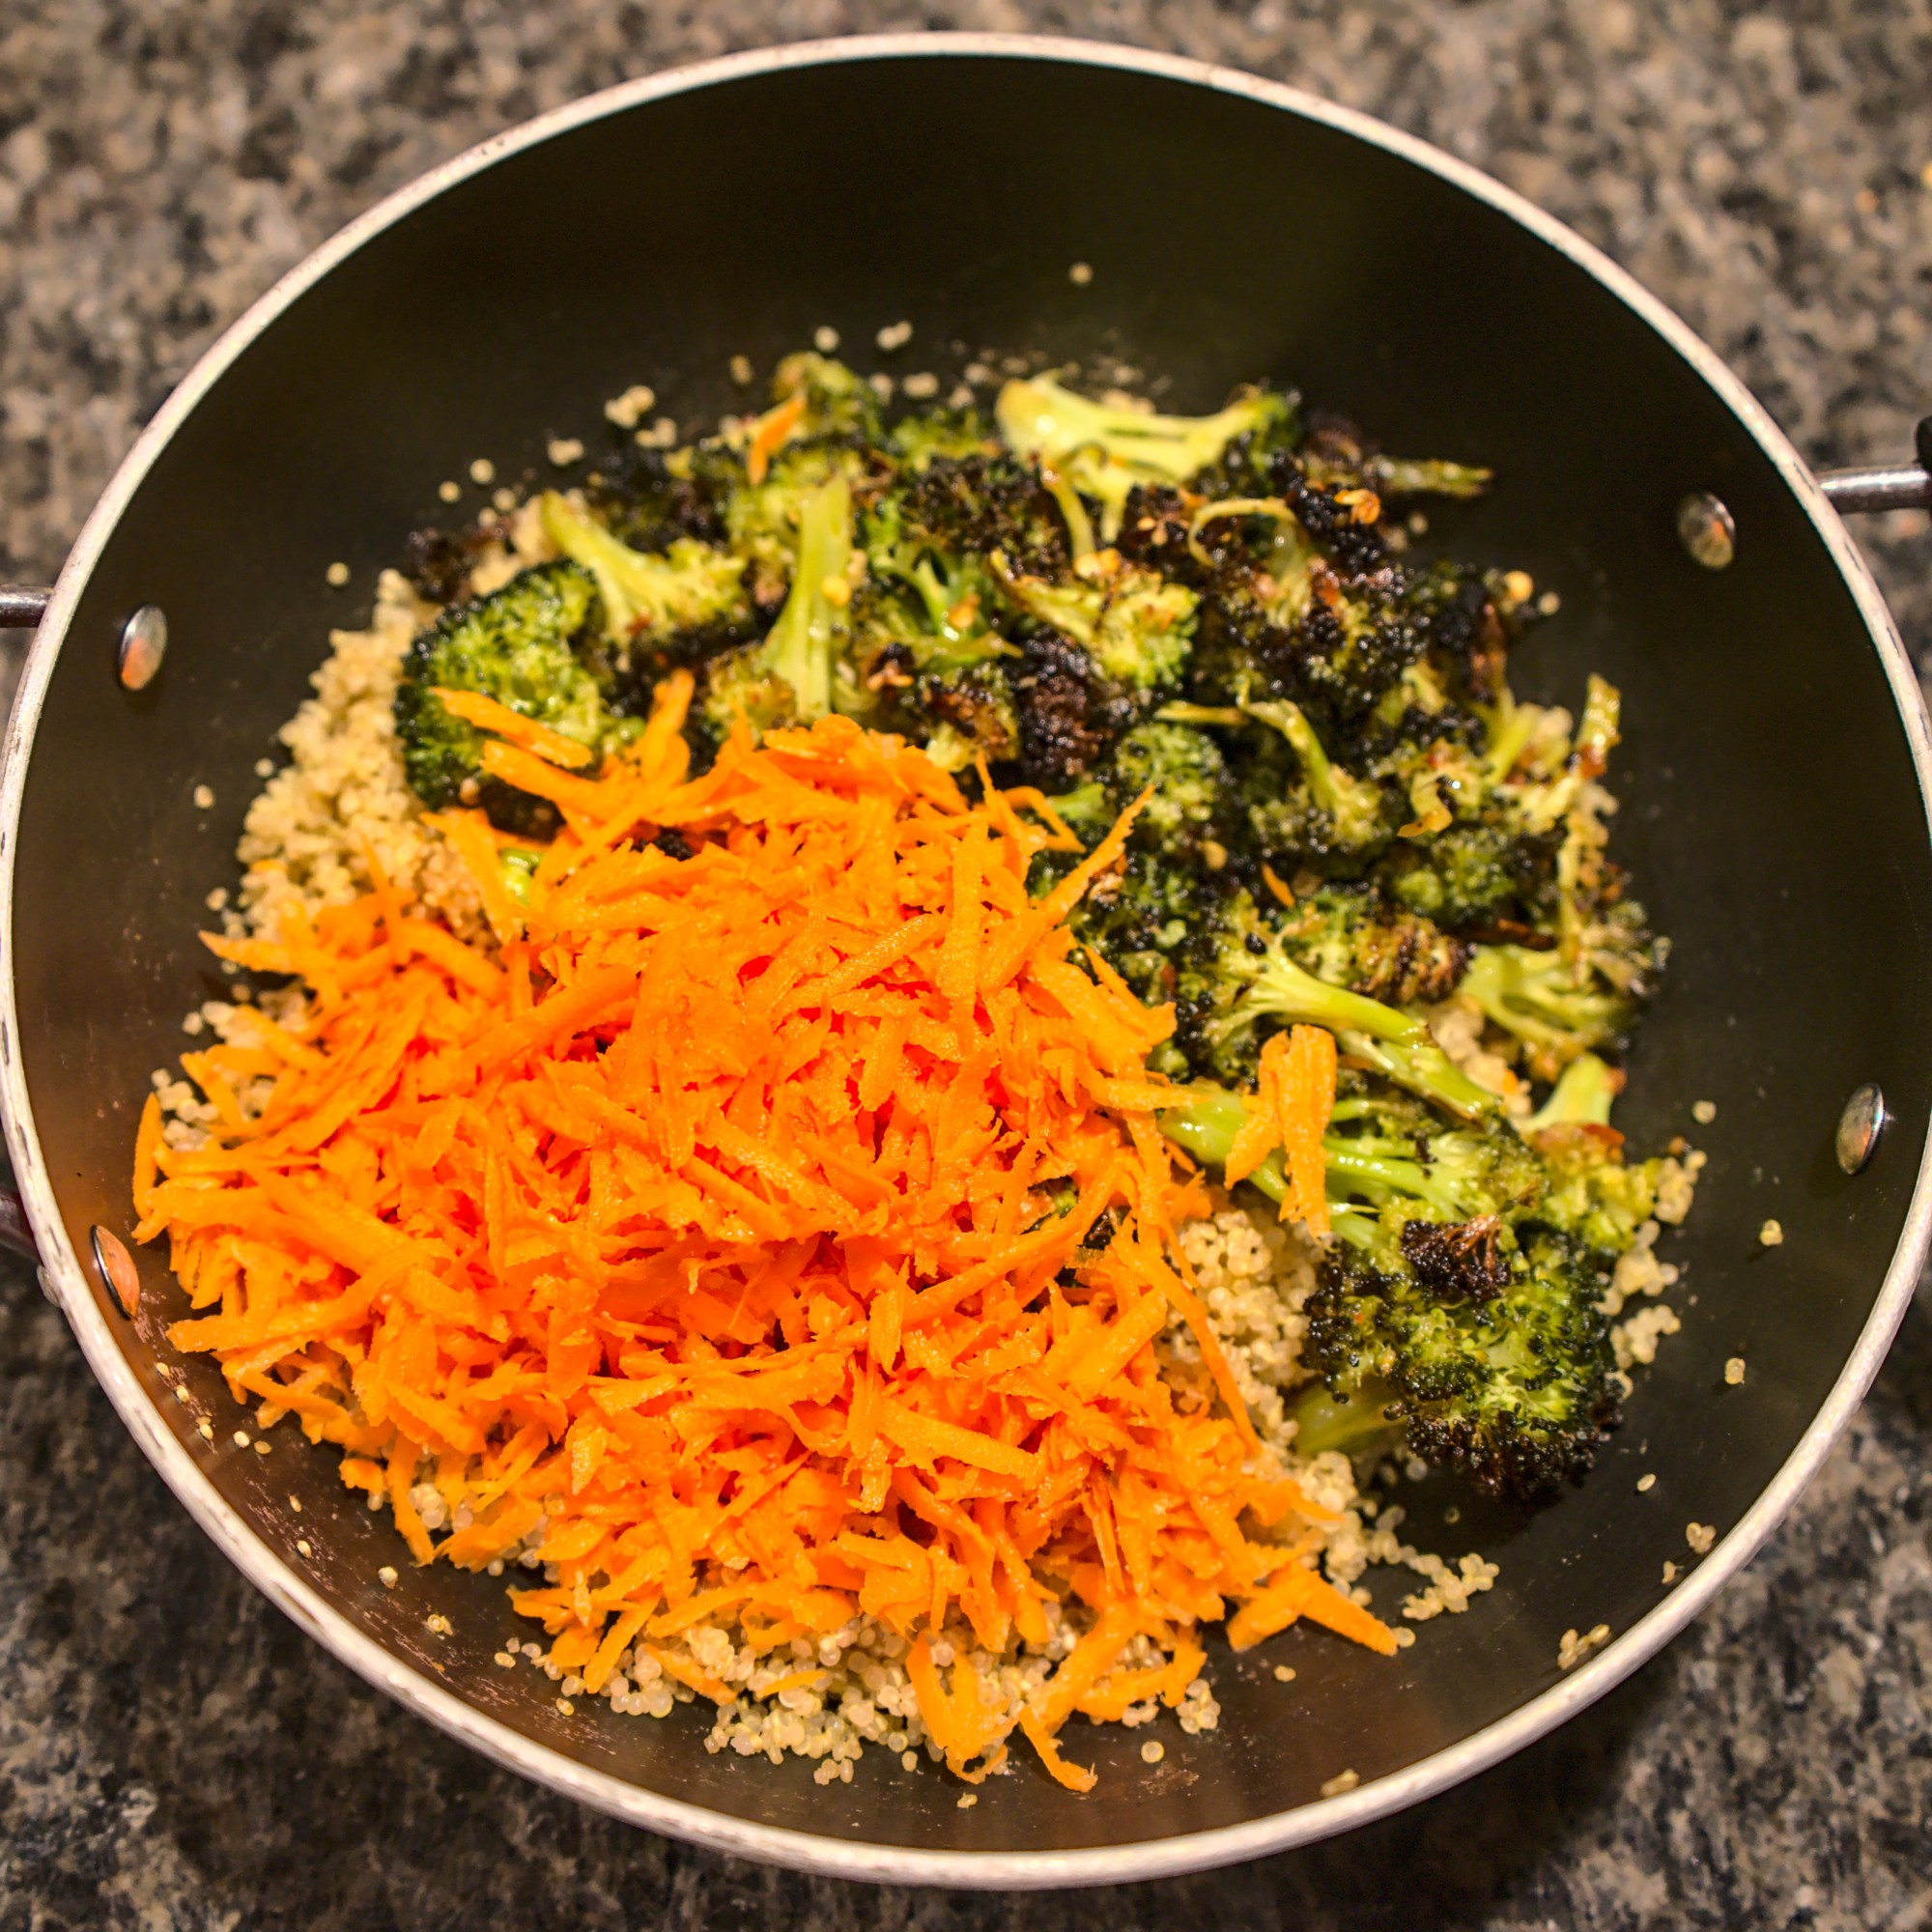
To the mixing bowl with quinoa, add the roasted broccoli, shredded carrots and basil pesto. Mix well to coat all components with the pesto
Add slivered almonds and mix
The salad can be served warm or can be chilled and enjoyed too
You can also follow me on Instagram to be up-to-date with what is cooking my kitchen. If you like this recipe, do share your comments below. Don’t forget to post your version on Instagram using #foodformyloveblog.
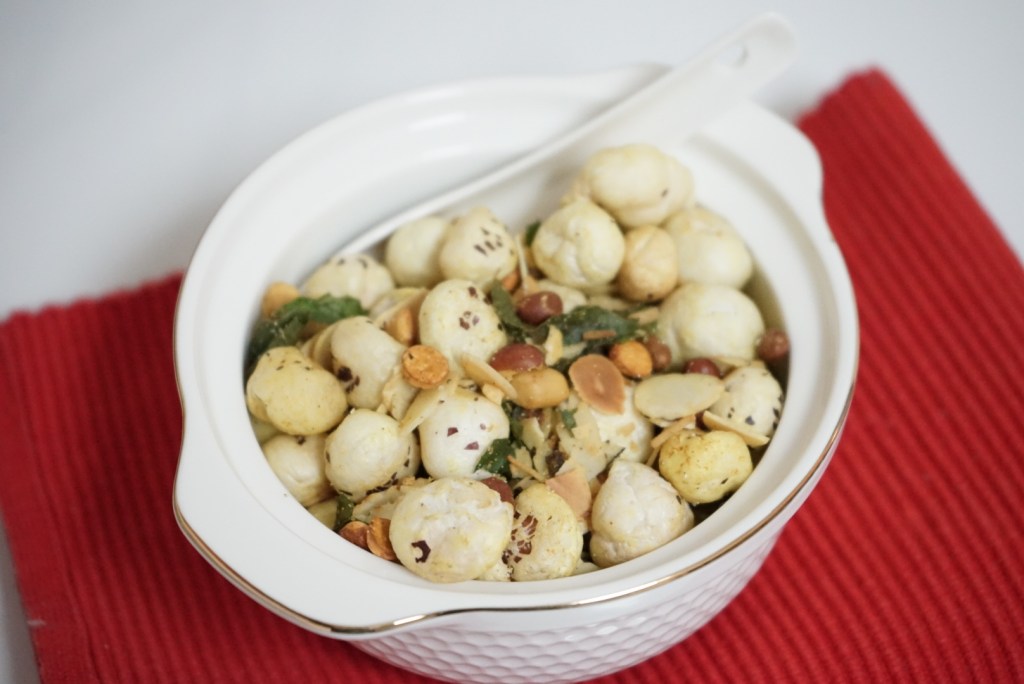
Whether you are looking for a filling snack during vrat times, a guilt-free savory snack, healthy tea-time namkeen or a munchie for a long drive, this Makhana Chivda will surely fulfill your needs.
With Makhana being so versatile with its use and its ability to pick up a variety of flavors, it works as a great replacement for the traditional Murmura (Puffed Rice) that is in Chivdas. With nutritional benefits such as protein and iron, Makhanas are a great replacement for store bought snacks such as crisps. And with the added goodness of nuts, seeds and fruits, this snack is surely a powerhouse of nutrition with taste and crunch.
Prep time
5 minutes
Cook time
15 minutes
Serves
Multiple
Ingredients
Seeds
Makhana – 2 7oz (200 gram) packets (Click on Makhana for an Amazon link or is available at any Indian grocery store)
Nuts
Pistachios – 1/4 cup, roughly chopped
Cashews – 1/4 cup, roughly chopped
Coconut – 1/4 cup, flakes of freshly dried coconut
Almonds – 1/4 cup slivered
Peanuts – 1/4 cup, roasted
Spices & Herbs
Hing – 1 tsp
Curry Leaves – A handful
Mustard Seeds – 1 tsp
Salt – As per taste
Amchur (Mango) Powder – 2 tsps
Green Chillies – 1-2 tbsp, crushed
Oils
Ghee – 1 tbsp for each round of roasting (See method for # of roasting steps)
Method
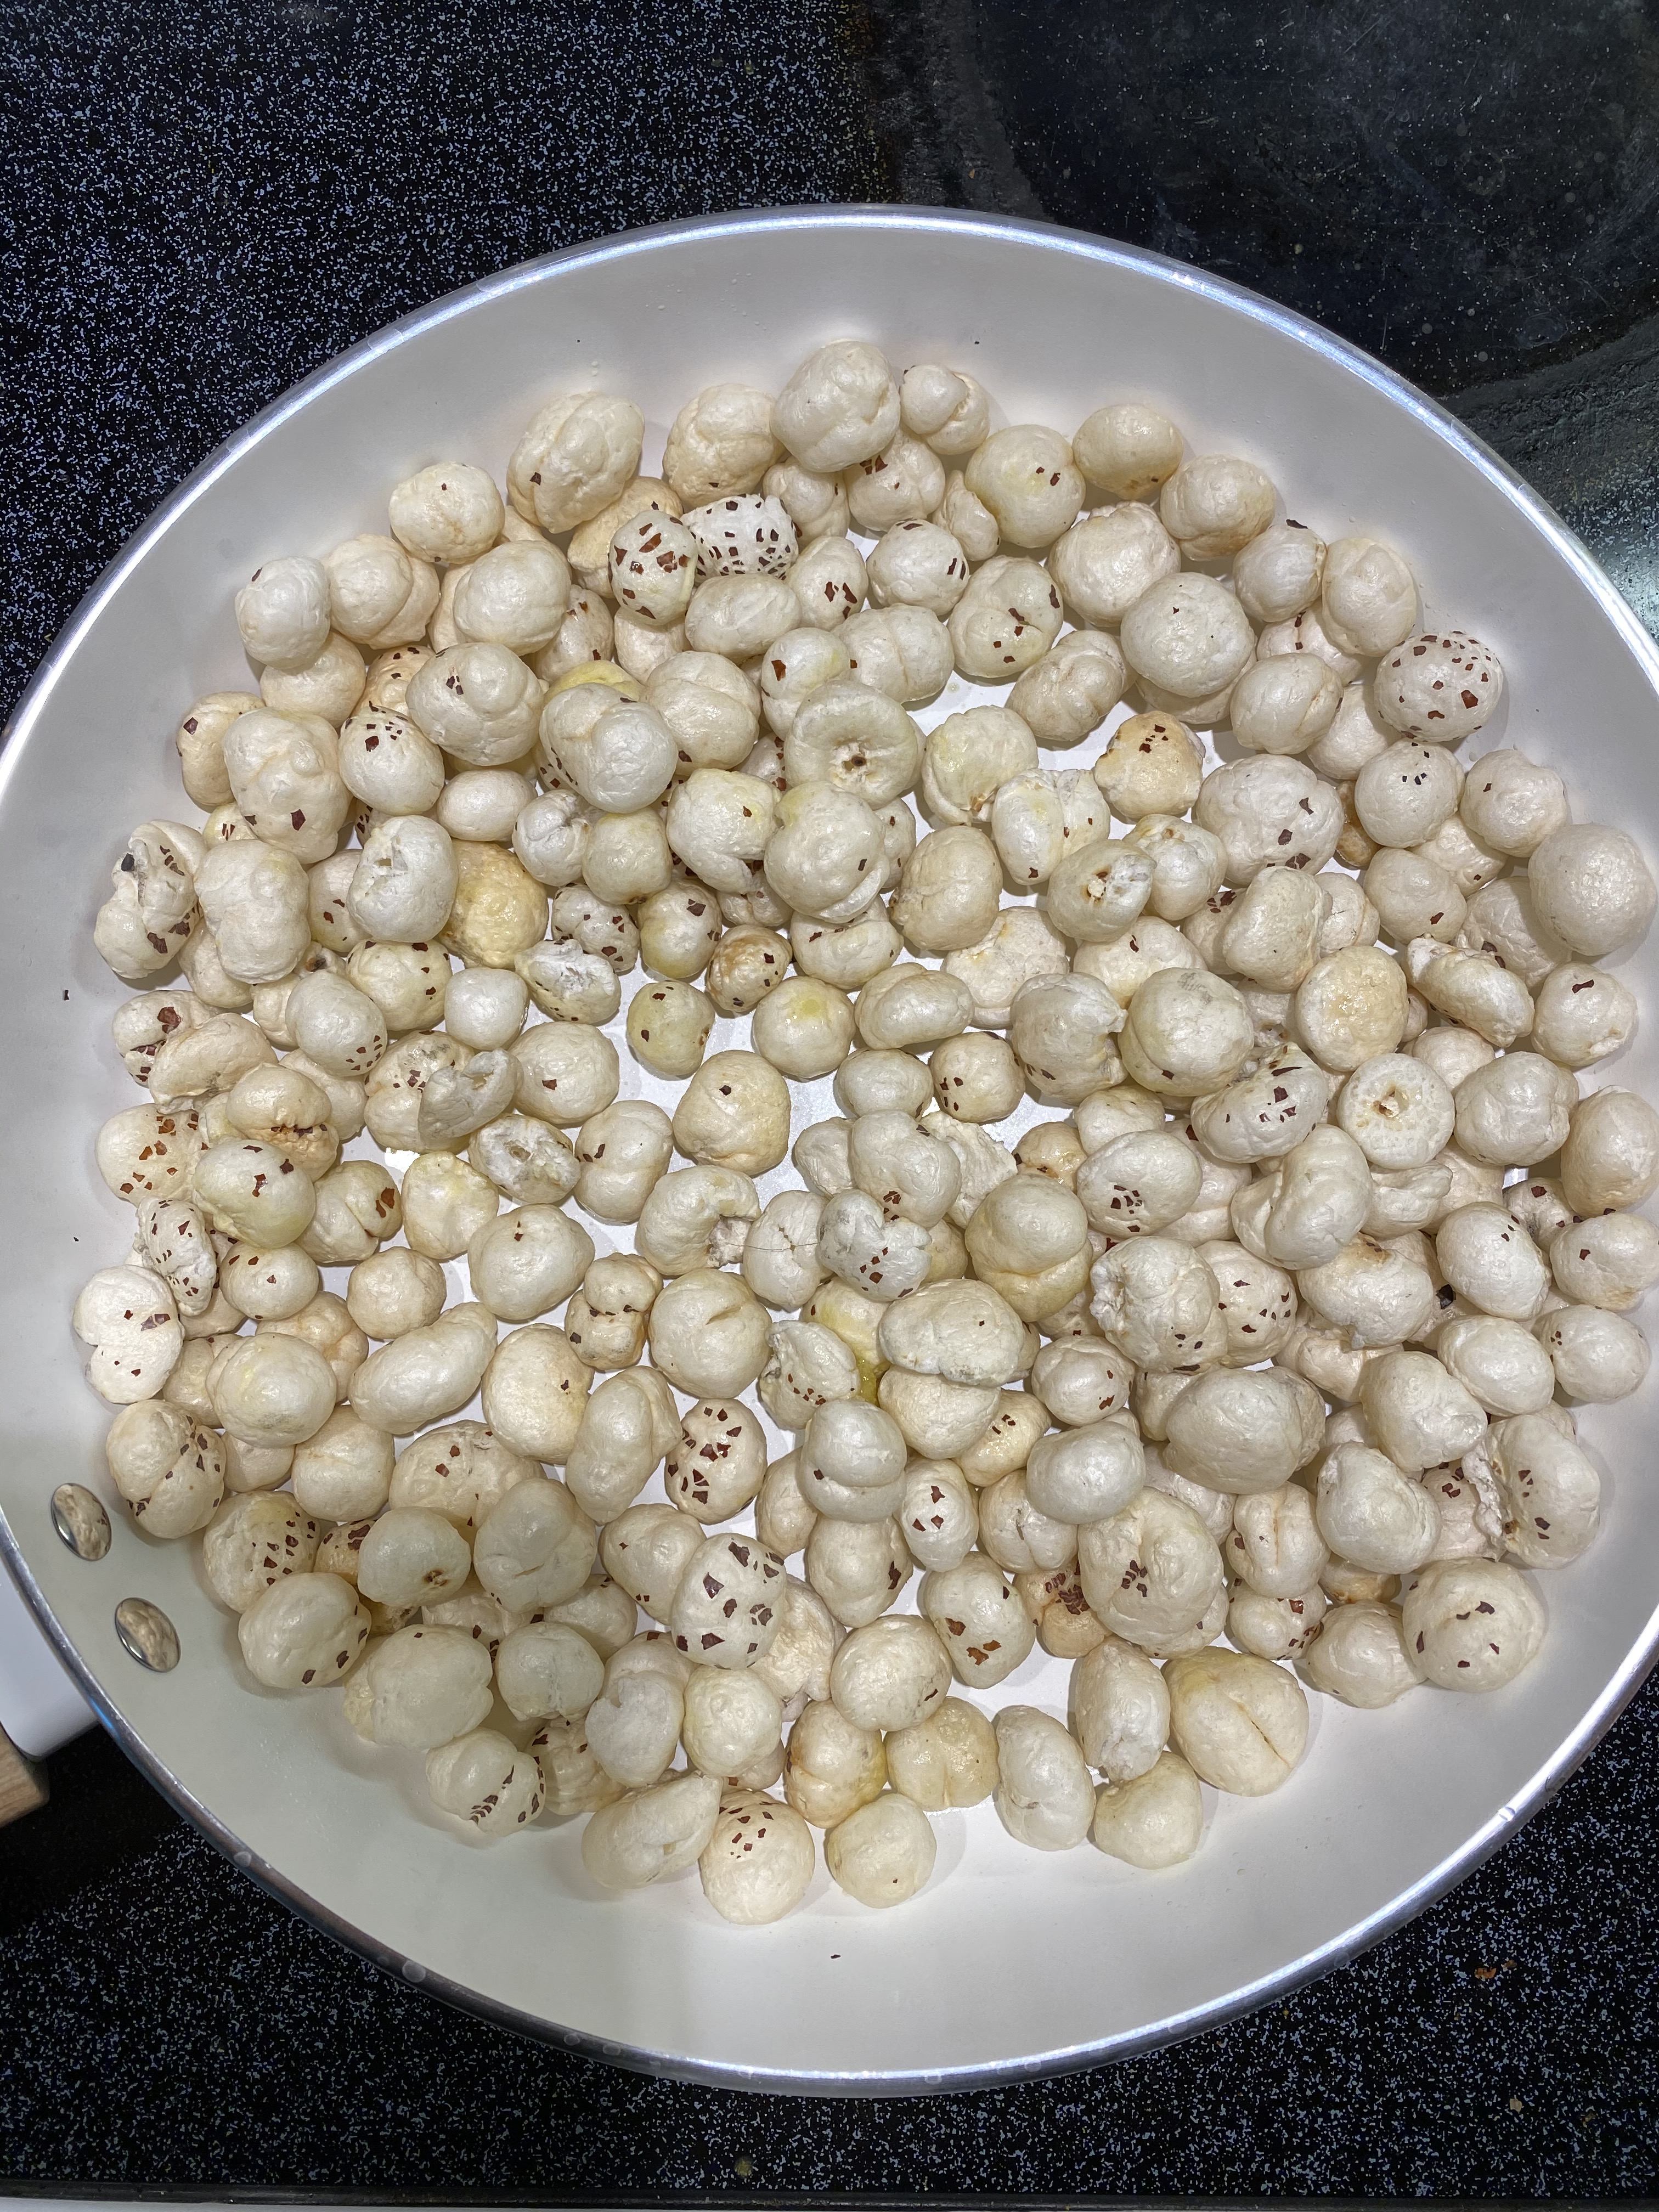
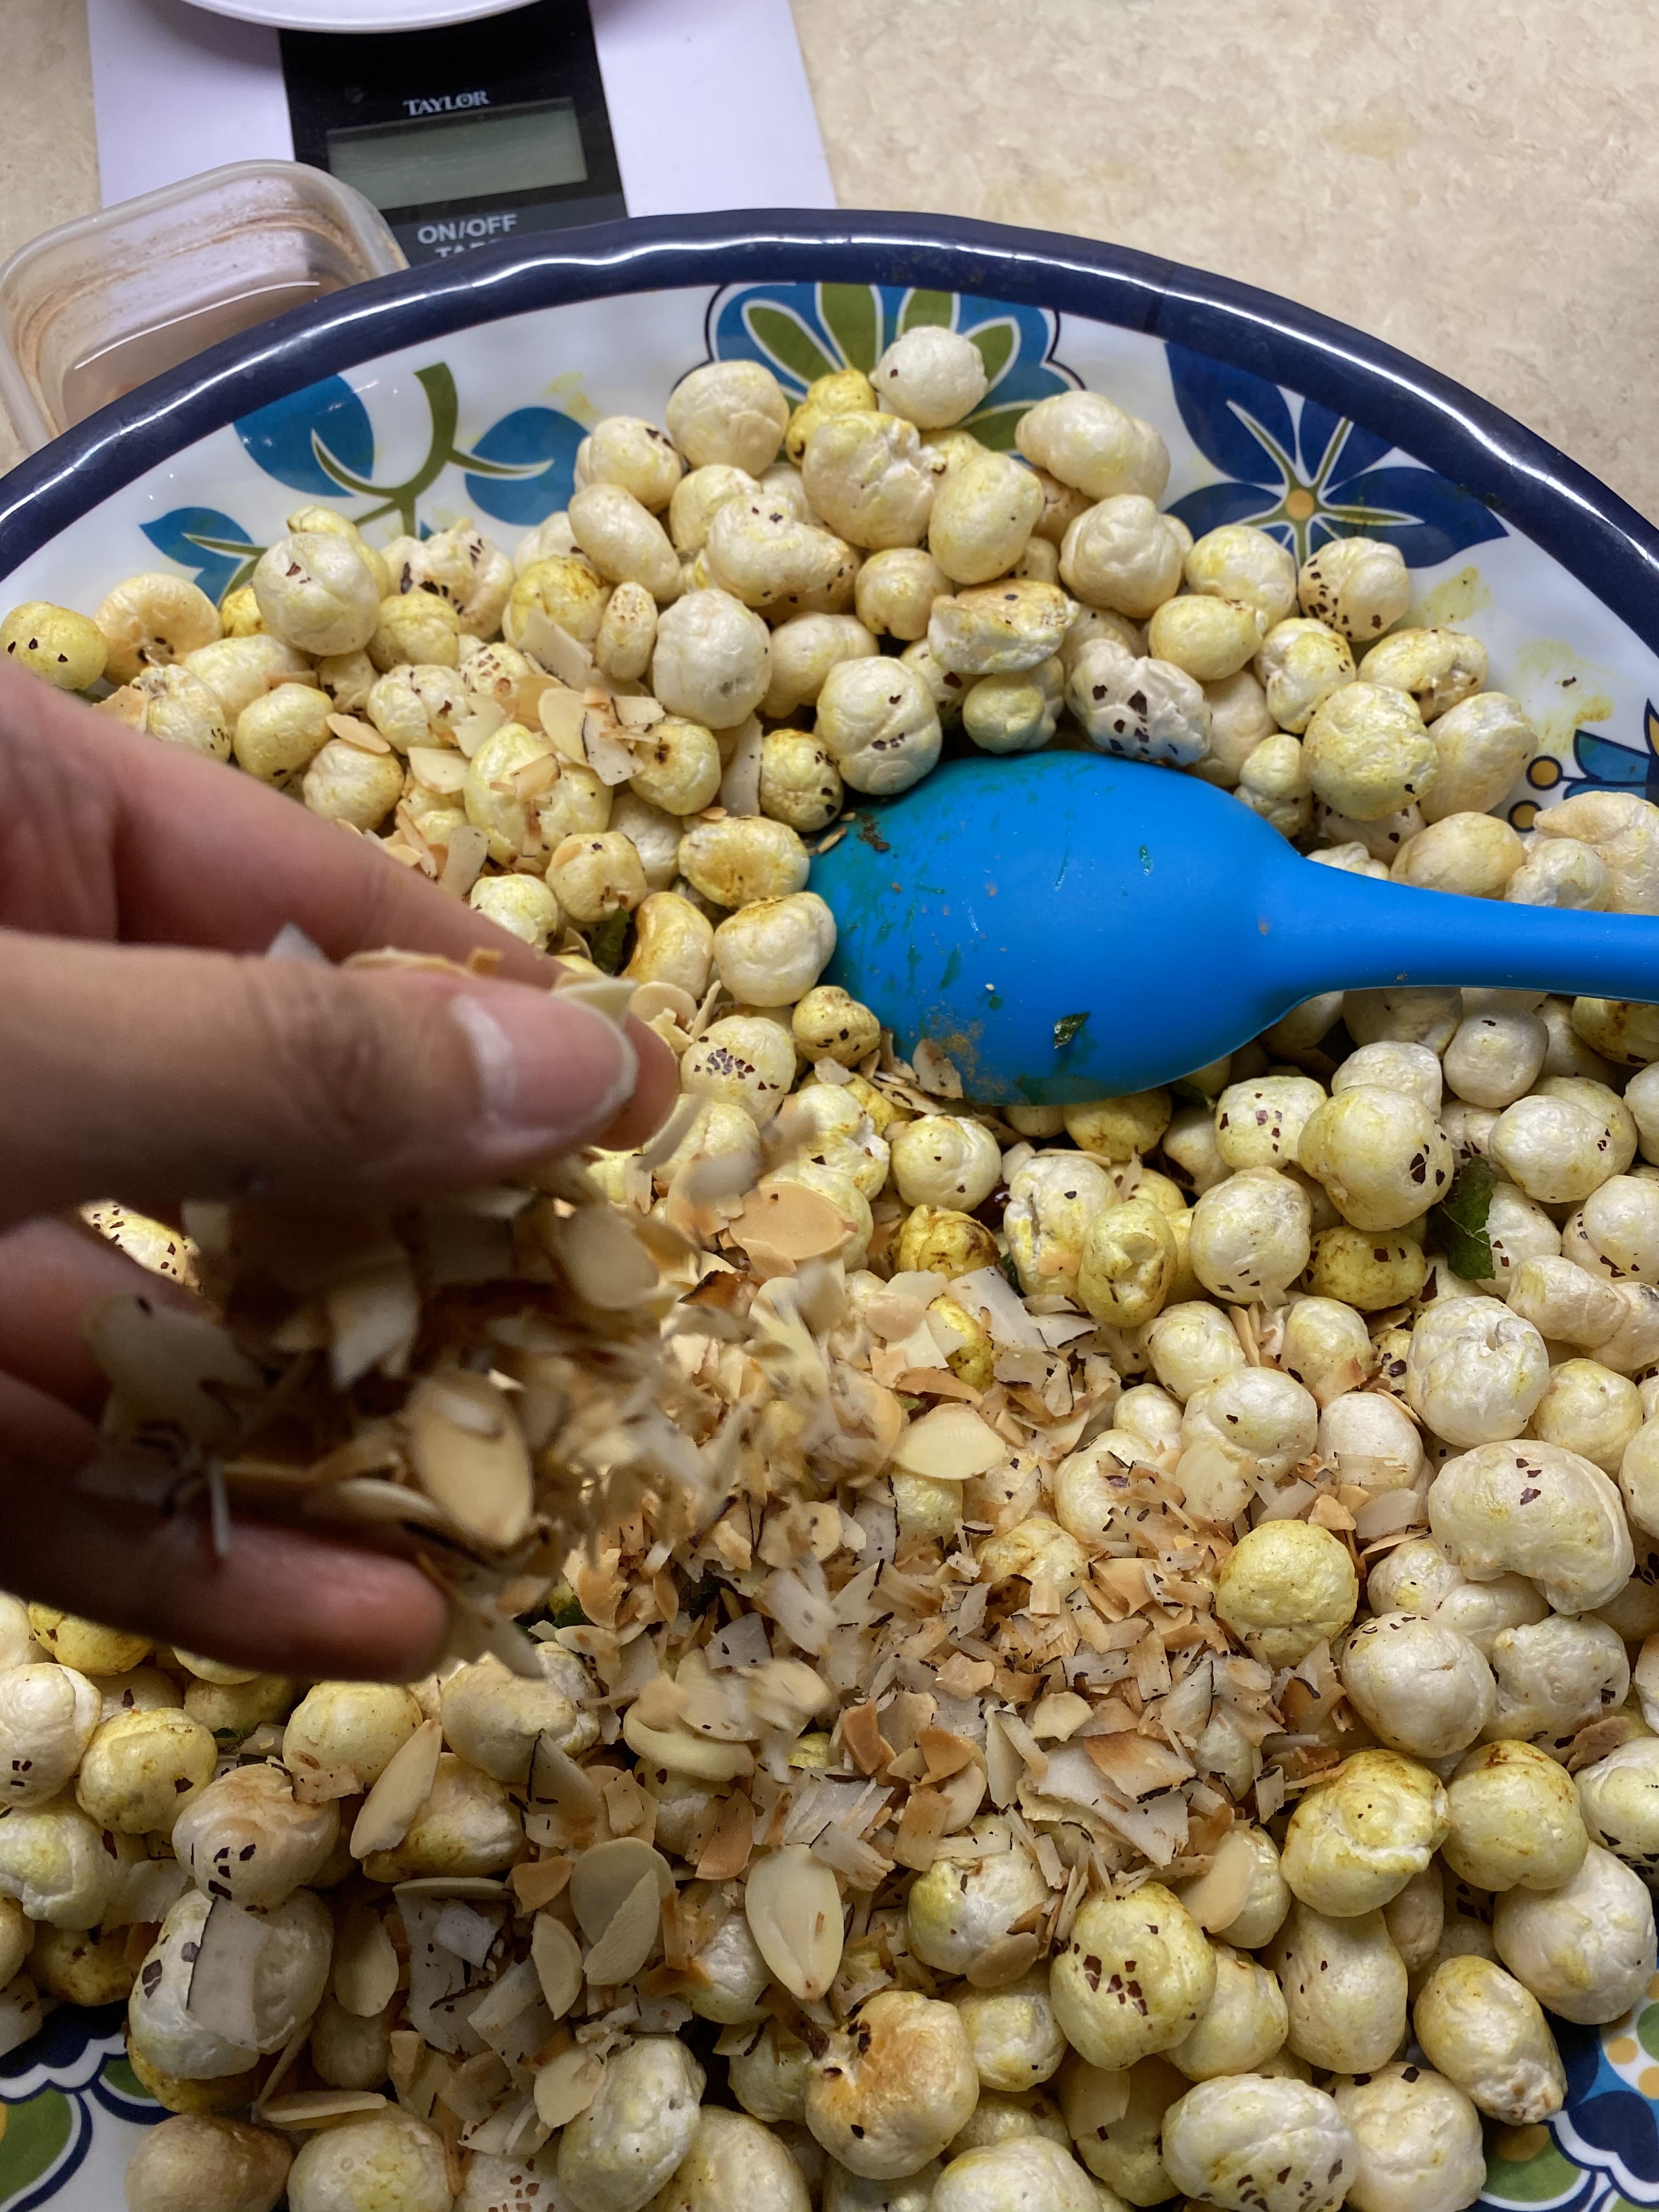
In a non-stick pan, add 2 tbsp of ghee. Add the plain makhana and roast them until they are lightly browned and crispy. Once roasted, place them in a mixing bowl
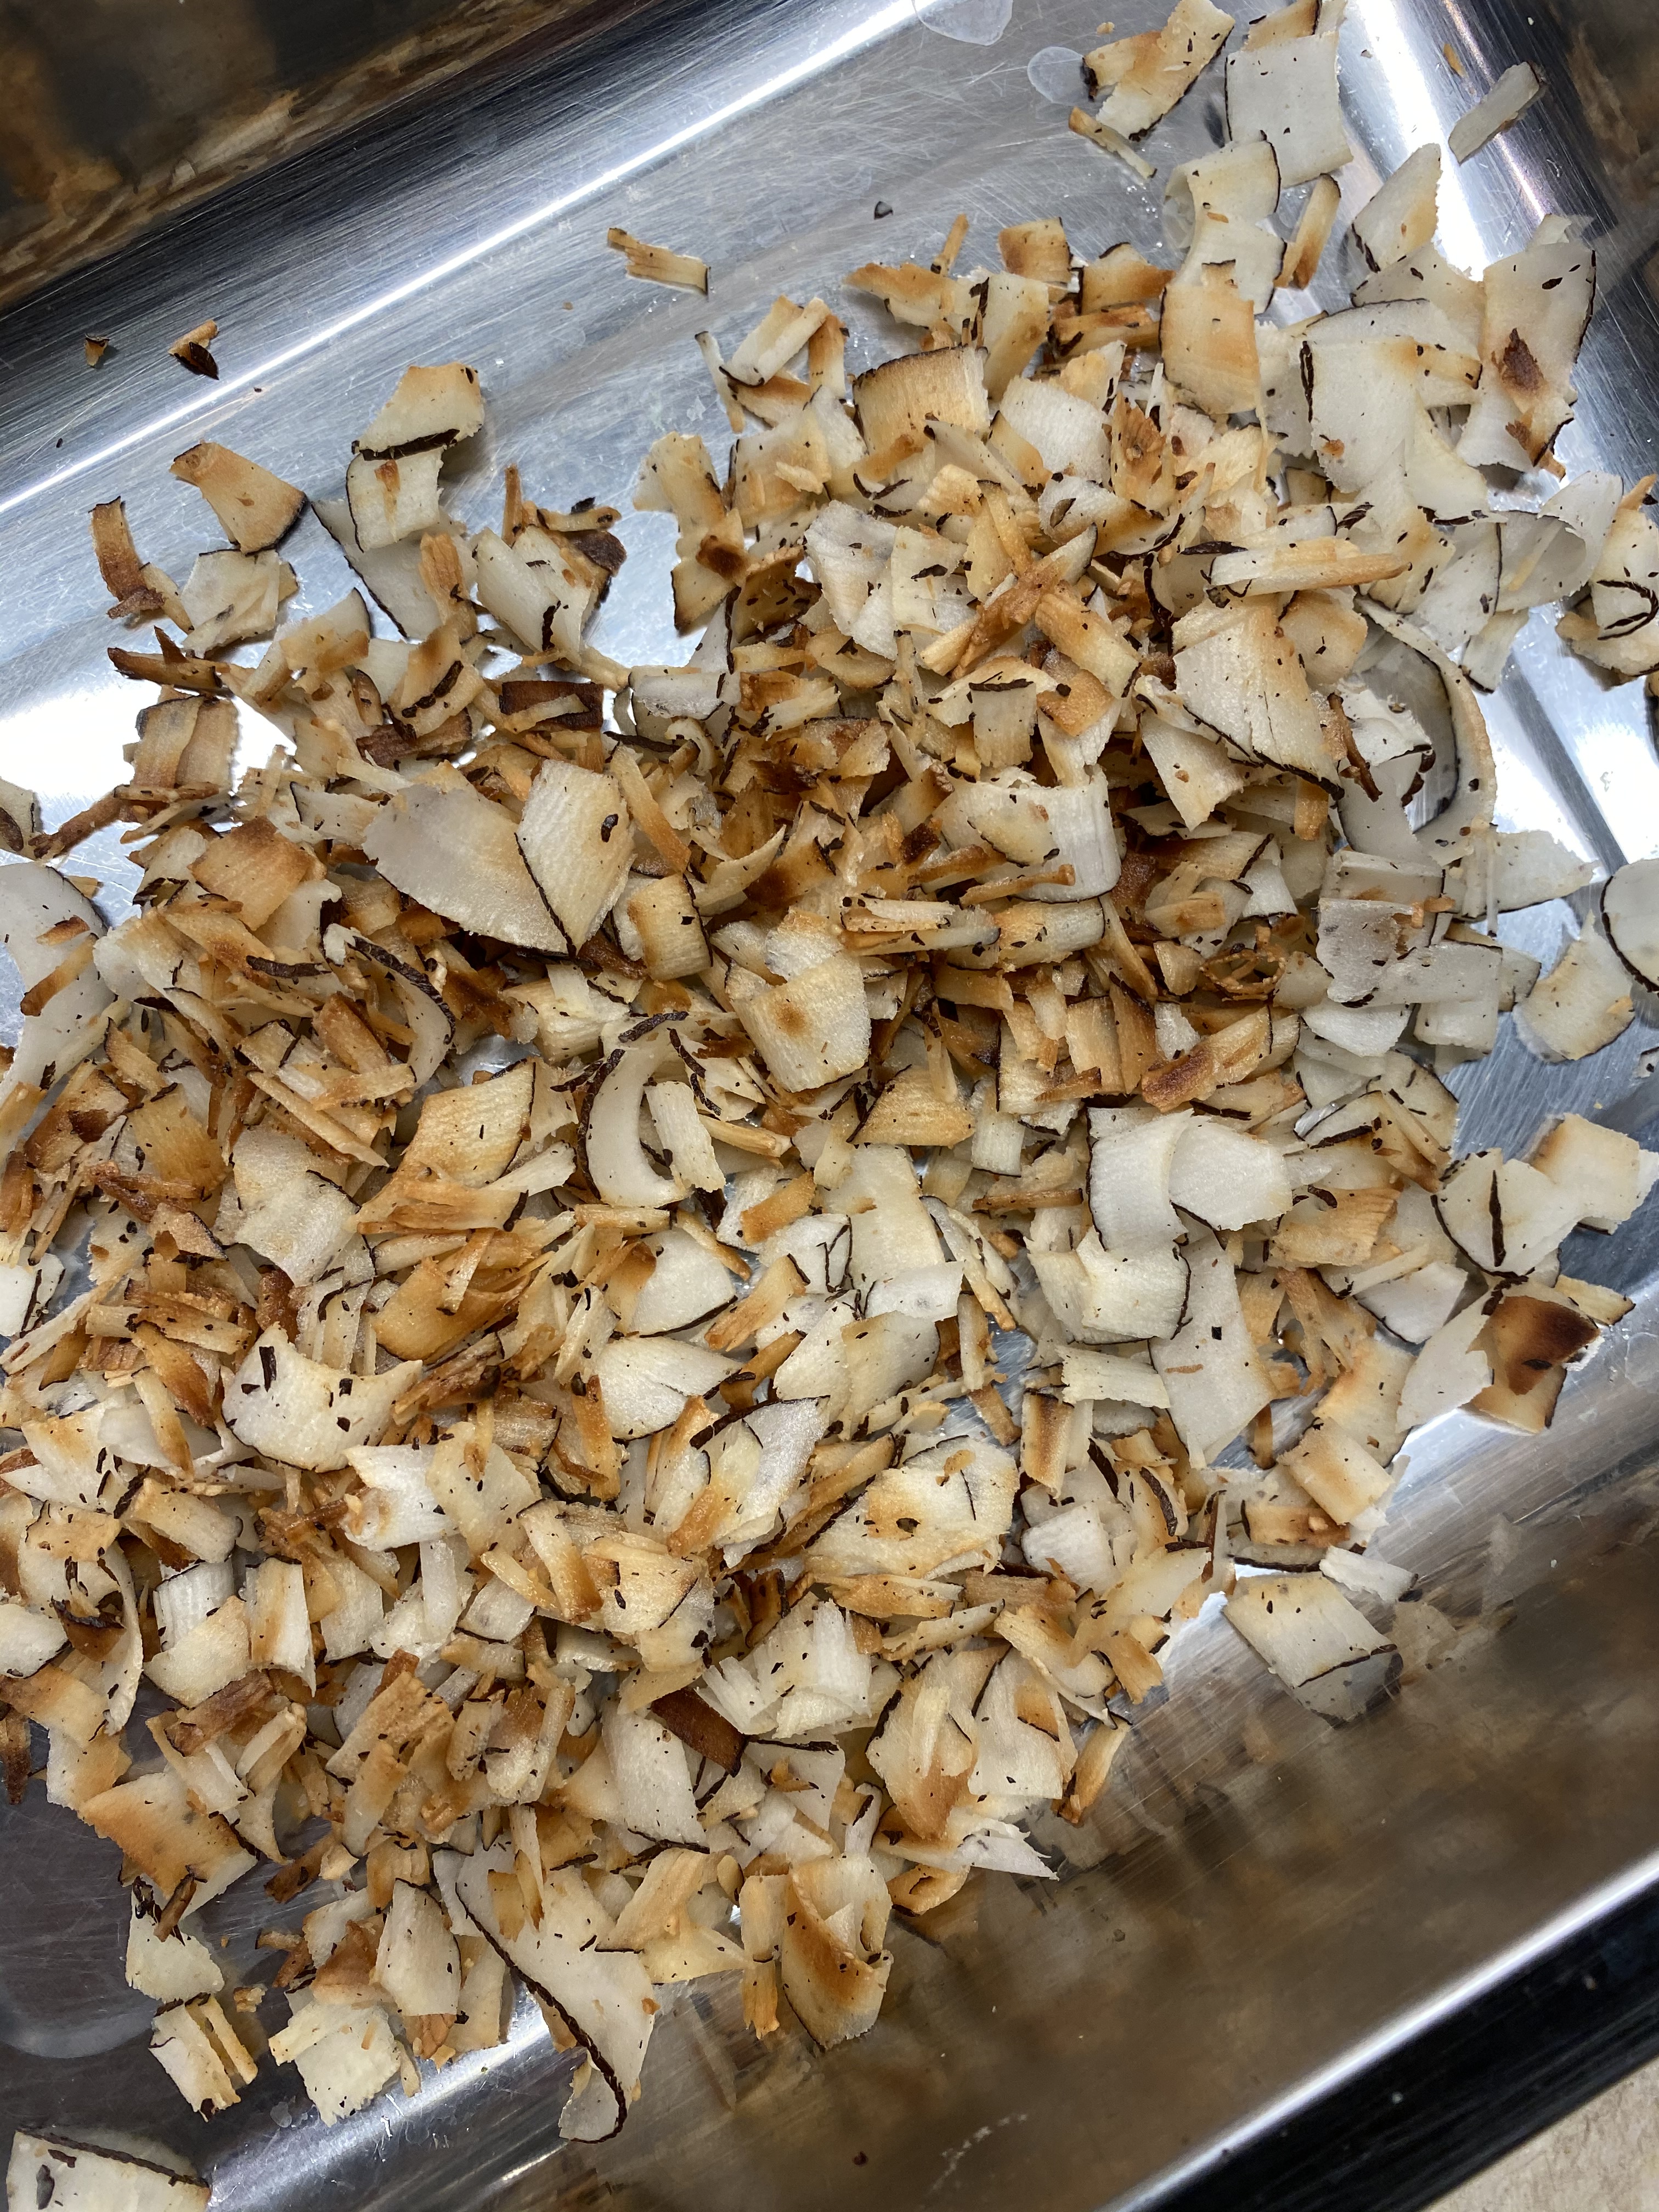
In the same pan, toast the coconut until they are lightly browned. Place the toasted coconut in a separate bowl
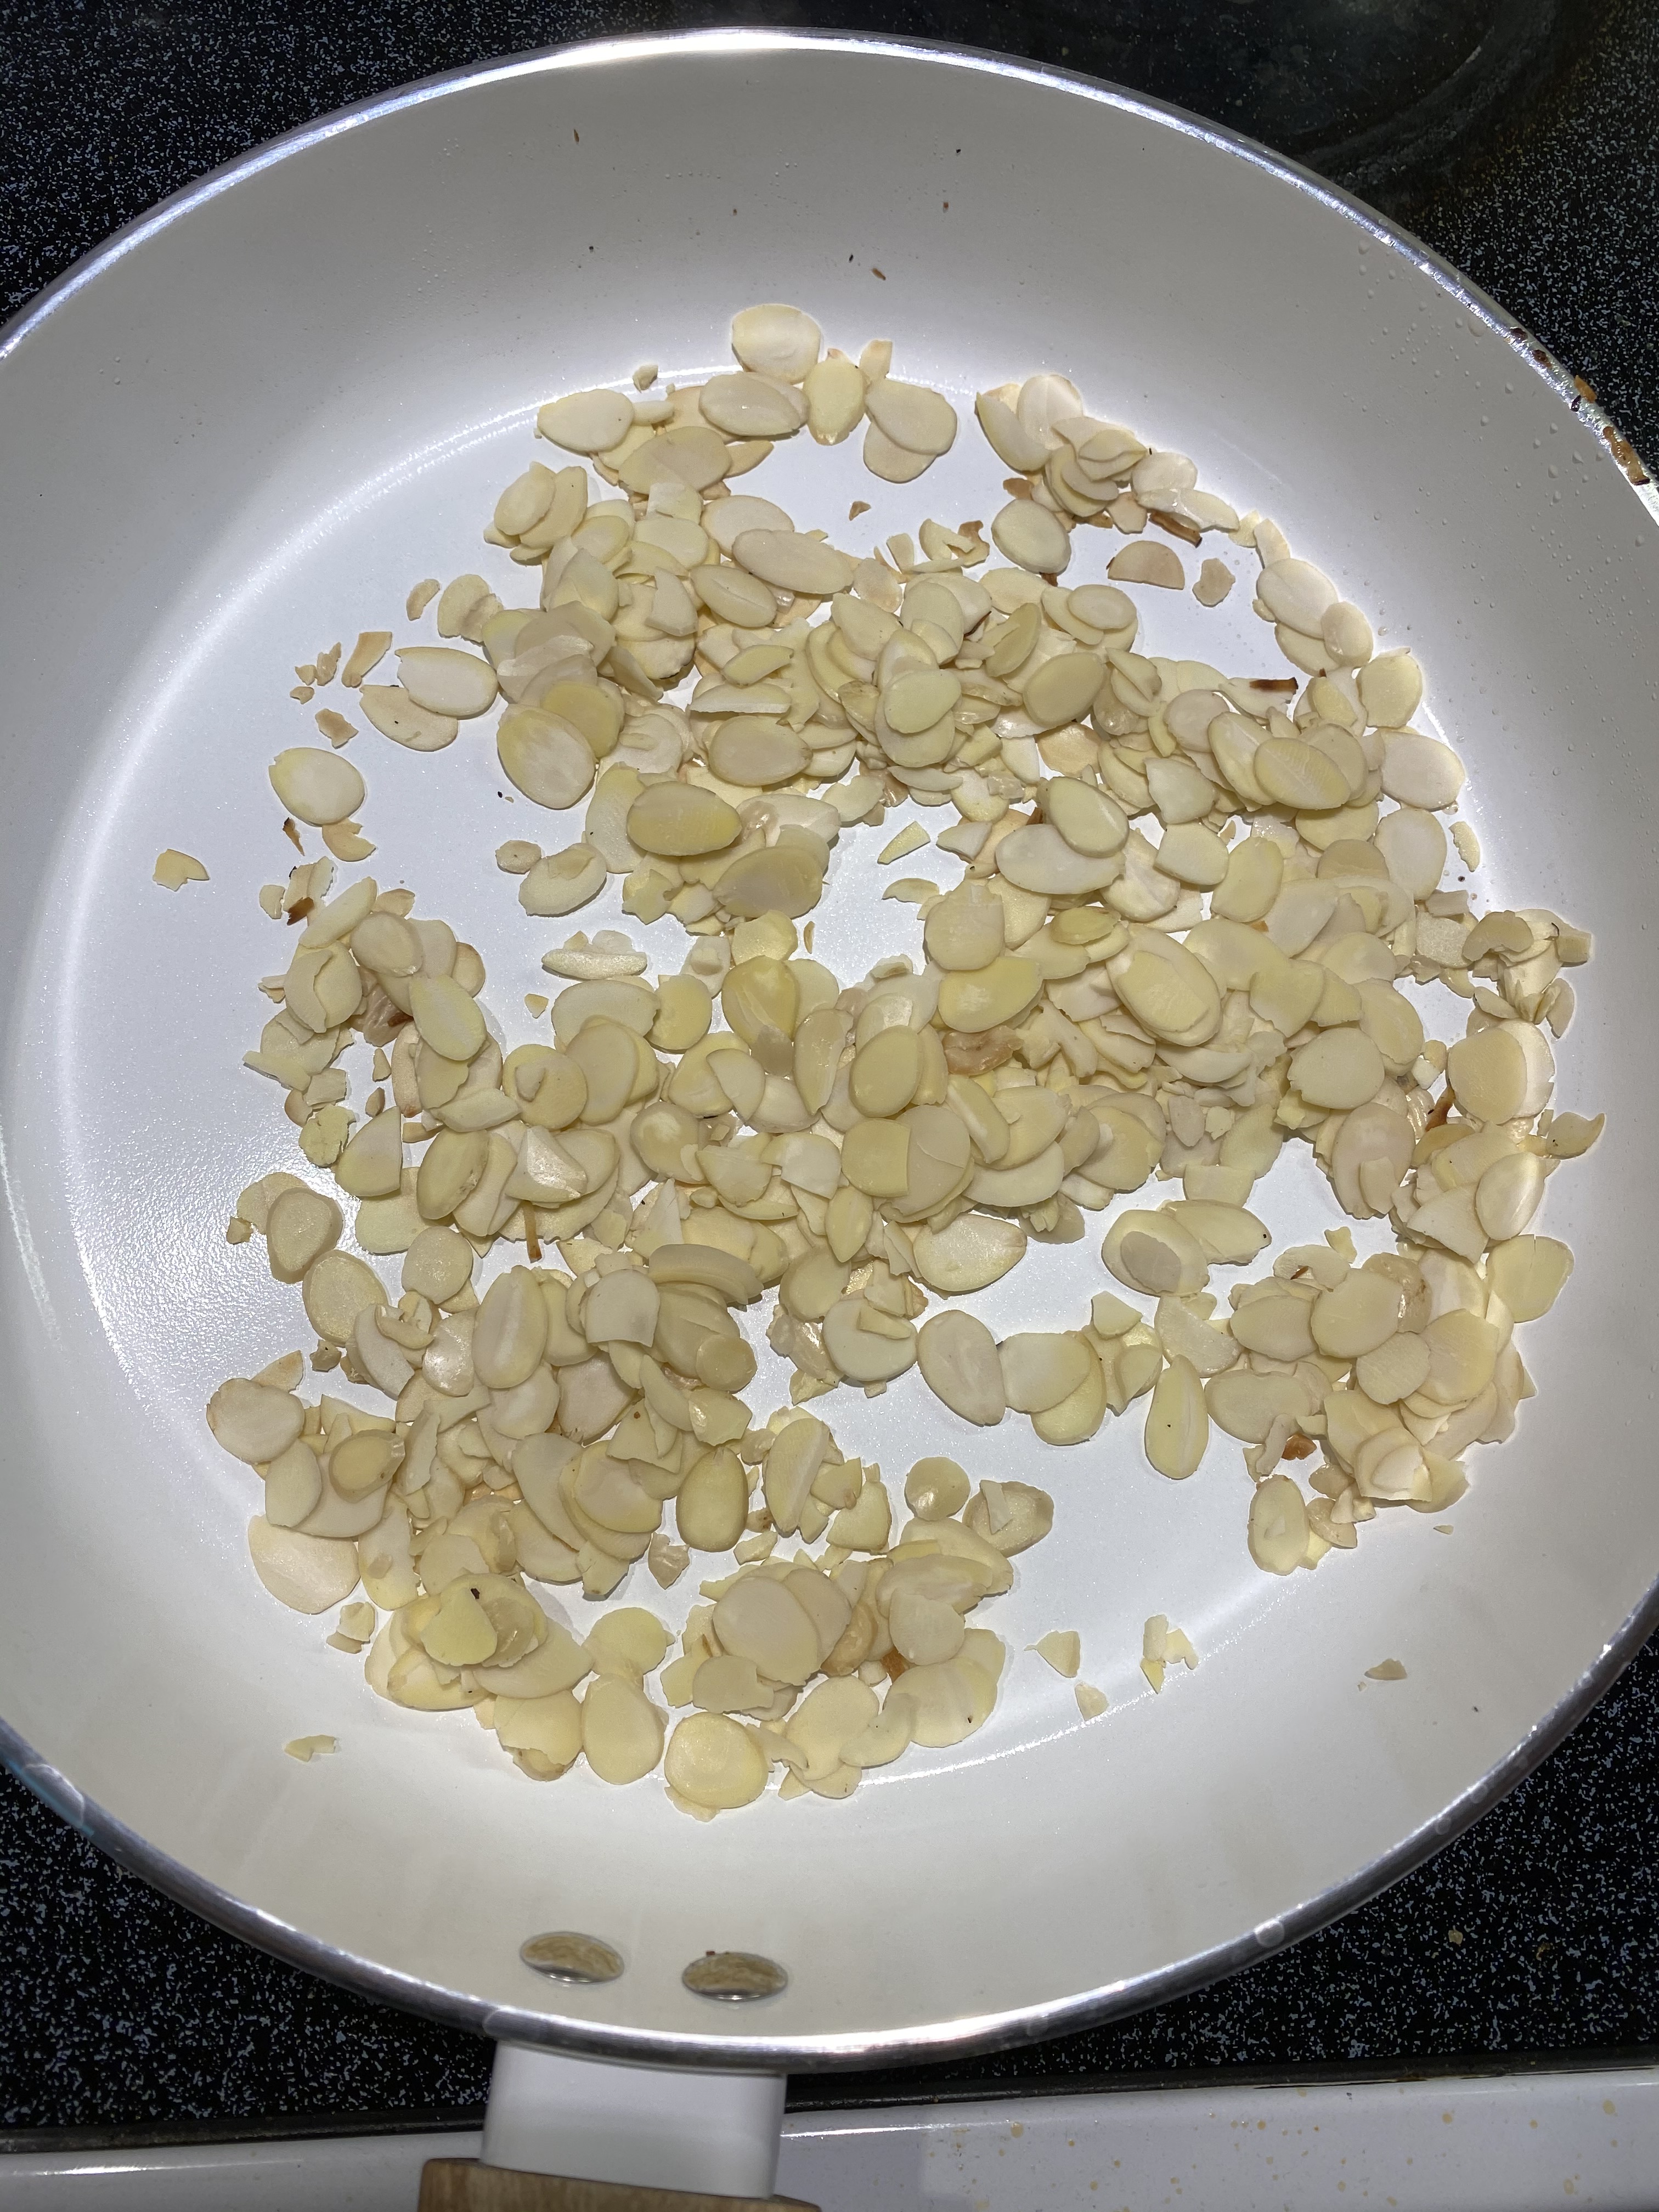
In the same pan, toast the slivered almonds, cashews and pistachios. Once lightly browned and toasted, add them to the bowl of coconut
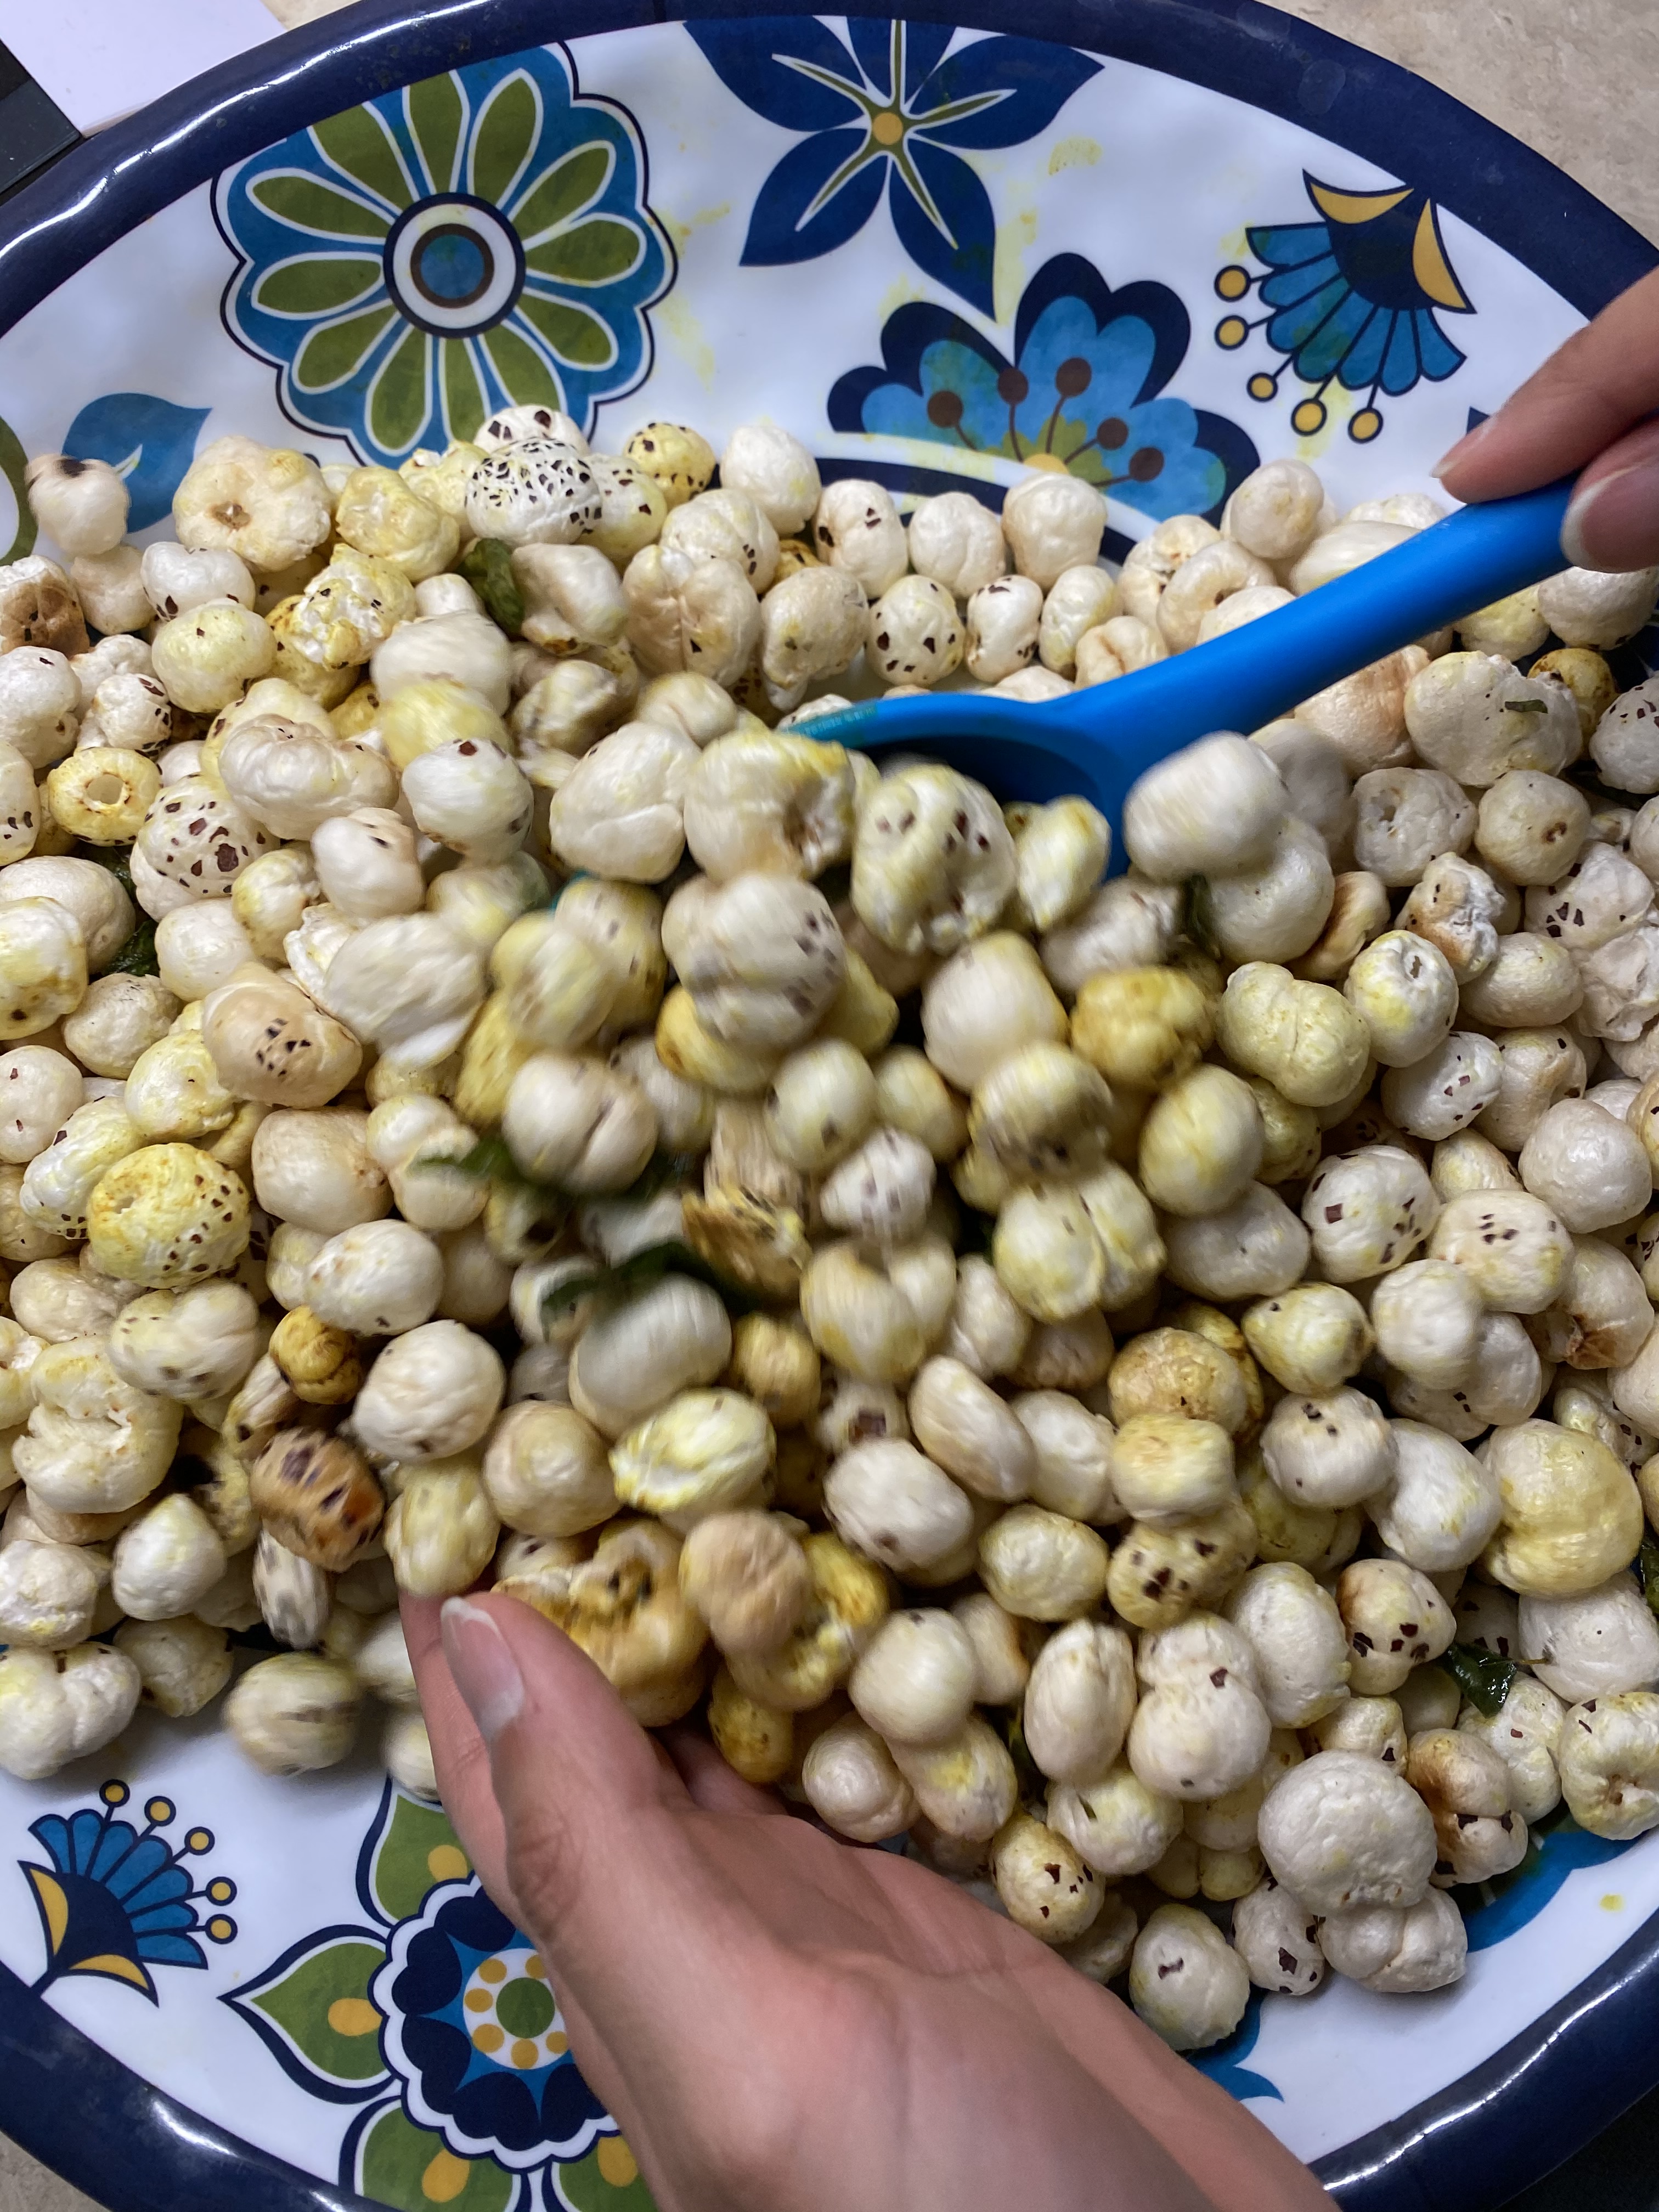
Make tadka. In the same pan, add 1 tbsp of ghee. To this, add mustard seeds, hing, curry leaves and green chillies. Add this tadka to the roasted makhanas and mix well
Add the toasted nuts to the makhanas and mix well
Sprinkle some salt and amchur powder and mix well
Store in an air-tight container for approx. 1 week
You can also follow me on Instagram to be up-to-date with what is cooking my kitchen. If you like this recipe, do rate it and share your comments below. Don’t forget to post your version on Instagram using #foodformyloveblog.
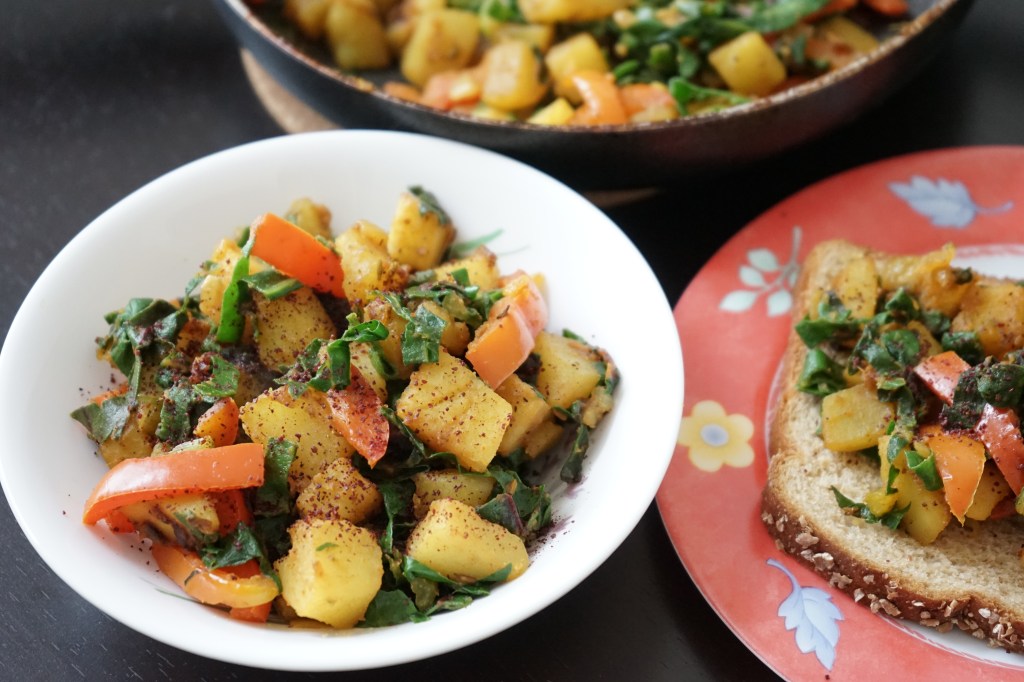
Weekends are for brunches. And brunches should be hearty. And Potatoes make everything hearty. But, yet again, this is another opportunity to get your dose of leafy green vegetables and not have to worry about for the rest of the day or the weekend.
A hash is one of the best ways to incorporate all sorts of vegetables and proteins into a breakfast or a brunch. There is nothing fancy about this recipe other than the fact that I have added a leafy green vegetable, Swiss Chard. It is colorful and pleasing to the eye. And if you are wondering how this is different from an Aloo Palak or an Aloo Methi, it is not that different. This is just a modern take on it. Read on for the recipe and the many different ways it can be eaten.
Prep time
10 minutes
Cook time
12 minutes
Serves
2-3
Ingredients
Vegetables
Potatoes – 2, medium sized, diced (Regular Yukon Gold Potatoes)
Red Bell Pepper – 1, julienned
Swiss Chard – 1 bunch, roughly chopped
Onion – 1 small, diced
Spices and Herbs
Cumin Seeds – 1 tsp
Garlic – 2 cloves, crushed (Or 1 tbsp powder)
Roasted Cumin Powder – 1.5 tsp
Salt – As per taste
Turmeric Powder – 1 tsp
Sumac – 1 tsp
Oils
Cooking Oil – 2 tbsp
Food safety tips
– Make sure to wash the leaves for 30 seconds under cold running water while gently rubbing the leaves to release any trapped dirt
– Separate leafy greens from raw meat or poultry products and use separate cutting boards for each to prevent bacterial cross contamination
– Discard leafy greens within 2 hours of chopping or cooking. Always buy leafy greens that are kept at a chilled temperature to prevent bacterial growth
Ingredient notes
Red skin potatoes or purple potatoes will also work well with this recipe
Any other type of leafy green such as kale or spinach can also be used
Method
In a pan, add oil. Once it heats up, add cumin seeds
When the cumin seeds splutter, add onions and garlic and cook until the onions are translucent
Add the potatoes and turmeric powder. Mix, cover the lid for 3-5 minutes and cook on medium flame until the potatoes are half cooked
Then add the red pepper, salt and roasted cumin powder. Mix again, cover the lid for 3-5 minutes and cook again until the potatoes are cooked through, but not mushy
Add the swiss chard, mix and cover the lid for 1-2 minutes until the leaves have wilted (The idea is to steam the greens to preserve nutrient content, not to cook them completely)
Turn off the flame, sprinkle sumac powder and mix well
Add a spoonful of the hash on a toasted bread and enjoy
Serving Suggestions
Prepare a breakfast hash bowl with the prepared hash and eggs in any style you like
On a whole grain wrap, add scrambled eggs, the prepared hash and sriracha sauce. Wrap it up to make a breakfast burrito for your breakfast on the go
Add a vegan protein element such as black beans, chickpeas or tofu
You can also follow me on Instagram to be up-to-date with what is cooking my kitchen. If you like this recipe, do rate it and share your comments below. Don’t forget to post your version on Instagram using #foodformyloveblog.
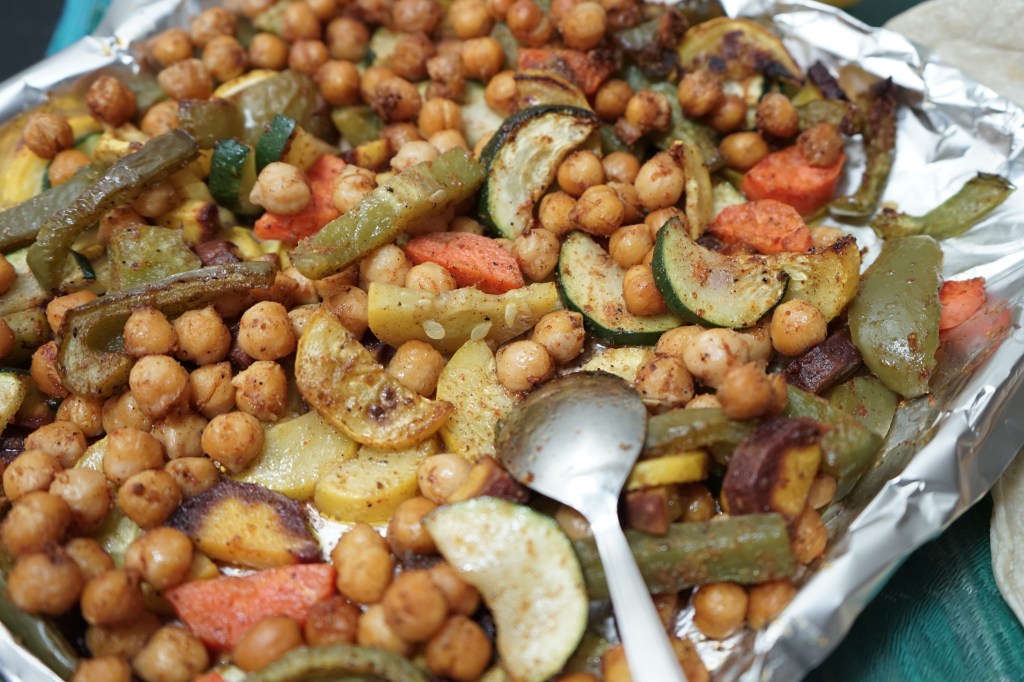
This recipe is fusion in all its glory. Perfectly seasoned, colorful and delicious, oh and did I mention, healthy?
Fajitas are a great “meatless” Monday (for those who eat meat) option. It is one of the best ways to get your dose of vegetables, all at once. Any choice of colorful, seasonal vegetables work great. But, just vegetables are never enough, not for me at least. It is not quite as filling. So, adding a plant-based protein such as Mushrooms, Tofu, or Chickpeas (in this case) adds a healthy twist to these fajitas.
Any flavor goes well with vegetables on a Fajita. But these are Mediterranean flavored, because that seems to be my obsession this week. Alter the spice as you desire , roast up the vegetables for that charred flavor and load them on a Corn tortilla. The best part of all is a cooling, refreshing, 5 minute, on the spot, Tzatziki sauce for a topping.
Although this takes more than 30 minutes to prepare, I could call this a quick weeknight meal, only if the veggies are pre-prepared. This is absolutely do-able to roast a whole batch of the veggies over the weekend when you have a little more time (which is what I get my husband to do when we are in long-distance so he can eat a ton of veggies, hassle-free 🙂 ). When you are ready to eat, just warm up your tortillas, load it up with veggies and top it off with the cooling Tzatziki sauce and you are good to go. It is strange that I am posting this recipe in the winter, but I am thinking of the upcoming spring and summer picnics that will see these Fajitas 🙂
Prep time
20 minutes
Cook time
45-50 minutes
Serves
2-3
Ingredients
Vegetables
Zucchini – 2, sliced into semi-circles (This recipe uses 1 green and 1 yellow squash)
Orange Carrot – 1 medium, sliced into semi-circles
Purple Carrot – 1 medium, sliced into semi-circles
Bell Peppers – 1 large, sliced
Cucumber – 1/2, finely chopped
Legumes
Chickpeas – 1 can or 1 1/2 cups, cooked
Spices and Herbs
Garlic Powder – 1 tbsp
Cinnamon Powder – 1 tsp
Cumin Powder – 1 tsp
Coriander Powder – 1 tsp
Red Chilli Powder – 1 1/2 tsps
Salt – As per taste
Lemon Juice – 1 tbsp
Lemon Zest – 1 tsp
Dill – 2 tbsp
Dairy
Plain Greek Yoghurt – 1/2 cup
Oils
Olive Oil – 3-4 tbsps
Breads
Corn Tortillas – As many as you would like to eat 🙂
Ingredient notes
Any combination of vegetables can be used
Any other legume such as kidney beans or black beans work well
Any plant-based protein source such as Tofu or Mushroom will also work well
I have used a Persian Cucumber in this recipe
Method
Pre-heat oven to 400F (Apprx. 200C)
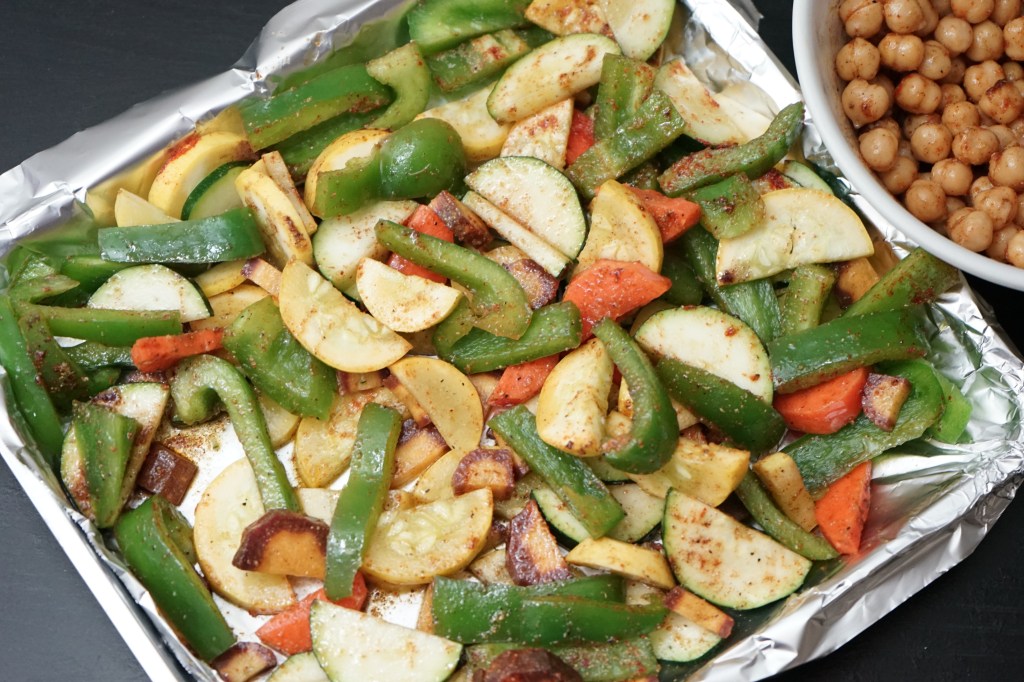
In a large mixing bowl, add all the vegetables, chickpeas, and olive oil. Then add, 1/2 tbsp garlic powder, chilli, cumin, coriander and cinnamon powders and mix well until every piece is coated well. Add salt and mix again
Line a baking tray with aluminium foil or parchment paper. Add the coated mixture to the tray, spreading it out into a single layer for even roasting. Place the tray in the oven and roast for 40-45 minutes (time depends on the oven model and capacity)
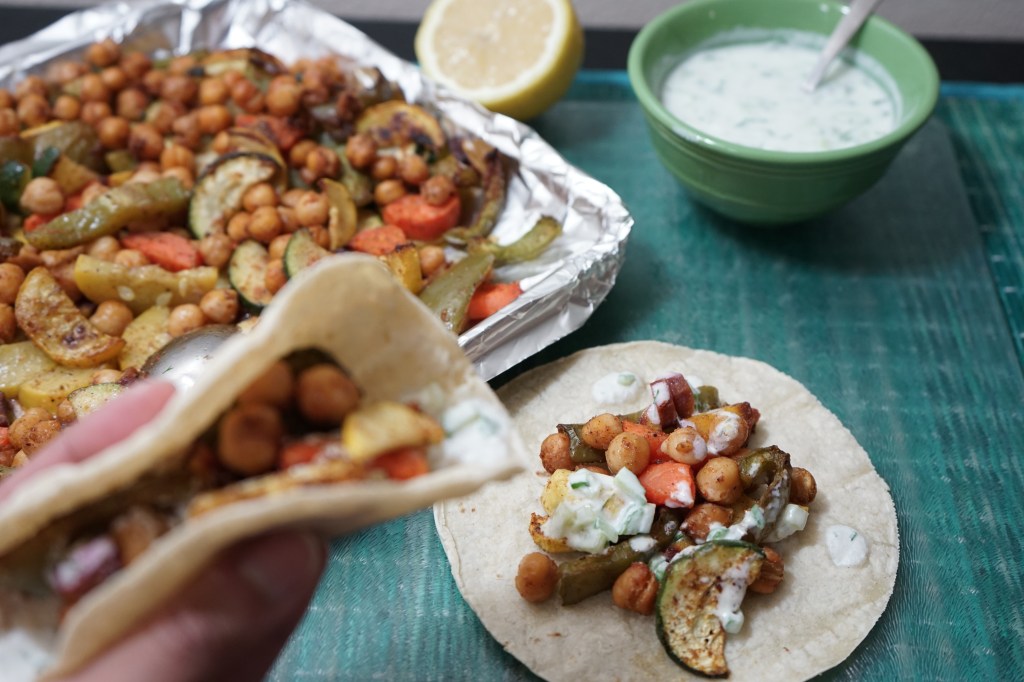
In the meanwhile, prepare the Tzatziki sauce. In a bowl, add the yoghurt, /12 tbsp garlic powder, salt, lemon juice and lemon zest. Whisk it together. Add the chopped cucumbers and dill and mix again. Chill the sauce in the refrigerator until ready to use
As the roasting is about to end, warm up corn tortillas and place on a plate
Once the vegetables are roasted and out of oven, load them up on the tortillas. Top with some Tzatziki sauce and enjoy the fajitas
Cooking Suggestion
If you don’t have an oven at home, the coated vegetables can be sauteed on a pan, just for a little longer than an oven so that they char well
The chickpeas can also be roasted on a pan by stirring until they becomes slightly crisp on the outside
You can also follow me on Instagram to be up-to-date with what is cooking my kitchen. If you like this recipe, do rate it and share your comments below. Don’t forget to post your version on Instagram using #foodformyloveblog.
I think I have mentioned this before, but I am salad junkie. Spring, summer or winter, I will eat salads all year around. And if that salad has one of my favorite vegetables, the salad is taken to the next level.
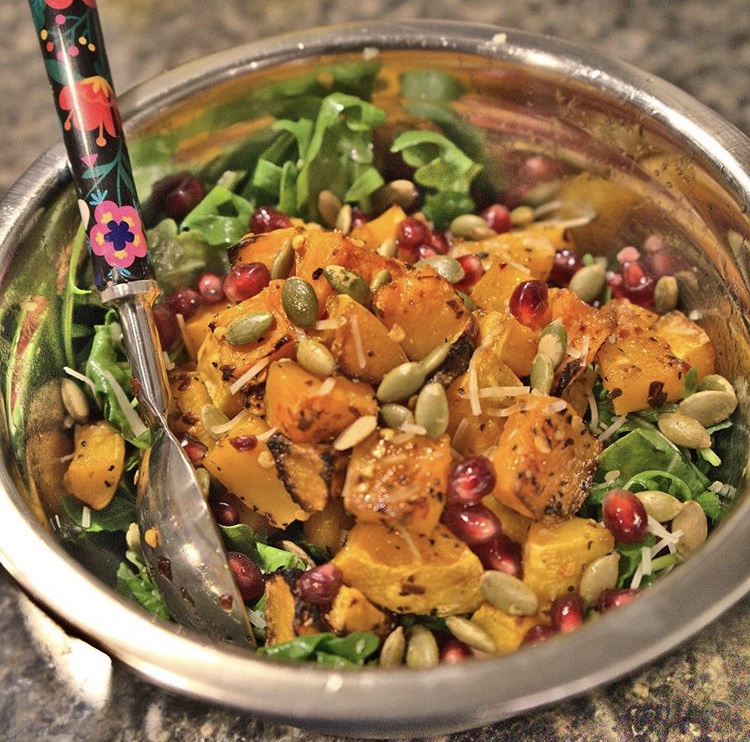
Butternut Squash is a popular winter squash and it makes for a great vegetable for a warm winter salad. Roasting the butternut squash gives it such as beautiful caramelized flavor, and when the squash is marinated with garlic, salt pepper and red chilli flakes, the flavors amalgamate to perfection. This salad has an extra special zing with a homemade orange-ginger dressing.
Salads are much more fun to eat when they have a variety of colors and textures, after all, we eat with all our senses. So think of not just the vegetable, but the greens, a crunchy element, a variety of colors etc. With all of those elements, this warm salad is sure to please you. Even for a non-salad lover (i.e. my husband) is sure to enjoy this beautiful salad (which he did 🙂 ).
Prep time
20 minutes
Cook time
30 minutes
Serves
2-3
Ingredients
Vegetables
Butternut Squash – 1 medium, peeled and cubed
Baby Arugula – 3 cups
Fruits
Pomegranate Seeds – 1/2 cup
Orange – 1 medium (juiced to 1/2 cup)
Nuts & Seeds
Roasted Pumpkin Seeds – 1/4 cup
Spices & Herbs
Ginger – 1 tbsp, crushed
Salt – As per taste
Pepper – 1/2 tbsp
Red Chilli Flakes – 1 tbsp
Garlic – 1 tbsp, crushed
Oils
Olive Oil – 2 tbsp
Ingredient notes
Arugula adds a peppery zing to the salad, but feel free to choose any other green leafy vegetable of your choice
Method
Preheat oven to 400F (Approx. 200C) and line a baking tray with aluminium foil or parchment paper
Place the cubed butternut squash on the tray. Drizzle olive oil. Add salt, pepper, crushed garlic and red chilli flakes. Mix well
After the oven is ready to go, place the tray in the oven and roast the butternut squash for 25-30 minutes
To prepare the dressing, in a mason jar, add olive oil orange juice, crushed ginger, salt and pepper. Close the lid of the jar and mix well until the dressing comes together
Once the butternut squash has roasted, take it out of the oven and add to a mixing bowl
To the same bowl, add the baby arugula and the dressing and toss the salad using wooden spatulas
Transfer to a serving bowl and garnish with bright red pomegranate seeds and roasted pumpkin seeds. Enjoy the warm salad
You can also follow me on Instagram to be up-to-date with what is cooking my kitchen. If you like this recipe, do rate it and share your comments below. Don’t forget to post your version on Instagram using #foodformyloveblog.
Makhana, also known as Phool Makhana or Fox Nuts are dried and puffed lotus seeds. These seeds originate in East Asia. The the process of cultivating, harvesting and processing these seeds is laborious, intricate work that only skilled farmers are known to manage.
Having originated in East Asia, Makhanas have gained popularity in the Western world as they are powerhouses of nutrition. Makhanas are loaded with soluble fiber, minerals such as magnesium and zinc, are low in fat and rich in protein.
In the Indian culture, several religious occassions call for a fast, and Makhanas are often the go to due to their nutrition and the satiety factor. I say, why only during a fast? Makhanas can be a great snack. They can be a snack, just like popcorn, because they can be used in snack mixes and can take on a variety of flavor profiles
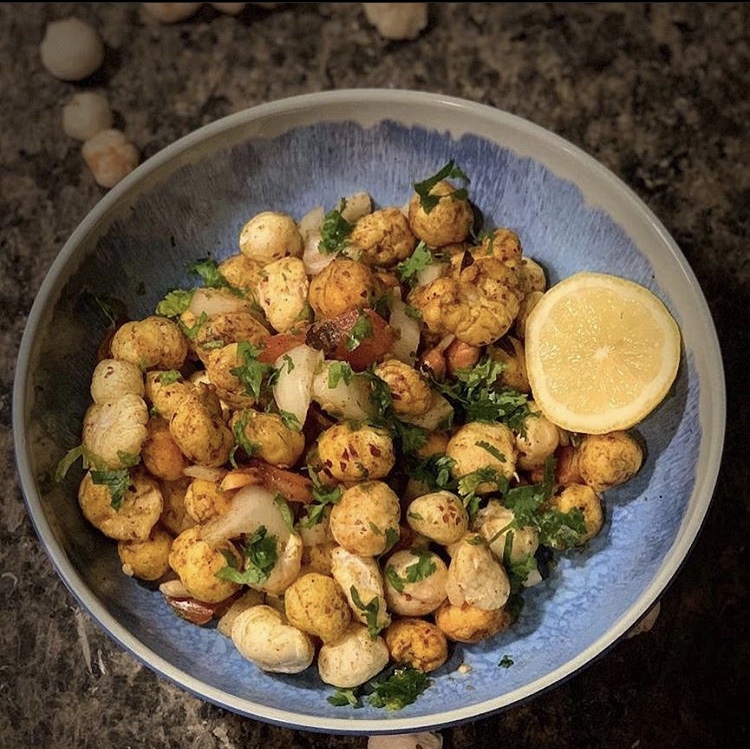
Makhanas are readily available in Indian grocery stores. Alternatively, they are also available on Amazon. This Makhana chaat uses spiced homemade spiced Makhanas with traditional elements of a chaat such as onions, tomatoes, cilantro and chaat masala. A quick chaat recipe for for an afternoon snack or along with an evening desi chai.
Prep time
10 minutes
Cook time
10 minutes
Serves
2
Ingredients
Base
Makhana – 2 cups
Vegetables
Carrots – 1/2 cup, shredded
Tomatoes – 1/2 cup, chopped
Onions – 1/4 cup, finely chopped
Spices and Herbs
Green Chillies – 1 tsp, finely chopped (Optional)
Curry Leaves – 4-5
Haldi Powder (Turmeric) – 1/4 tsp
Red Chilli Powder – 1/4 tsp
Chaat Masala – 1 tsp
Lemon Juice – 1 tsp
Cilantro – 2 tbsp, finely chopped
Salt – As per taste
Hing (Asafoetida) – 1/4 tsp
Oils
Cooking Oil – 1 tbsp
Method
In a pan, add oil. Once it has heated up, add curry leaves
When the curry leaves splutter, add the hing, haldi and red chilli powder. Fry these in the oil for 30 seconds until the spices bloom and the rawness of the spices has been cooked
Add the makhana and mix well with the spices. Continue to roast for 3-4 minutes
Transfer the spiced roasted makhana to a mixing bowl
Add the chopped vegetables, chaat masala (and green chillies) and mix well. Adjust the chaat masala as needed
Transfer a portion to a bowl, garnish with cilantro (and optional peanuts for a crunch) and enjoy with a side of masala chai or as an afternoon snack at work
You can also follow me on Instagram to be up-to-date with what is cooking my kitchen. If you like this recipe, do rate it and share your comments below. Don’t forget to post your version on Instagram using #foodformyloveblog.
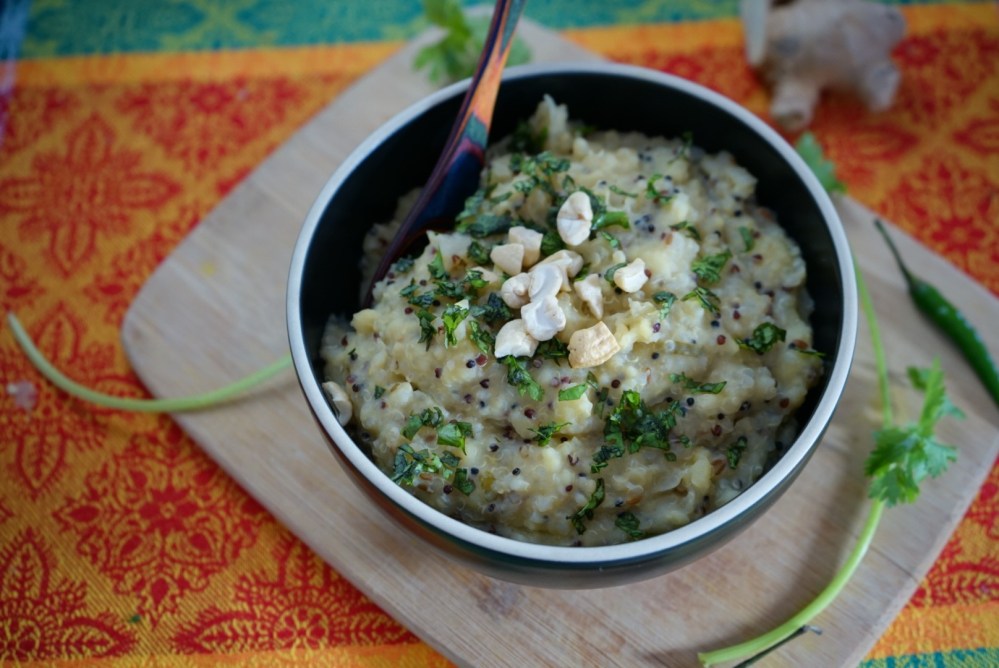
Khichdi, a dish from the Indian subcontinent, is made with rice and lentils. In the south of India, it is called Pongal. It is wholesome, mildly spiced and is easy to digest. Khichdi has a creamy porridge like consistency. It is a comfort food to some, a staple for others and a dish prepared on religious occasions in some cases.
For me, it is most definitely comfort food. Growing up, Sunday nights used to be and continue to be Khichdi nights. Just the incredible aroma of the ghee roasted ginger and onions is enough to get me salivating. These days, when I am out of vegetables in my pantry or cannot think of what to cook, dear old khichdi comes to my rescue, and it never disappoints. In fact, when my husband comes home after a long day or work and workout, he throws everything in a pot while he freshens up. From start to finish, this is a meal under 30 minutes.
Khichdi has evolved and many variations are seen today. The variations are based on flavor differences across the many Indian states, spices and most recently, a variation in lentils and grains used for the preparation.
As someone who is not much of a rice eater, I have replaced the rice with quinoa, a more nutritious grain, and it beautifully complements the moong dal (petite yellow lentils), which are traditionally used in khichidis. It is a one-pot meal perfect for a quick weeknight dinner or a weekend lunch.
Prep time
10 minutes
Cook time
15 minutes
Serves
2
Ingredients
Grains and Lentils
Quinoa – 1 cup
Moong Dal (Petite Yellow Lentils) – 1.5 cups
Vegetables
Onions – 1 medium, finely chopped
Mixed vegetables of choice (Optional) – 1 cup, chopped
Spices & Herbs
Ginger – 2 tbsp, crushed
Jeera (Cumin Seeds) – 2 tsps
Green Chillies – 5-6, finely chopped (Feel free to add more or less depending on your spice tolerance)
Cilantro – A few sprigs, finely chopped (For garnish)
Oils
Ghee (Plain) – 2 tbsp (Recommended for great flavor)
Method
Set the Instant Pot to Saute mode.
Add ghee and jeera.
Once the jeera splutters, add the chopped ginger and onions. Saute until the onions are translucent
Add the green chilies and saute for 1 minute
Add the quinoa, yellow moong dal and water
Add salt and mix well
Cancel the saute mode. Turn on the pressure cook mode and set the timer to 15 minutes under high pressure. Close the lid and make sure the vent is closed
After the cooking time is complete, manually release the vent and open the lid
If the khichdi is thick, feel free to add some water to loosen it up. Completely your choice. Don’t worry if it is too mushy, that is the right consistency for a Khichdi
Transfer to a serving bowl. Garnish with cilantro and cashews and serve piping hot
Cooking and serving suggestions
A pressure cooker can be used for the recipe too. The cook time will be about 5-6 whistles
If using the stove-top method, soak the moong dal for 30 minutes and then follow-up the above method. It will greatly reduce the cook time
The Khichdi is best served with a a drizzle more of ghee on the top and with a side of yoghurt or pickle
If vegan, eliminate the ghee and use regular cooking oil
The petite yellow lentils can be replaced with sprouted mung beans, black lentils or other lentils of your choice
You can also follow me on Instagram to be up-to-date with what is cooking my kitchen. If you like this recipe, do rate it and share your comments below. Don’t forget to post your version on Instagram using #foodformyloveblog.