Tag: one-pot

  • Vegetarian Kothu Roti

    You know how we Indians eat roti/paratha and subzi separately? Or we end up with a leftover rotis or parathas and don’t know what to do with it? Well, let’s take it up a notch by putting the roti/paratha in the subzi and make it a one-pot meal.

    Kothu Roti or Kothu Paratha is a dish that is extremely popular in the southern Indian state of Tamil Nadu and in Sri Lanka, and popular as street food. In the Tamil language, “kothu” means “to chop”. Can you guess why? Because the dish is essentially chopped roti or paratha mixed with vegetables (or meat) and cooked together with spices.


    I was introduced to Kothu Paratha by close friend who took me to a Tamilian restaurant in Atlanta that specializes with this. I instantly feel in love with it. It is a flavorful and aromatic dish that can be customized with vegetables and meat.

    Traditionally, Kothu Paratha, as the name suggests, is prepared with parotta. To be clear, parotta and paratha are not the same. Parotta is made from all purpose flour and is more stretchy and flaky, where as paratha is prepared from whole wheat flour. Rotis are also used, but not the regular whole wheat rotis. The specific rotis used in the traditional Sri Lankan style dish is “Godamba Rotis” which are thin flatbreads made from all purpose. But I had several pre-prepared rotis so I used it in this recipe, hence Kothu Roti.

    There are many additives that can be used to spruce up the Kothu Paratha or Kothu Roti. For instance, I like to scramble an egg in every now and then. Maybe even try some srambled paneer. For non-vegetarians, there are a variety of meat options that can be added as well. In this recipe, I skimmed on the vegetables, but feel free to customize as you like. This dish is usually quite spicy and as such, it is served with a chilled raita.

    Prep time5 minutes
    Cook time15 minutes
    Serves2

    Ingredients

    Vegetables

    • Yellow or Red Onion – 1 cup, finely chopped or sliced
    • Tomato – 1 cup, chopped
    • Green Bell Peppers – 1 cup, chopped

    Spices

    • Saunf (Fennel Seeds Powder) – 1 tbsp (Reduce to 1/2 tbsp if you don’t like the flavor of it)
    • Red Chilli Powder – 1 tsp
    • Turmeric – 1/2 tsp
    • Cumin-Coriander Powder – 1 tsp
    • Garam Masala – 1 tsp (Optional)
    • Salt – As per taste
    • Mustard Seeds – 1 tsp
    • Jeera (Cumin Seeds) – 1 tsp
    • Ginger – 1 tbsp, finely chopped
    • Garlic – 1 tsp, finely chopped
    • Curry Leaves – A handful

    Lentils

    • Urad Dal (Black Gram) – 1 tsp
    • Chana Dal (Split Baby Chickpeas) – 1 tsp

    Bread

    • Roti – 6

    Oils

    • Cooking Oil – 1-2 tbsp

    Ingredient notes

    • Feel free to add other vegetables of your choice
    • For protein, scramble some eggs or paneer (or tofu, if vegan)
    • Customize your spices as per your liking
    • You can also use parathas or frozen rotis or parathas


    Method

    1. Heat oil in a pan. Make sure the heat is medium-high throughout the process
    2. Add mustard seeds. Once they crackle, add jeera, urad dal, chana dal and curry leaves. Saute for 1-2 minutes until the lentils turn slightly brown
    3. Add chopped ginger and garlic. Saute 1-2 minutes until they brown
    4. Add chopped onions. Saute for 3-4 minutes until they turn translucent
    5. Add tomatoes and let them cook down for 3-4 minutes
    6. In the meanwhile, take the pre-prepared rotis and roughly chop them by hand or using a pizza cutter or knife
    7. Once the tomatoes have cooked through, add salt and all the spices (except garam masala). Mix well. Add a splash of water to de-glaze the pan and create a saucy consistency. Let this simmer for 2-3 minutes
    8. Add the green bell peppers and mix. No need to cook them, just let it have a crunchy texture. The optional step at this stage is to add a tsp of garam masala for some extra flavor
    9. Turn the heat to low-medium. Add the chopped rotis and mix well until all the rotis are coated with the spices
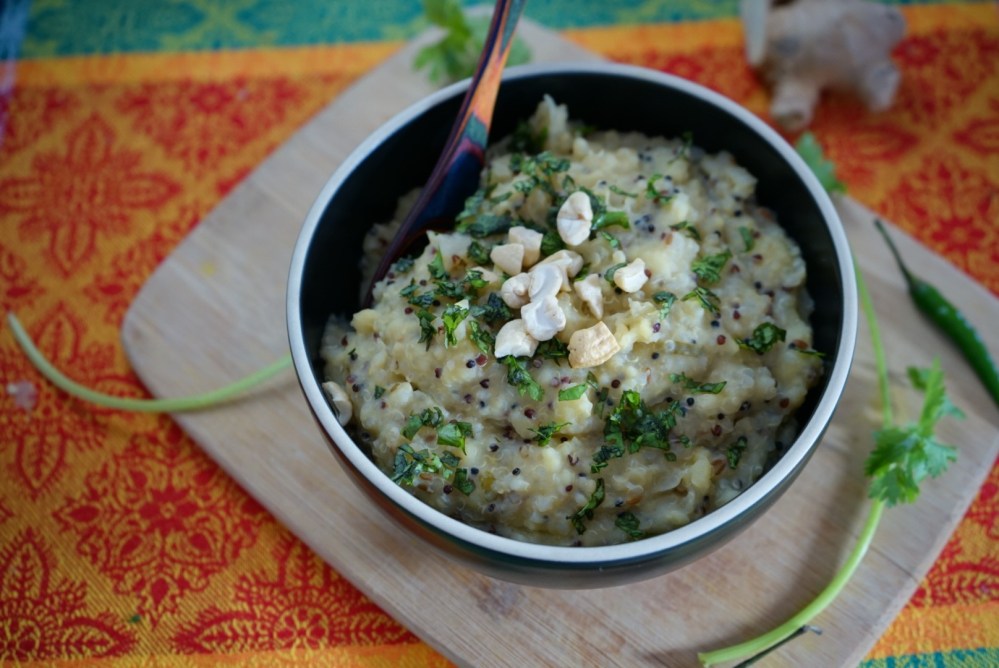
    10. Plate it, garnish with cilantro (Maybe even a squueze of lemon juice) and serve with chilled raita

    You can also follow me on Instagram to be up-to-date with what is cooking my kitchen. If you like this recipe, do share your comments below. Don’t forget to post your version on Instagram using #foodformyloveblog.

    Rating: 1 out of 5.
  • Coconut Vegetable Stew

    They say that “variety is the spice of life”. So, if you are bored of the regular Rasam, Sambhar and Dals, this stew will be a nice change to your regular menu. It is creamy and hearty with warm aromatic spices, and can be paired with rice, roti, dosa or aapam.


    While this type of a Coconut Stew originates from the southern Indian state of Kerala, it has found many variations across India, mainly in the use of spices, but using the same coconut milk base. In Kerala, fresh coconut milk is presumably used. However, here in the US, I have had to resort to canned Coconut milk. Not my preferred choice, but it is not all that bad. It does the job.

    This stew can be customized with your choice of spices and vegetables, and it comes together in less than 30 minutes. Its a one-pot meal for a quick weeknight dinner.

    Prep time15 minutes
    Cook time20 minutes
    Serves2-3

    Ingredients

    Vegetables

    • Potatoes – 2, small cubes (Approx. 1 cup)
    • Green Beans – 1 inch pieces (Approx. 2 cups)
    • Carrots – 1 inch matchstick pieces (Approx. 2 cups)
    • Onions – Sliced, 1 cup
    • Green Peas – 1 cup

    Spices, Flavors and Herbs

    • Green Chillies – 2-3, slit (Adjust as per spice preference)
    • Ginger – Finely chopped, 1 tbsp
    • Garlic – Finely chopped, 1 tbsp
    • Bay Leaf – 1
    • Cloves – 2
    • Green Cardamom – 2 pods (Or 1/4 tsp Cardamom Powder)
    • Cinnamon – 1/4 tsp (1 small stick)

    Dairy/Non-Dairy

    • Coconut Milk – 1 can (Unsweetened, low-fat)

    Oils

    • Cooking Oil – 2-3 tbsp

    Method

    1. Turn on Instant Pot to saute mode for 10 minutes. Add oil
    2. Once the display reads hot, add all the bay leaf, cinnamon, cardamom and cloves
    3. Once the spices are aromatic, add the onions, garlic, ginger and green chillies. Saute until the onions are cooked through and are translucent and the ginger and garlic have lightly browned
    4. Add all the vegetables and mix well
    5. Split the can of coconut milk into 2 halves. To one half, add 1 cup of water and dilute it. Keep the other half aside
    6. Add the diluted half to the vegetable and spice mixture
    7. Mix well. Set the Instant Pot to pressure cook mode (high pressure) and set the timer to 5 minutes. This step is to cook the vegetables in the coconut milk so that all the flavors amalgamate
    8. Once the pressure cooking is done, release the pressure and open the lid. Once again, set the Instant Pot to saute mode for 5 minutes
    9. Add the remaining thicker half of the coconut milk. Simmer for 5 minutes
    10. Transfer the stew to a serving bowl and serve piping hot with rice, roti, dosa or aapam

    **If using a pressure cooker, for step 7, pressure cook for 1-2 whistles max.


    You can also follow me on Instagram to be up-to-date with what is cooking my kitchen. If you like this recipe, do share your comments below. Don’t forget to post your version on Instagram using #foodformyloveblog.

  • Quinoa and Moong Dal Khichdi

    Khichdi, a dish from the Indian subcontinent, is made with rice and lentils. In the south of India, it is called Pongal. It is wholesome, mildly spiced and is easy to digest. Khichdi has a creamy porridge like consistency. It is a comfort food to some, a staple for others and a dish prepared on religious occasions in some cases.

    For me, it is most definitely comfort food. Growing up, Sunday nights used to be and continue to be Khichdi nights. Just the incredible aroma of the ghee roasted ginger and onions is enough to get me salivating. These days, when I am out of vegetables in my pantry or cannot think of what to cook, dear old khichdi comes to my rescue, and it never disappoints. In fact, when my husband comes home after a long day or work and workout, he throws everything in a pot while he freshens up. From start to finish, this is a meal under 30 minutes.

    Khichdi has evolved and many variations are seen today. The variations are based on flavor differences across the many Indian states, spices and most recently, a variation in lentils and grains used for the preparation.


    As someone who is not much of a rice eater, I have replaced the rice with quinoa, a more nutritious grain, and it beautifully complements the moong dal (petite yellow lentils), which are traditionally used in khichidis. It is a one-pot meal perfect for a quick weeknight dinner or a weekend lunch.

    Prep time10 minutes
    Cook time15 minutes
    Serves2

    Ingredients

    Grains and Lentils

    • Quinoa – 1 cup
    • Moong Dal (Petite Yellow Lentils) – 1.5 cups

    Vegetables

    • Onions – 1 medium, finely chopped
    • Mixed vegetables of choice (Optional) – 1 cup, chopped

    Spices & Herbs

    • Ginger – 2 tbsp, crushed
    • Jeera (Cumin Seeds) – 2 tsps
    • Green Chillies – 5-6, finely chopped (Feel free to add more or less depending on your spice tolerance)
    • Hing (Asafoetida) – 1/4 tsp
    • Salt – As per taste
    • Haldi Powder (Turmeric) – 1 tsp (Optional)
    • Cilantro – A few sprigs, finely chopped (For garnish)

    Oils

    • Ghee (Plain) – 2 tbsp (Recommended for great flavor)

    Method

    1. Set the Instant Pot to Saute mode.
    2. Add ghee and jeera.
    3. Once the jeera splutters, add the chopped ginger and onions. Saute until the onions are translucent
    4. Add the green chilies and saute for 1 minute
    5. Add the quinoa, yellow moong dal and water
    6. Add salt and mix well
    7. Cancel the saute mode. Turn on the pressure cook mode and set the timer to 15 minutes under high pressure. Close the lid and make sure the vent is closed
    8. After the cooking time is complete, manually release the vent and open the lid
    9. If the khichdi is thick, feel free to add some water to loosen it up. Completely your choice. Don’t worry if it is too mushy, that is the right consistency for a Khichdi
    10. Transfer to a serving bowl. Garnish with cilantro and cashews and serve piping hot

    Cooking and serving suggestions

    • A pressure cooker can be used for the recipe too. The cook time will be about 5-6 whistles
    • If using the stove-top method, soak the moong dal for 30 minutes and then follow-up the above method. It will greatly reduce the cook time
    • The Khichdi is best served with a a drizzle more of ghee on the top and with a side of yoghurt or pickle
    • If vegan, eliminate the ghee and use regular cooking oil
    • The petite yellow lentils can be replaced with sprouted mung beans, black lentils or other lentils of your choice

    You can also follow me on Instagram to be up-to-date with what is cooking my kitchen. If you like this recipe, do rate it and share your comments below. Don’t forget to post your version on Instagram using #foodformyloveblog.

  • Masala Bhaat

    This dish holds a special place in my heart because it is from my childhood. It is a specialty of a close family friend who is Maharashtrian. She introduced me and my mum to her secret masala (spice mixture) that was used in this dish – Goda Masala. Whenever we met, she would prepare this dish and the house would simply smell magical. While I don’t get to eat her version anymore (because we live in different countries and we have not met in years), she does transport a whole load of the masala for me and mum.

    Goda masala is a unique masala from the Indian state of Maharashtra. It has a very distinguishable flavor and aroma. Its uniqueness comes from the use of very rare spices such as cassia buds and lichen. Every household is known to have their own variation and personal touch to the masala. While it has a very pungent aroma, it is not “hot”. The masala typically has standalone use in a dish due to its overpowering flavor. The version of masala that I use is from India and is not available here in the US (Maybe I will do a giveaway some day 🙂 ). In the meanwhile, other brands of this masala are readily available on Amazon or at an Indian grocery store.

    This dish makes for a perfect, one-pot weeknight meal and leftovers can be used for lunch boxes. Some basic spices, the secret masala, rice and a bag of frozen mixed vegetables are all you need. Go all out and use fresh vegetables if you have the time.


    Prep time10 minutes
    Cook time20 minutes
    Serves2

    Ingredients

    Vegetables

    • Mixed Vegetables – 2 cups, frozen (Or 2 cups worth of any combination of vegetables)
    • Baby Potatoes – 8-10, halved
    • Onion – 1 medium, finely chopped

    Spices & Herbs

    • Dhania Powder (Coriander) – 1/2 tbsp
    • Goda Masala – 2 tbsp
    • Tej Patta (Bay Leaf) – 1
    • Dalchini Powder (Cinnamon) – 1/2 tsp
    • Laung (Cloves) – 3-4
    • Elaichi (Cardamom) – 2 pods or 1/2 tsp of the powder
    • Green Chillies – 3-4, finely chopped
    • Ginger – 1/2 tbsp, crushed
    • Garlic – 1/2 tbsp crushed
    • Salt – As per taste
    • Fresh Dhania (Cilantro) – A few sprigs for garnish and spice paste

    Oils

    • Cooking Oil – 2 tbsp

    Grains

    • Rice – 1 1/2 cups (washed and soaked)

    Method

    1. In a blender, add cilantro, green chillis, ginger and garlic (with a splash of water) to make an aromatic green paste. Keep this aside for use later
    2. Turn on the Instant Pot to “sauté” mode. If using a pressure cooker, heat it up on medium heat
    3. Add 2 tbsp of oil. To this, add the bay leaves, cinnamon, cardamom and cloves. Fry for 30-45 seconds until the bay leaves start to sizzle
    4. Add onions and sauté until they are translucent
    5. All the baby potatoes, vegetables and sauté for 1-2 minutes
    6. Add the soaked rice and mix for 1 minute
    7. Add the blended green paste. Mix well for an additional 1-2 minutes
    8. Add coriander powder, goda masala and mix for 1-2 minutes
    9. Add the required water (approx. 3 cups of water of 1 ½ cups of rice), and then add salt as per taste
    10. Close the Instant Pot lid. Use the pressure cooker mode with a cook time of a 12-13 minutes. If using a pressure cooker, close the lid, place the pressure weight on the lid. Cook for 4-5 whistles
    11. Once the cooking is complete, manually release the pressure from the Instant Pot. If using a pressure cooker, wait for the cool down and then remove the pressure weight.
    12. Serve the masala bhaat on a plate. Garnish with lemon juice, fresh cilantro and dried coconut. Enjoy with a side of raita (spiced yogurt) or pickle

    Cooking Suggestions

    • This recipe can work just as well with other grains such as quinoa or cous cous (for those who want to avoid rice)

    You can also follow me on Instagram to be up-to-date with what is cooking my kitchen. If you like this recipe, do rate it and share your comments below. Don’t forget to post your version on Instagram using #foodformyloveblog.