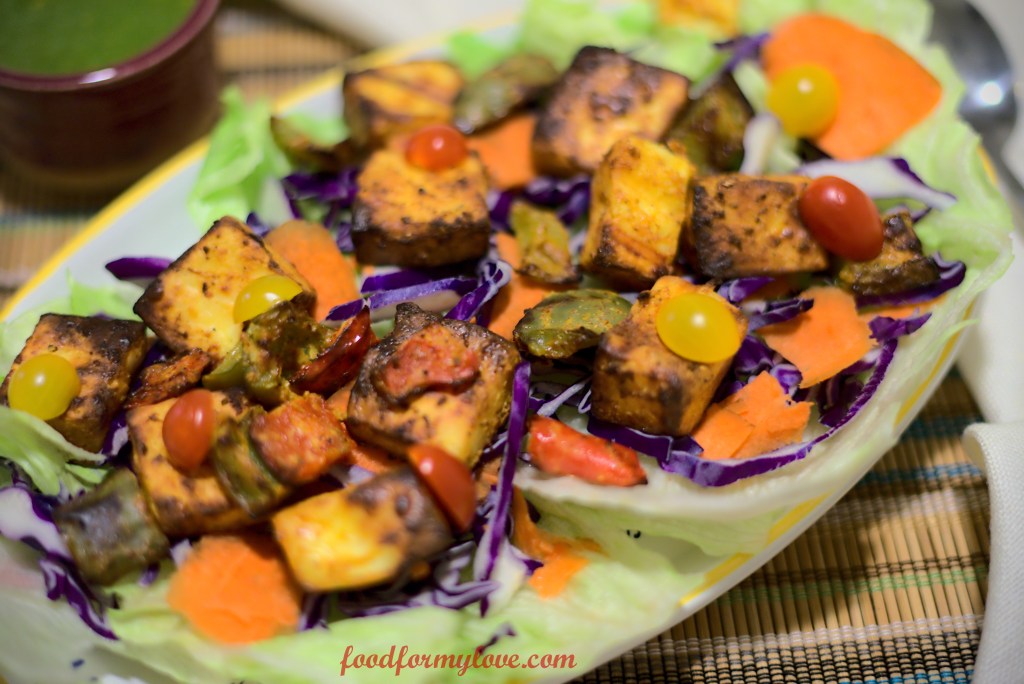
Paneer is one of those things that every Indian loves. Whether it is paneer tikka masala, paneer makhani, palak paneer or paneer bhurji. I am taking my paneer love to the next level with this salad. It adds an extra feel good factor to my paneer tikka cravings with the addition of vegetables and greens. Low carb and high in protein, this salad is certainly not a side one and can be a meal in itself.
Making paneer tikka can be daunting. Let me tell you, it is not. It uses pantry ingredients and nothing exotic. Yes, the marination can take a couple of extra hours, but putting the salad together thereafter takes just a few minutes.
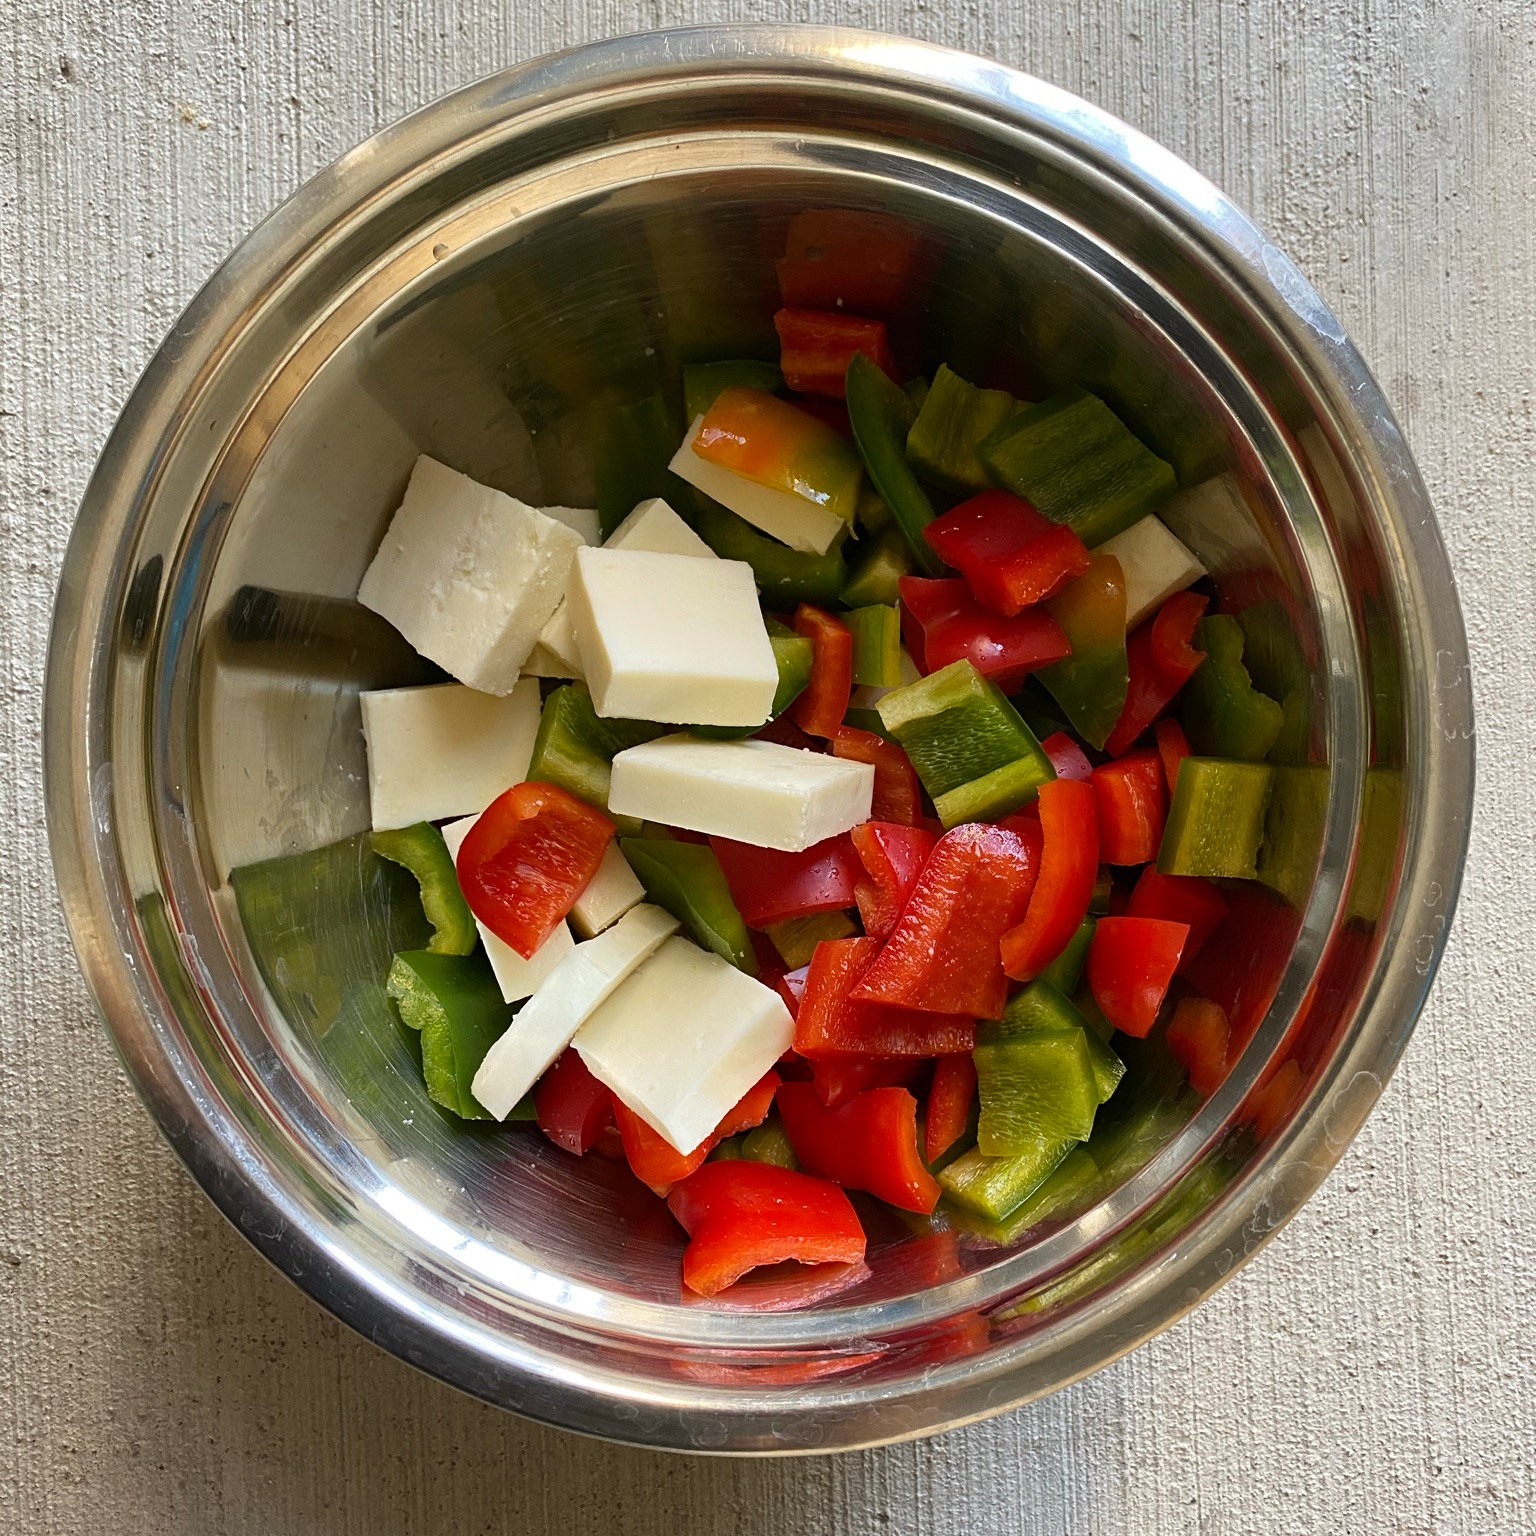
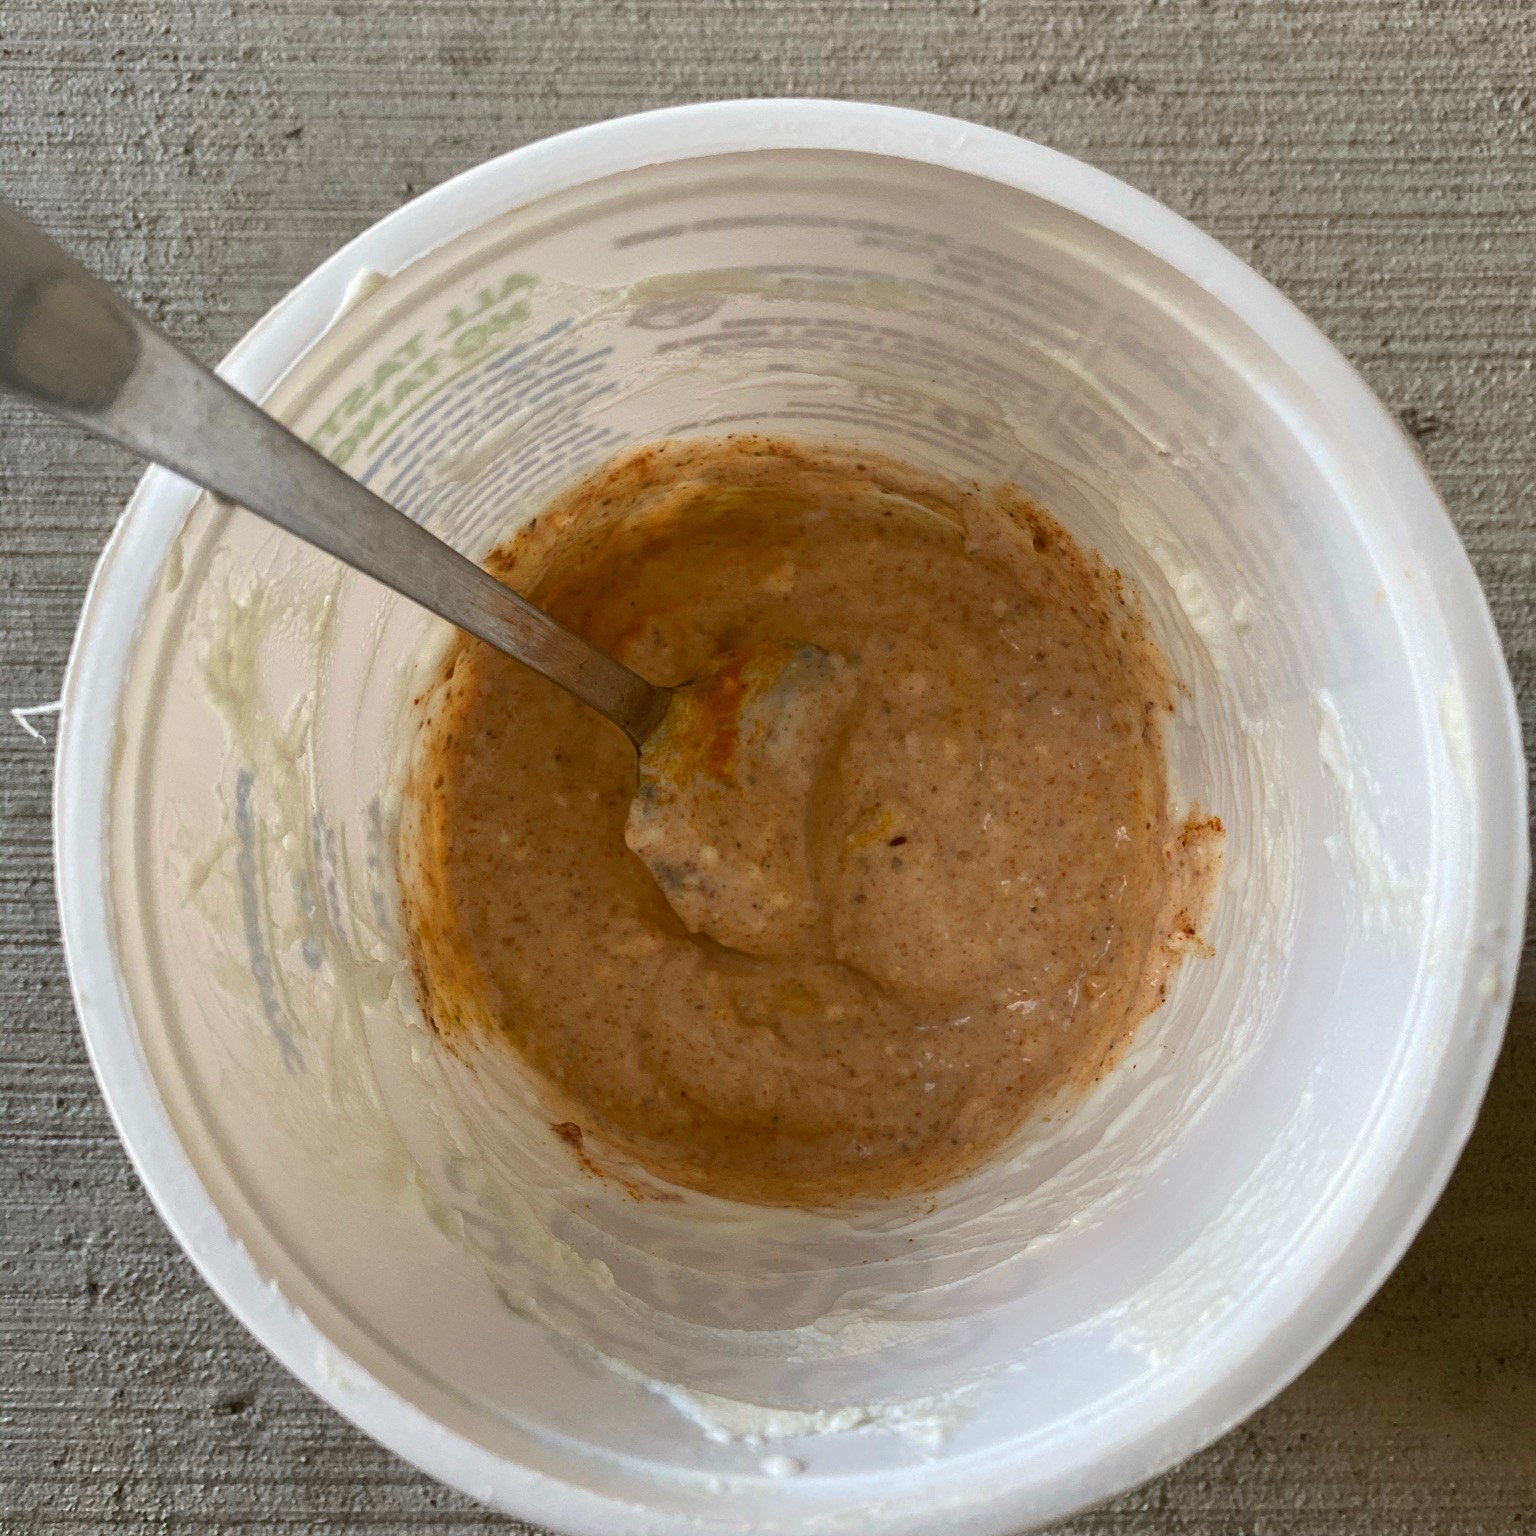
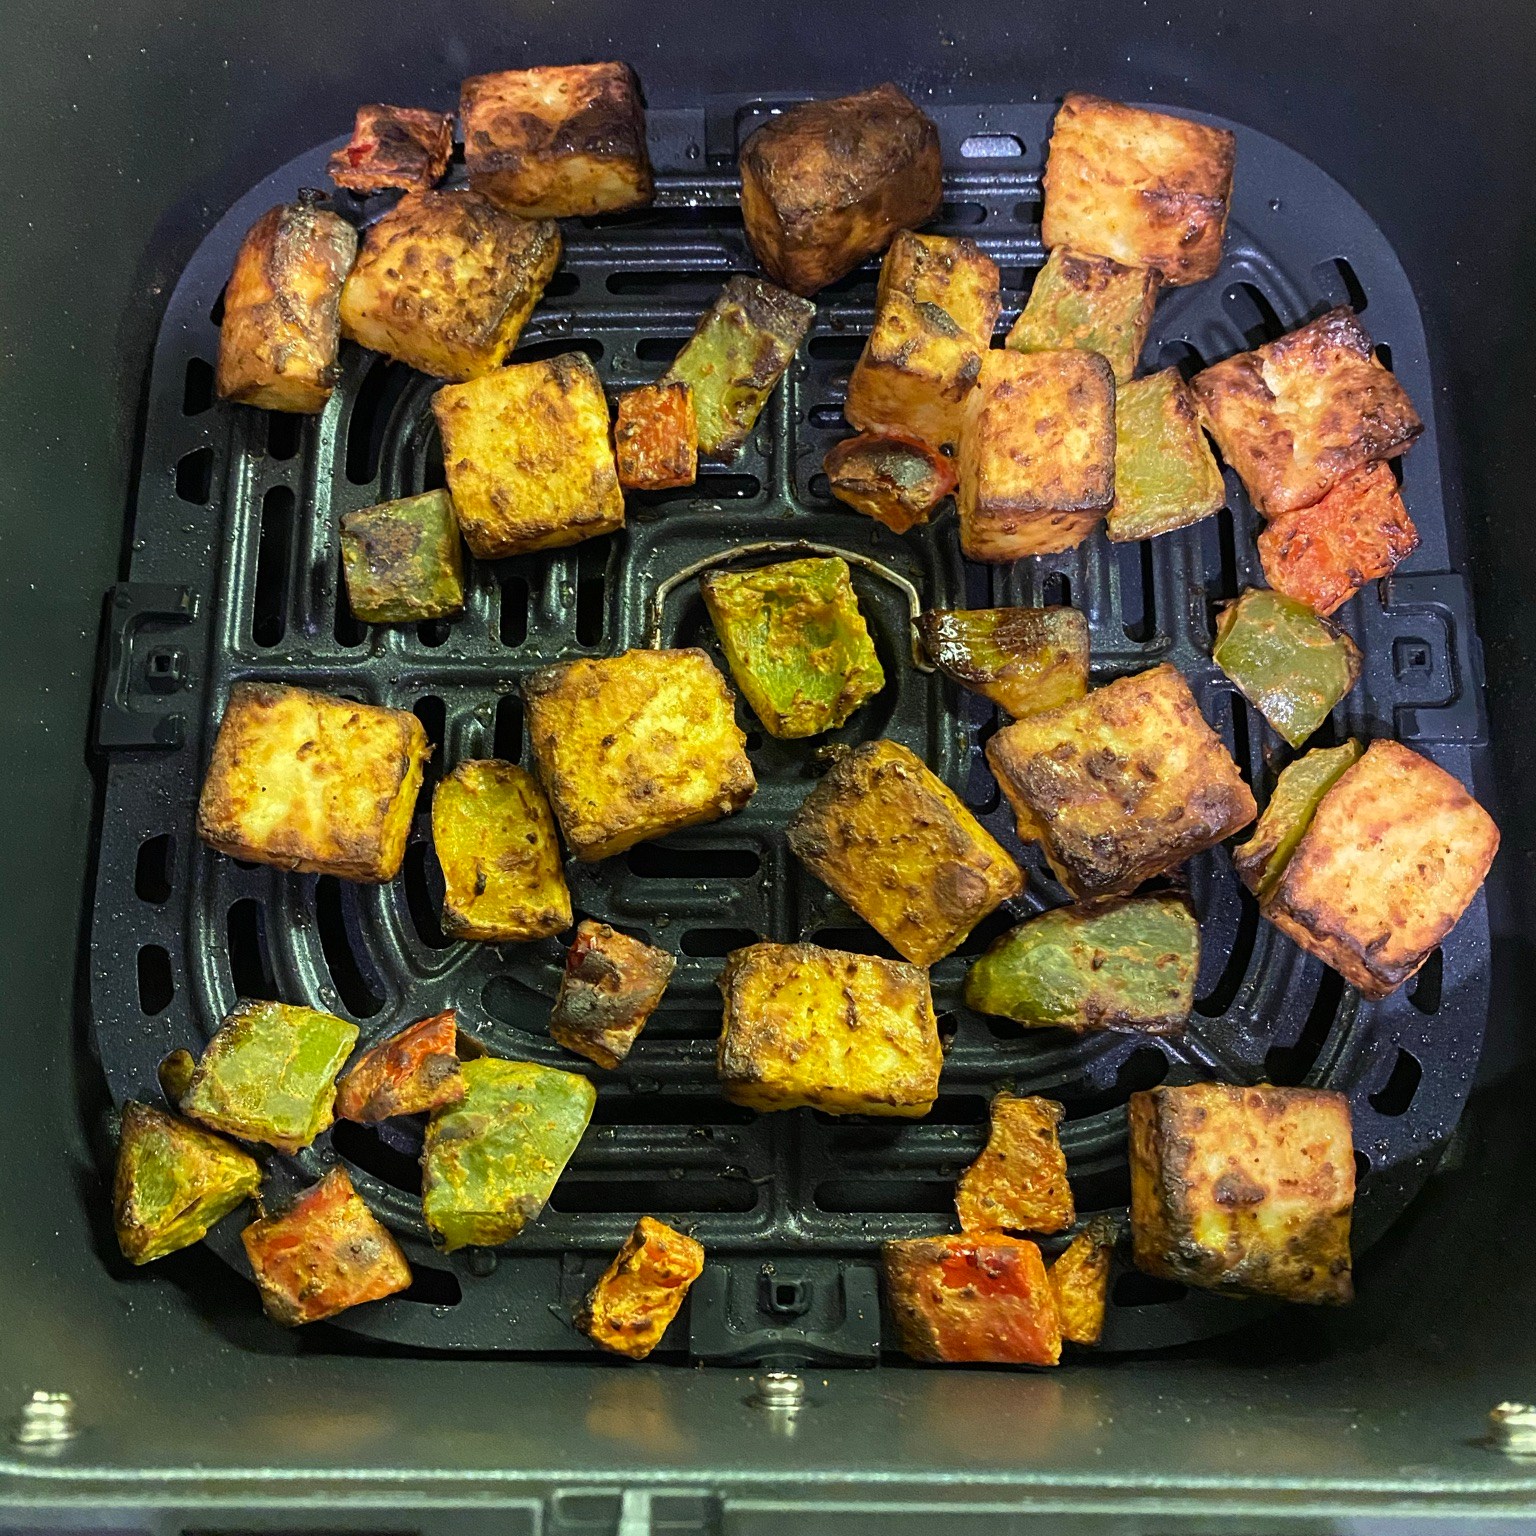
The paneer can be cut into whatever shape and size you choose. As much as I like bite sized paneer pieces in a salad, larger pieces give the appearance of a heavier salad, so I have gone with larger chunks. Simple pantry ingredients like yoghurt and your choice of spices mixed together, coated on the paneer and vegetables and left to marinate for 3-4 hours is all it takes. In the meanwhile, you can prep the greens to put the salad together.
All in all, the flavorful grilled paneer can have multiple uses through the week and makes for a great protein rich meal post-workout. So this can be prepared over the weekend and enjoyed through the week.
| Prep time | 3-4 hours |
| Cook time | 10-15 mins |
| Serves | 2 |
Ingredients
Protein
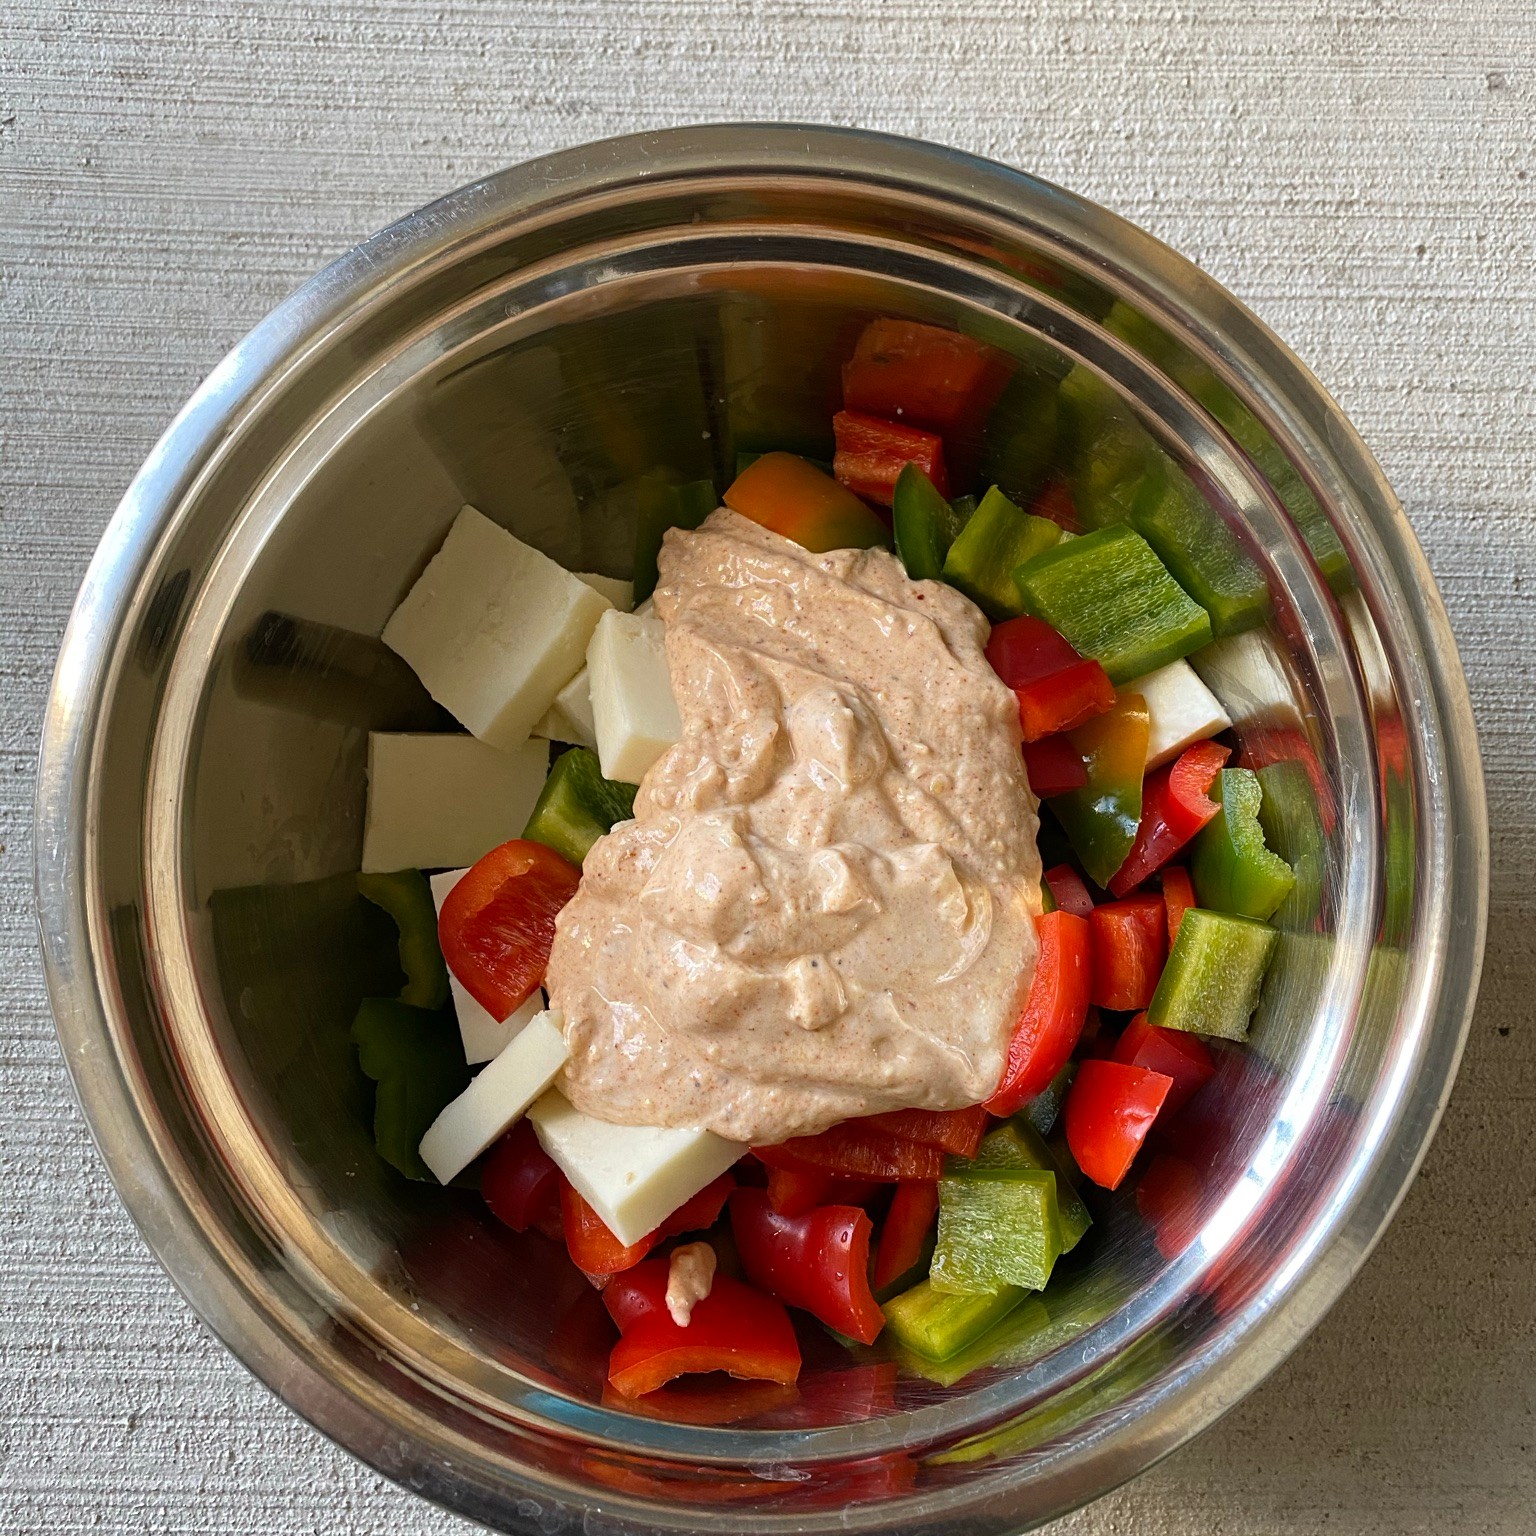
- Paneer – 1 block of 14oz, large dice
Vegetables
- Multi-colored Bell Peppers – 2-3, large dice
- Iceberg Lettuce – 1 small head, thoroughly washed, dried and chopped
- Cherry Tomatoes – A handful, halved
- Purple Cabbage – 1/2 cup, shredded
- Carrot – 1/2 cup, julienned
Marination
- Yoghurt – 1/2 cup
- Red Chili Powder – 1 tbsp
- Coriander-Cumin Powder – 1 tbsp
- Garam Masala – 1 tbsp
- Ginger – Crushed, 1 tbsp
- Garlic – Crushed, 1 tbsp
- Salt – As per taste
- Oil – 2 tbsp
Ingredient Notes
- Paneer can be substituted with halloumi cheese. For a vegan option, tofu can be the protein substitute and plain plant based yoghurt
- Any variety of greens can be used. I have used iceberg lettuce, but romaine lettuce, spinach, arugula or mixed greens can also be used
Method
- Marination
- To a bowl, add the paneer and vegetables
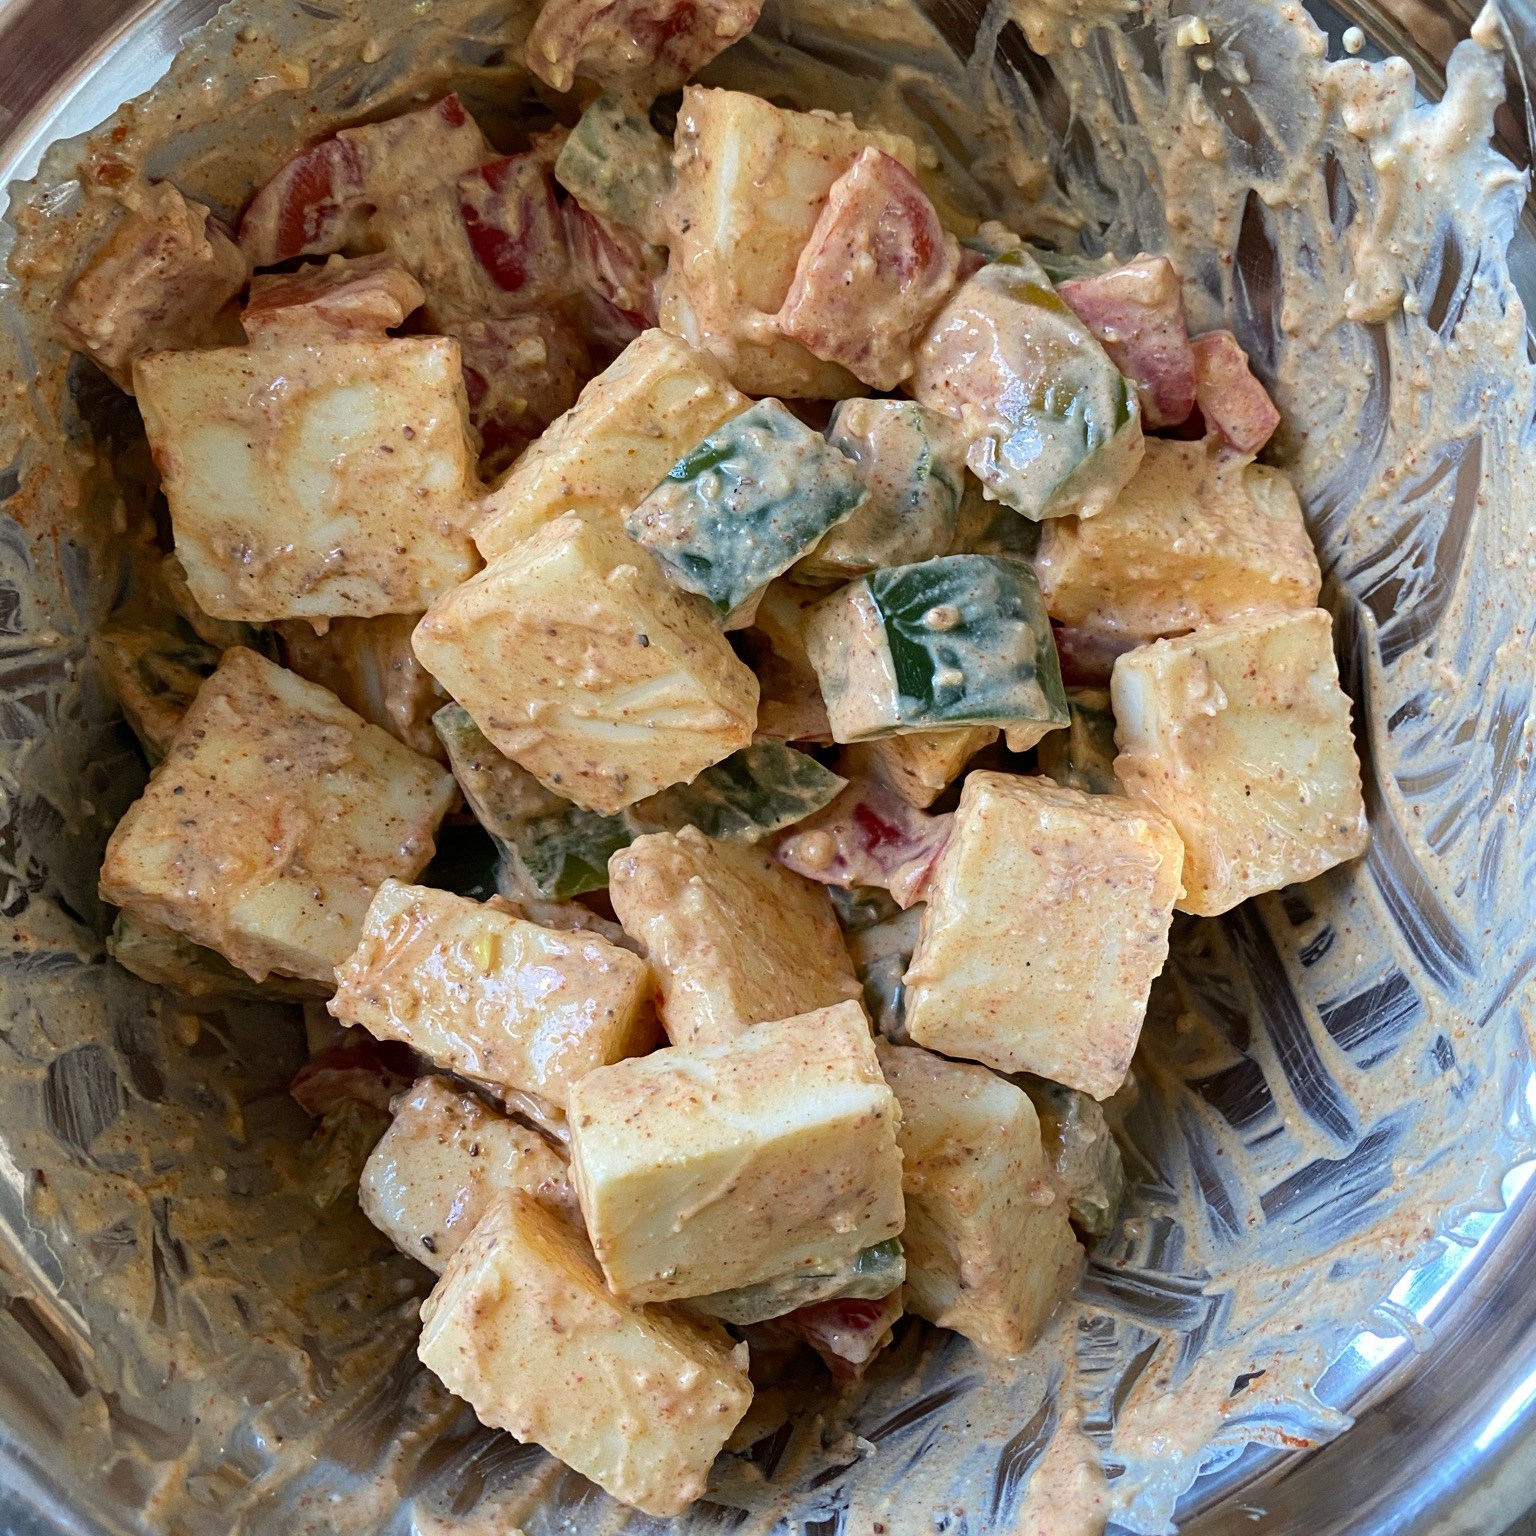
- Add all the remaining marination ingredients. Mix well and make sure every piece is coated with the marination masala. Place in the refrigerator to marinate for 3-4 hours
- Grilling the paneer
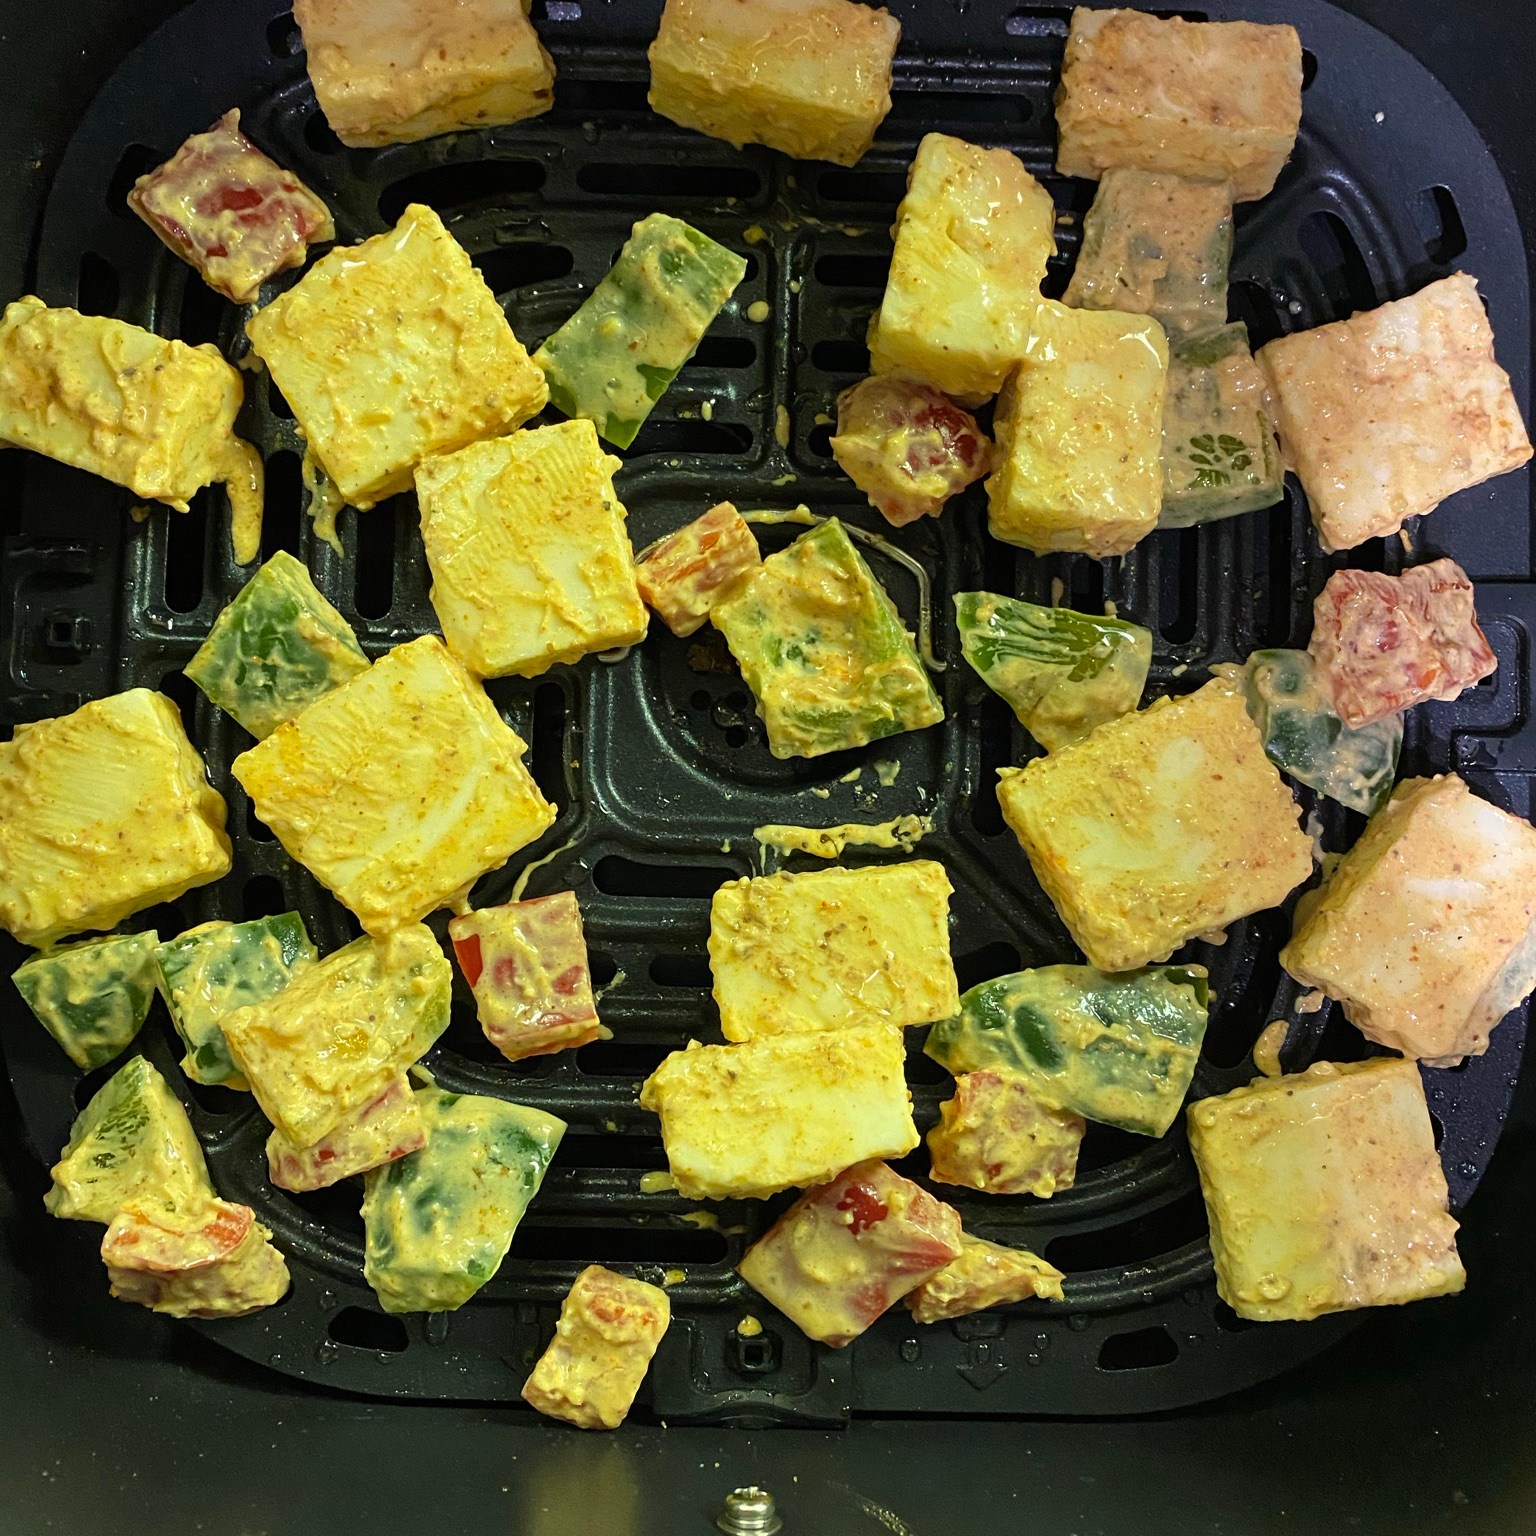
- Air fryer
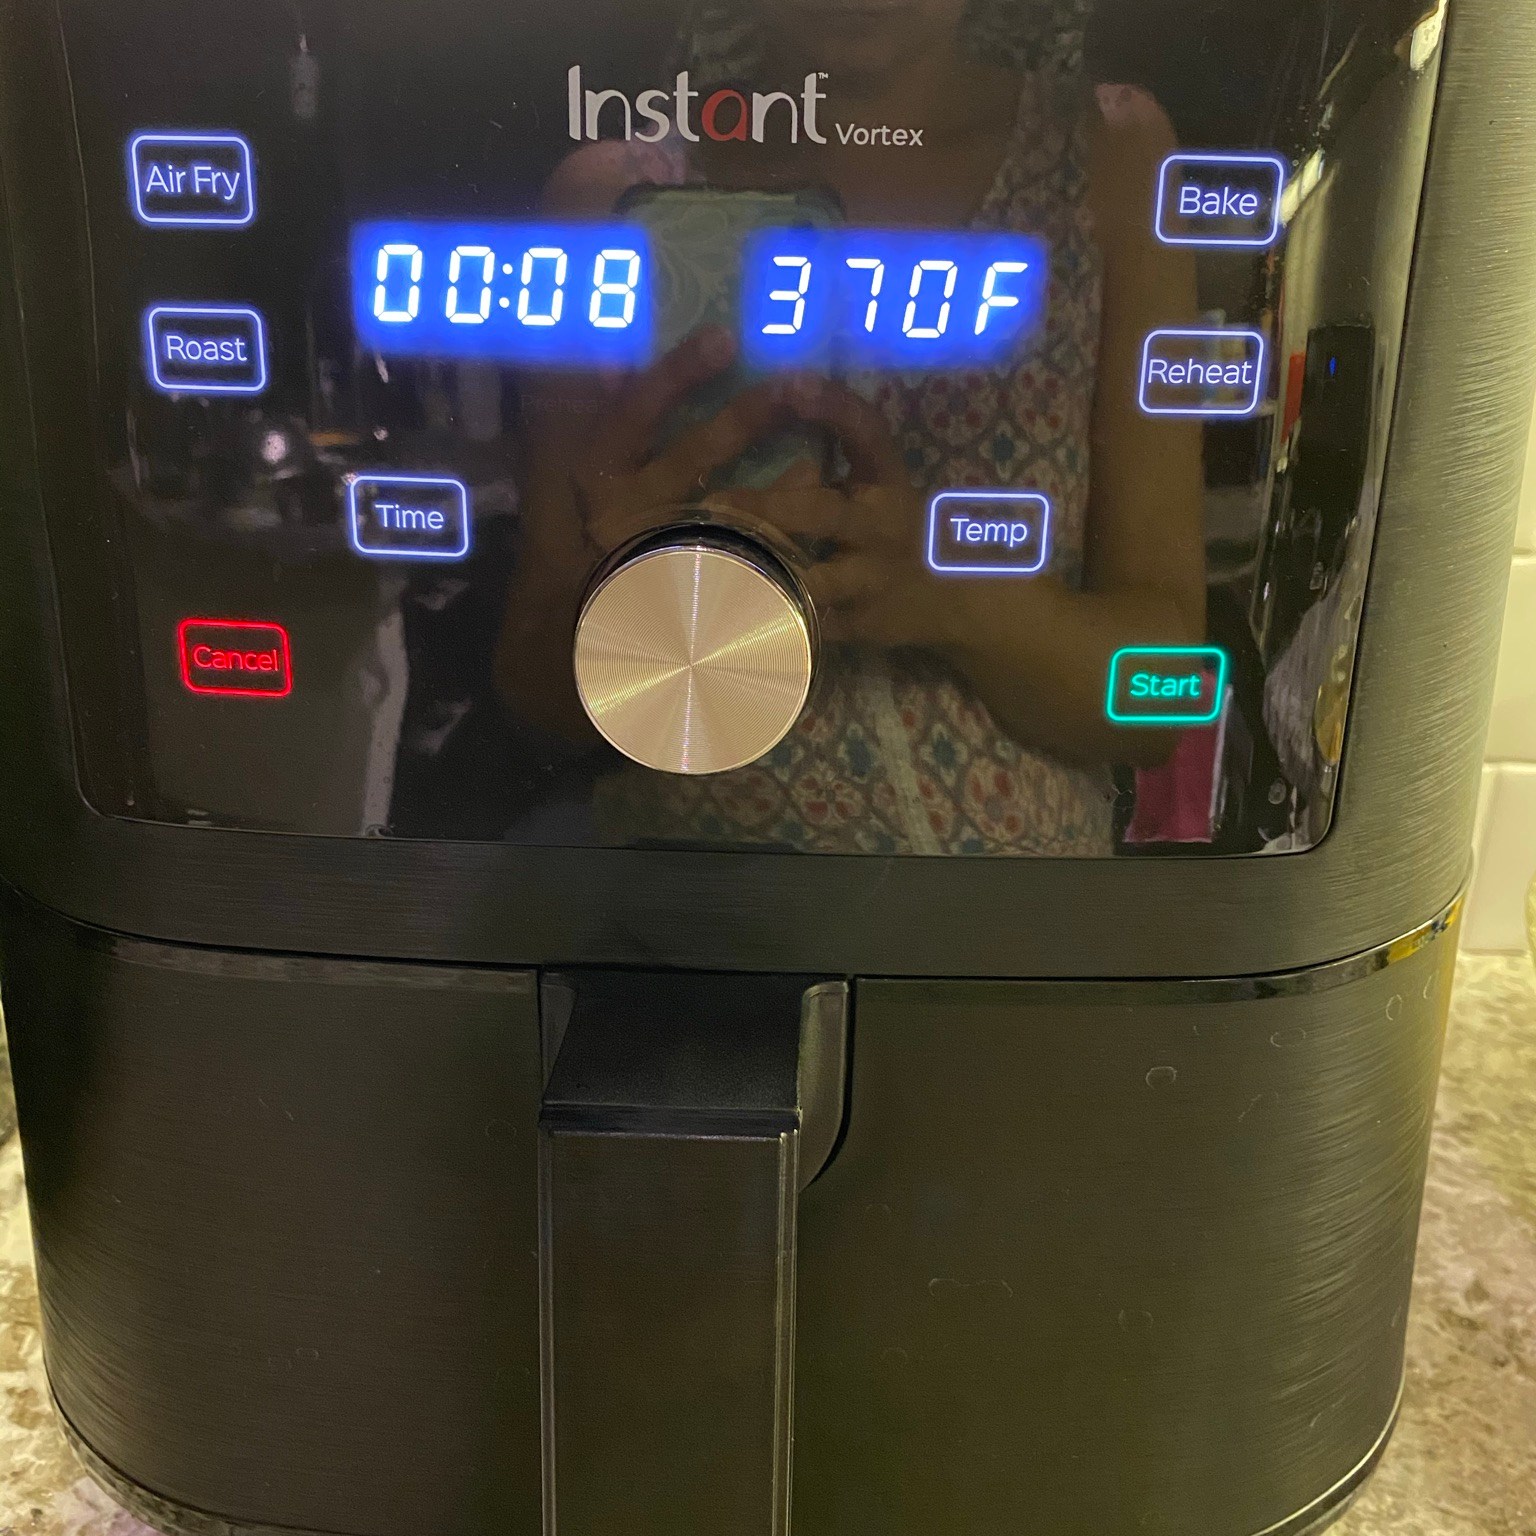
- Set the air fryer to “Air Fry” mode
- Once the pre-heat cycle is completed, add the vegetables and paneer to the air fryer basket. Set the timer to 8 minutes and temperature to 370F
- Stove top grill
- Heat 1-2 tbsps of on a grill pan
- Add the marinated pieces of vegetables and paneer to the grill pan. Cook until all sides are golden
- Oven
- Pre-heat the oven to 370F
- In the meanwhile, place the marinated vegetables and paneer on a baking tray lined with parchment paper
- Once pre-heat is complete, bake for 8-10 minutes until they are golden brown
- Air fryer
- Assembling the salad
- To a bowl or large platter, add lettuce
- On this place the grilled paneer and vegetables
- Add chopped tomatoes
- Squeeze some lemon juice and ENJOY with a dipping sauce like mint chutney or mayonnaise!
You can also follow me on Instagram to be up-to-date with what is cooking my kitchen. If you like this recipe, do share your comments below. Don’t forget to post your version on Instagram using #foodformyloveblog.