Tag: street-food

  • Vada Ghugni

    Who doesn’t love street food! I know I do, as I am sure a zillion other people around the world do too. Street foods are fascinating. They are such a cultural thing, they are almost an opening into the world of a particular culture’s food. A lot of street food is made by non-trained cooks who use family recipes from generations to prepare and sell food to make a decent living. Yet, there lie some of the best secrets to ingredients and cooking techniques that the street food vendors have inherited from their families that are reflective of their cultures and traditions.

    For me, exploring street foods is a must whenever I visit a new city, whether it is in India or any other city around the world. When it comes to India, there is such incredible variety across the states that even a lifetime is not enough to explore them all. But at least I can try ๐Ÿ™‚

    Vada Ghugni (Or Bara Ghugni) is a popular street food in eastern Indian states such as West Bengal and Orissa. But, first, what is it? Bara or Vada is exactly what it says, a regular Urad Dal Vada. Ghugni is interesting, because at first I thought it was just a regular Chole/Channa Masala. But in exploring different recipes, I learnt that the Ghugni is different not just in the spices it uses but also that is has Potatoes in it, and the key difference being that Ghugni uses dried white or yellow peas (or even Kala Channa [Brown Chickpeas] in states like Bihar and Jharkand) that are soaked and cooked.

    Did you know white peas and chickpeas are not the same?

    White peas (called safed [white] vatana in hindi) are essentially peas that are dried after harvesting and their skins are removed. They work as substitute for fresh green peas. they are typically boiled, cooked and used for dal or in chaats.


    I took the liberty to use chickpeas in this recipe because I did not have white peas in my pantry. That did slightly change the look and texture of the Ghugni (which is supposed to be slightly runny with mushy cooked white peas). But I think I managed to keep the flavor. It is very reminiscent of a vada sambhar, but has a lot more spicy and tangy toppings just like any chaat.

    Vada Ghugni, although a “street food”, can be served at multiple eating occasions at home such as breakfast, brunch or an evening snack. It is quite heavy, so I would avoid it as a dinner item.

    Prep time6 hours
    Cook time25 minutes
    Serves2-3

    Ingredients

    Lentils and Beans

    • Chole (Chickpeas) – 1 15oz can (Approx. 500gms)
    • Urad Dal (Black Gram) – 1 cup

    Vegetables

    • Onion – 1 large, chopped
    • Tomato – 2 large, chopped
    • Potato – 2 medium sized, cubed (Boiled)

    Spices and Herbs

    • Jeera (Cumin Seeds) – 1 tsp
    • Curry Leaves – 1-2, finely chopped
    • Dhania (Cilantro) – A handful, finely chopped
    • Green Chilies – 2 tbsp, crushed
    • Ginger – 1 tbsp, crushed
    • Garlic – 1 tbsp, crushed
    • Haldi (Turmeric) Poweder – 1 tsp
    • Dhania-Jeera (Coriander-Cumin) Powder – 2 tsbp
    • Laal Mirch (Red Chili Powder) – 1 tsp
    • Garam Masala – 1 tsp
    • Black Pepper – 1/2 tsp
    • Salt – As per taste

    Oils

    • Vegetable Oil – Approx. 1 cup (for frying the vadas) + 2 tbsp for cooking the Ghugni

    Ingredient notes

    • If using White Peas (Safed Vatana) instead of Chickpeas, use 1 cup of the dried Peas. These will also need to be soaked and pressured cooked
    • To add a kick to the Ghugni, additional spices such as Dalchini (Cinnamon) and Amchur (Dried Mango) powders can also be added

    Method: Vadas

    1. Wash and soak Urad Dal for 6 hours
    2. Add the soaked Urad Dal to a grinder. For the first round, grind without any water. For the following rounds of grinding, slowing add 1-2 tbsps of water each time until the batter is smooth and thick. It should not be runny
    3. Add the batter to a mixing bowl. To this, add finely chopped curry leaves, black pepper,1 tbsp of green chilies and salt. Mix well and set aside for a few minutes
    4. Add 1 cup oil to a pot and allow it to heat up. To know whether it is at the right temperature, drop a pinch of the batter to it. If the batter rises to the top, then the oil is at the right temperature
    5. Using an ice cream scoop, carefully drop a small ball of the batter into the oil. Allow one side to cook and start to turn brown. Then, carefully turn it over to allow the other side to cook. Once both sides are golden brown, carefully take it out of the pot and place it on a paper-towel lined plate for all the oil to be soaked up. Repeat for the rest of the batter (The ice-cream scoop method is for amateur fryers like me ๐Ÿ™‚ If you feel confident, feel free to scoop up a ball of batter with your hands and carefully drop it into the oil)
    6. This quantity of batter should make about 12 vadas

    Method: Ghugni

    1. To a pan, add 2 tbsp of oil. Once it is hot, add jeera and let it splutter
    2. To this, add the chopped onions (leaving 1-2 tbsp aside for garnishing). Fry until they turn translucent
    3. Add the crushed green chilies, ginger and garlic. Continue to fry until they the rawness is cooked
    4. Add the haldi, dhani-jeera and laal mirch powders, mix well and allow the masalas to cook release their aromas for a few minutes
    5. Add the chopped tomatoes (leaving 1-2 tbsp aside for garnishing), mix well and allow the whole mixture to cook until oil is released from it
    6. Add the canned chickpeas and boiled potatoes to the pan. Add water, salt, close the lid and let the mixture simmer for a few minutes
    7. After a few minutes, using the back of a wooden spatula, mash some of the potatoes and chickpeas. This makes the sauce thicker. Add some more water as desired and continue to cook for a few more minutes
    8. Just before turning off the heat, top it off with some garam masala and mix well
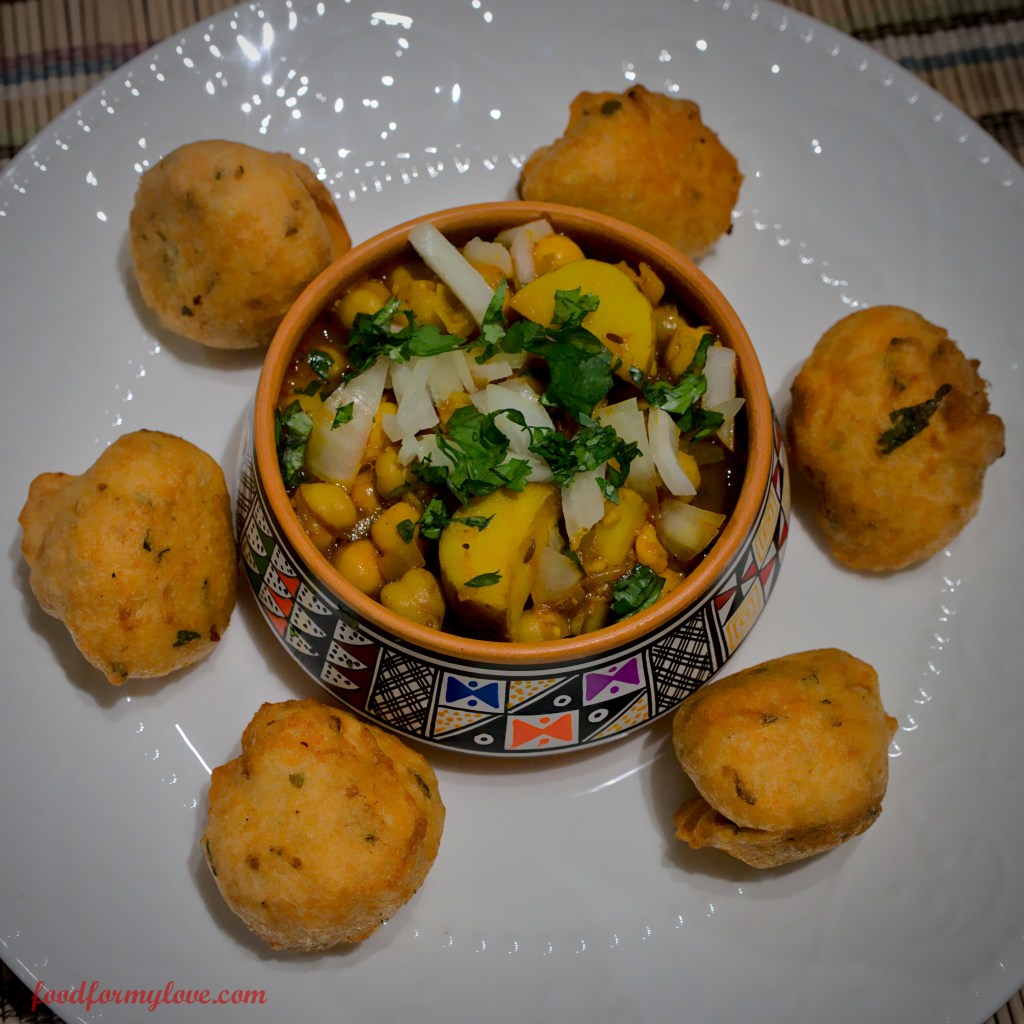
    Serving suggestions

    • In a small bowl, place 2-3 vadas
    • Ladle on a generous amount of the Ghugni
    • Top with chopped onions and tomatoes
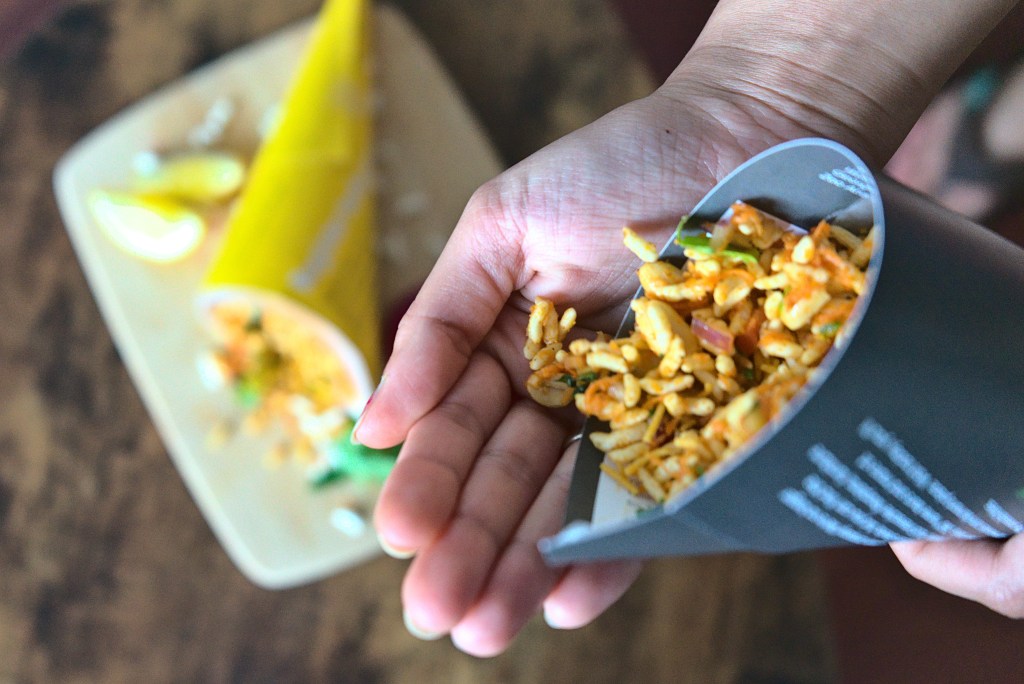
    • Optional toppings include sev, chopped green chilies, cilantro, slivers of fresh ginger, a squeeze of lemon juice, mint chutney and sweet date-tamarind chutney
    • Leftover Ghugni can also be served with pooris and rotis

    You can also follow me on Instagram to be up-to-date with what is cooking my kitchen. If you like this recipe, do share your comments below. Don’t forget to post your version on Instagram using #foodformyloveblog.

  • Mysore Style Churmuri

    In India, evening chai (tea)/coffee and snacks are a must. And one such snack item is chaat. There are a gazillion types of chaats across India but very few are commonly known and consumed, such as Pani Puri, Dahi Papdi Chaat, Bhel Puri, etc. Being here in the US, we don’t have the luxury of street food and chaats. And neither do chips and cookies make the cut for a satisfying evening snack. So, we have to turn to homemade snacks.

    So, if you are like me and are looking for an easy evening snack and different than the usual, this one is for you. This chaat is a true taste of the southern Indian state of Karnataka, particularly from a city called Mysore.


    Mysore is very, very, very close to my heart. Not only is it the city where I was born, but it is the city where my mother was born and raised. So we have double the memories in this city. And some of the best memories are related to food, aren’t they? Churmuri is one such memory.

    Churmuri (Also known as Jhalmuri or Bhel Puri) is a snack made out of puffed rice. The additives are the ones that vary across India and give it their distinct flavor. While the common ones are tomatoes, carrots, green chillies and peanuts, some regions use different types of chutneys for added flavor. But this one uses a special blend of powders namely Puliyogre (Tamarind Rice) Powder and Chutney Powder. These powders originate in South India and the Mysore variation of these powders is what makes this Churmuri Mysore style.

    This Churmuri is truly unlike anything you will find anywhere else. My mum used to enjoy this Churmuri every single day after college. It used to be served by a particular street cart vendor who was the only one who was permitted to be on the premises of my mother’s all girls college. Such an interesting story and such a delicious memory.


    Try it and you not be disappointed. The specific powders that I mentioned above are readily available at Indian grocery stores. I use the ones that my mum and my grandmother’s sister make for me. More delicious memories ๐Ÿ™‚

    Prep time15 minutes
    Cook timeN/A
    Serves2

    Ingredients

    Base

    • Puffed Rice – 2 cups

    Vegetables

    • Carrots – 1 small, shredded
    • Onions – 1 small, finely chopped
    • Cucumber – 1 small, finely chopped

    Spices, Flavors and Herbs

    • Cilantro – A handful
    • Green Chillies – 2-3, finely chopped
    • Puliyogre Powder – 1/4 tsp
    • Chutney Powder – 1/4 tsp

    Nuts and Seeds

    • Roasted Peanuts – 1/4 cup

    Method

    1. In a mixing bowl, add the puffed rice and a drizzle of oil. Mix this well to coat the puffed rice
    2. To the bowl, add all the vegetables and spices. Mix very well
    3. Mix in the roasted peanuts right before serving

    Serving Suggestion

    • In India, Churmuri is typically served in cone shaped containers, usually made out of any available paper. But they are also served in paper plates/bowls or even more eco-friendly versions like bamboo or leaf. To mimic the true experience, you can use any available rectangular shaped paper and roll it into a cone. Just use some parchment or wax paper, also rolled into a cone shape, as a liner. Spoon in the Churmuri to this and enjoy ๐Ÿ™‚

    You can also follow me on Instagram to be up-to-date with what is cooking my kitchen. If you like this recipe, do share your comments below. Don’t forget to post your version on Instagram using #foodformyloveblog.

  • Vegetarian Kothu Roti

    You know how we Indians eat roti/paratha and subzi separately? Or we end up with a leftover rotis or parathas and don’t know what to do with it? Well, let’s take it up a notch by putting the roti/paratha in the subzi and make it a one-pot meal.

    Kothu Roti or Kothu Paratha is a dish that is extremely popular in the southern Indian state of Tamil Nadu and in Sri Lanka, and popular as street food. In the Tamil language, “kothu” means “to chop”. Can you guess why? Because the dish is essentially chopped roti or paratha mixed with vegetables (or meat) and cooked together with spices.


    I was introduced to Kothu Paratha by close friend who took me to a Tamilian restaurant in Atlanta that specializes with this. I instantly feel in love with it. It is a flavorful and aromatic dish that can be customized with vegetables and meat.

    Traditionally, Kothu Paratha, as the name suggests, is prepared with parotta. To be clear, parotta and paratha are not the same. Parotta is made from all purpose flour and is more stretchy and flaky, where as paratha is prepared from whole wheat flour. Rotis are also used, but not the regular whole wheat rotis. The specific rotis used in the traditional Sri Lankan style dish is “Godamba Rotis” which are thin flatbreads made from all purpose. But I had several pre-prepared rotis so I used it in this recipe, hence Kothu Roti.

    There are many additives that can be used to spruce up the Kothu Paratha or Kothu Roti. For instance, I like to scramble an egg in every now and then. Maybe even try some srambled paneer. For non-vegetarians, there are a variety of meat options that can be added as well. In this recipe, I skimmed on the vegetables, but feel free to customize as you like. This dish is usually quite spicy and as such, it is served with a chilled raita.

    Prep time5 minutes
    Cook time15 minutes
    Serves2

    Ingredients

    Vegetables

    • Yellow or Red Onion – 1 cup, finely chopped or sliced
    • Tomato – 1 cup, chopped
    • Green Bell Peppers – 1 cup, chopped

    Spices

    • Saunf (Fennel Seeds Powder) – 1 tbsp (Reduce to 1/2 tbsp if you don’t like the flavor of it)
    • Red Chilli Powder – 1 tsp
    • Turmeric – 1/2 tsp
    • Cumin-Coriander Powder – 1 tsp
    • Garam Masala – 1 tsp (Optional)
    • Salt – As per taste
    • Mustard Seeds – 1 tsp
    • Jeera (Cumin Seeds) – 1 tsp
    • Ginger – 1 tbsp, finely chopped
    • Garlic – 1 tsp, finely chopped
    • Curry Leaves – A handful

    Lentils

    • Urad Dal (Black Gram) – 1 tsp
    • Chana Dal (Split Baby Chickpeas) – 1 tsp

    Bread

    • Roti – 6

    Oils

    • Cooking Oil – 1-2 tbsp

    Ingredient notes

    • Feel free to add other vegetables of your choice
    • For protein, scramble some eggs or paneer (or tofu, if vegan)
    • Customize your spices as per your liking
    • You can also use parathas or frozen rotis or parathas


    Method

    1. Heat oil in a pan. Make sure the heat is medium-high throughout the process
    2. Add mustard seeds. Once they crackle, add jeera, urad dal, chana dal and curry leaves. Saute for 1-2 minutes until the lentils turn slightly brown
    3. Add chopped ginger and garlic. Saute 1-2 minutes until they brown
    4. Add chopped onions. Saute for 3-4 minutes until they turn translucent
    5. Add tomatoes and let them cook down for 3-4 minutes
    6. In the meanwhile, take the pre-prepared rotis and roughly chop them by hand or using a pizza cutter or knife
    7. Once the tomatoes have cooked through, add salt and all the spices (except garam masala). Mix well. Add a splash of water to de-glaze the pan and create a saucy consistency. Let this simmer for 2-3 minutes
    8. Add the green bell peppers and mix. No need to cook them, just let it have a crunchy texture. The optional step at this stage is to add a tsp of garam masala for some extra flavor
    9. Turn the heat to low-medium. Add the chopped rotis and mix well until all the rotis are coated with the spices
    10. Plate it, garnish with cilantro (Maybe even a squueze of lemon juice) and serve with chilled raita

    You can also follow me on Instagram to be up-to-date with what is cooking my kitchen. If you like this recipe, do share your comments below. Don’t forget to post your version on Instagram using #foodformyloveblog.

    Rating: 1 out of 5.