Category: Lunch/Dinner

  • Palak Chole

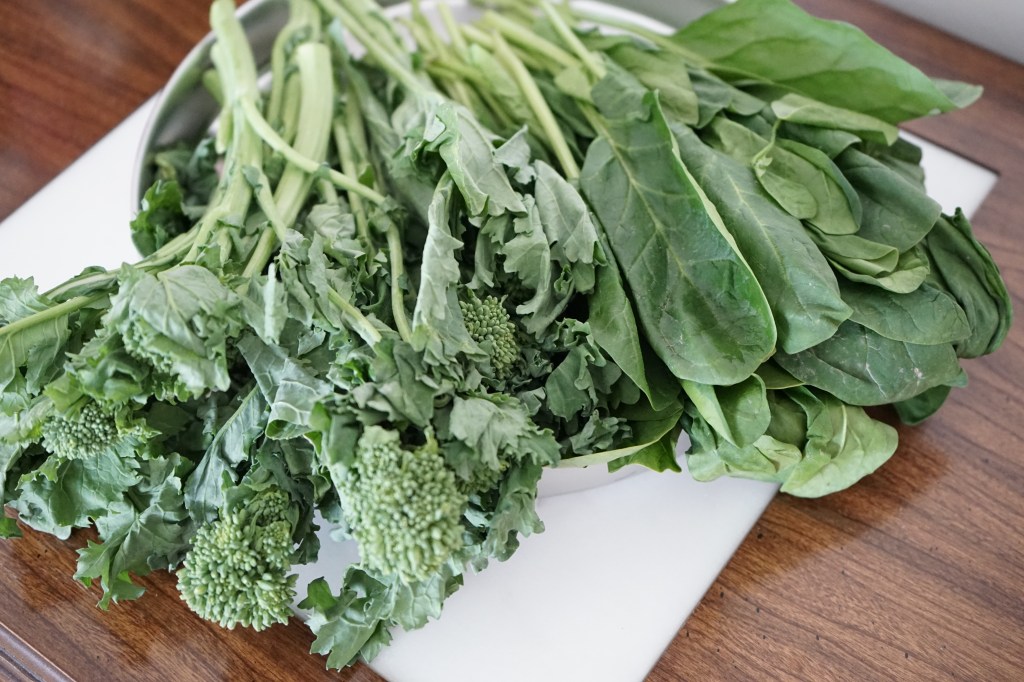
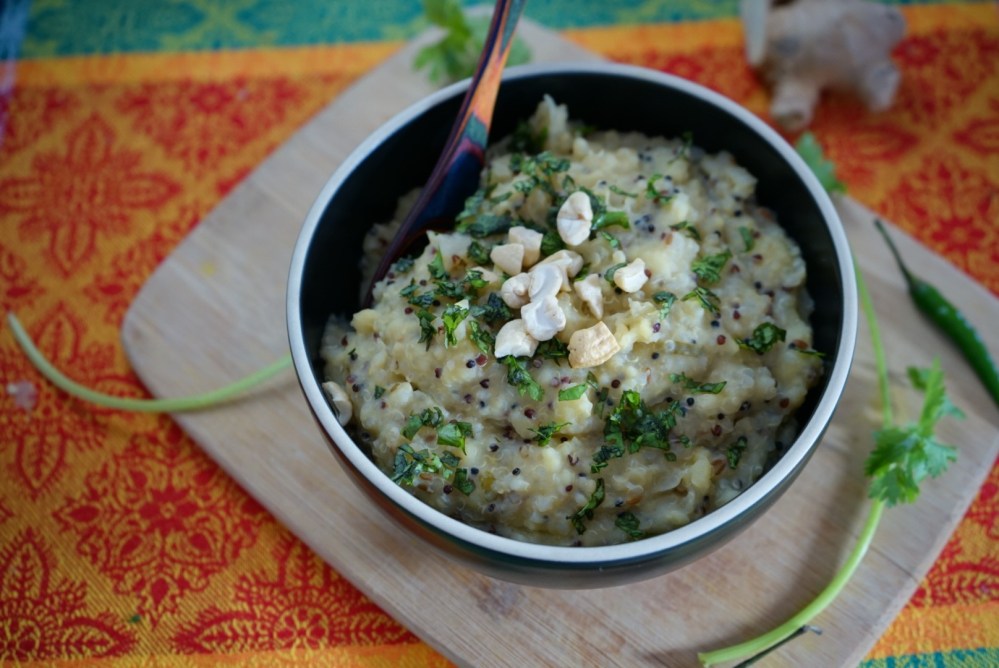
    For vegetarians, such as myself, protein is one of those nutrients that there just isn’t enough of. So, in an effort to add as much protein to our diets as possible, we rely on lentils and beans, like Chole (Chickpeas or Garbanzo Beans). In this process, we often get bogged down and forget the other essential nutrients that come from leafy greens. And if you have not already figured this out, I am a huge fan of adding leafy greens to any recipe. And that is exactly what I have done here.


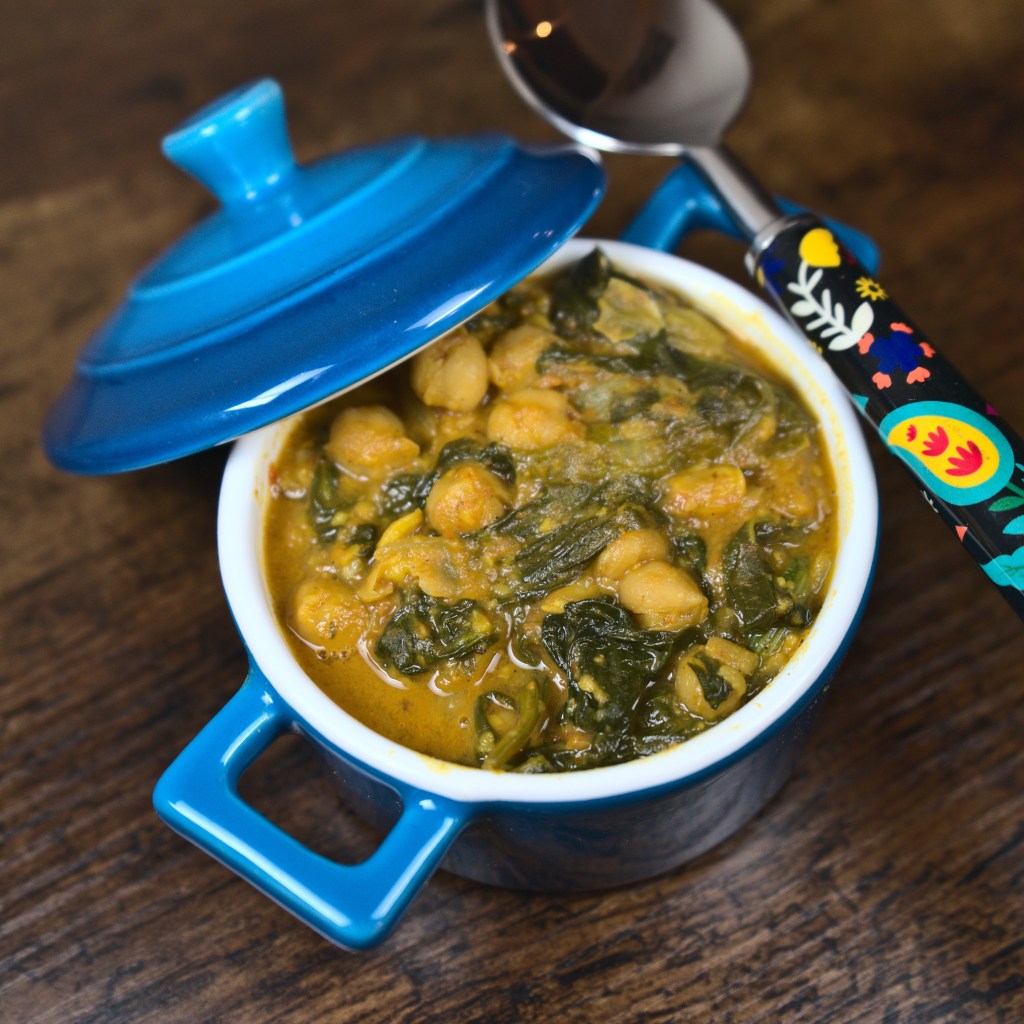
    It is not just about eating your greens, but it is also about how you are cooking them in an optimal manner for nutrient absorption. So in this recipe, I have prepared the Chole and I have added the Palak (Spinach) after turning off the heat. The Palak cooks just enough with the residual heat, thus maintaining its nutrients.


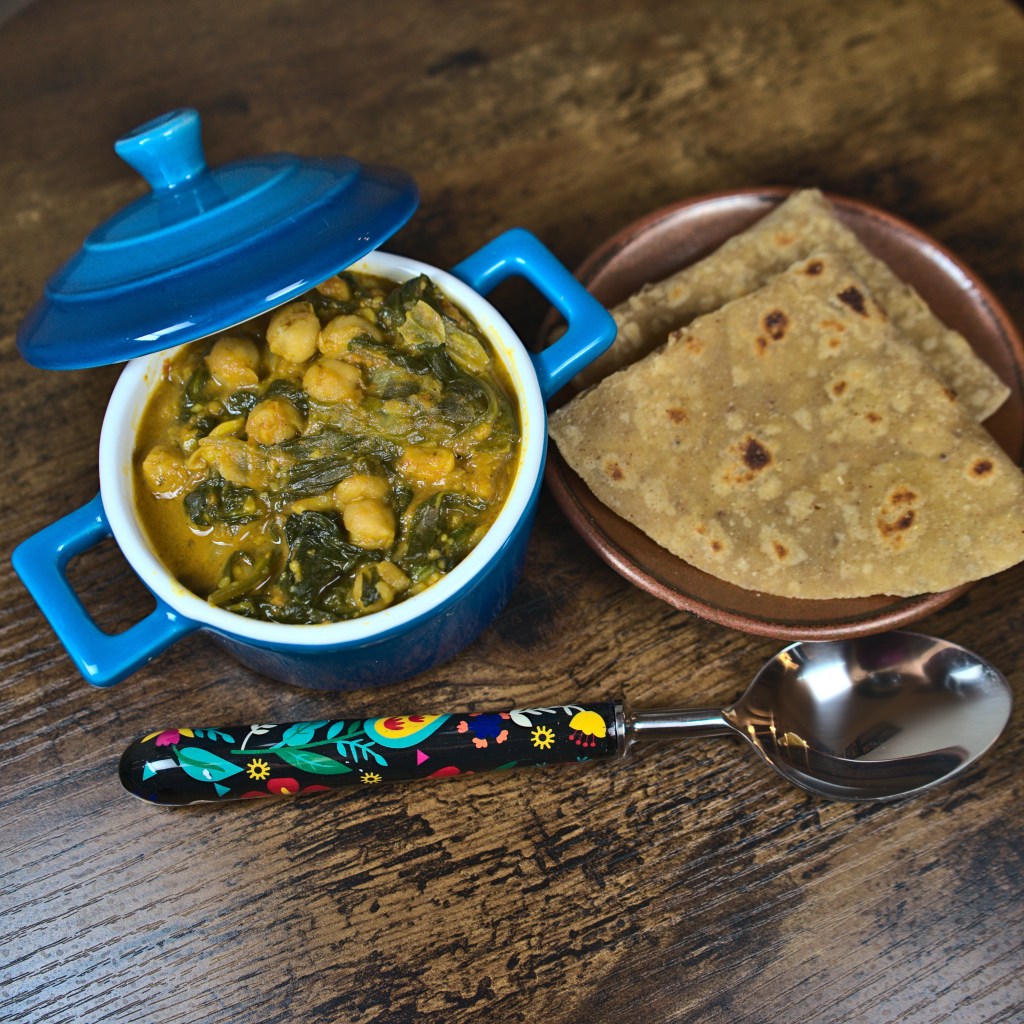
    My husband loves Chole, but getting him to eat leafy greens is just as hard as getting children to eat their greens. So I usually buy a huge bag of triple washed greens, Palak in this case, and leave it in the refrigerator so he can throw a handful of it in whatever he is cooking. When we are away on long-distance, Chole is one of his quick, go-to recipes, so convincing him to throw in some Palak was not hard. He thoroughly enjoyed it. So yayy! 🙂


    Prep time5 minutes
    Cook time15 minutes
    Serves3-4

    Ingredients

    Beans

    • Chole (Chickpeas or Garbanzo Beans) – 2 cans
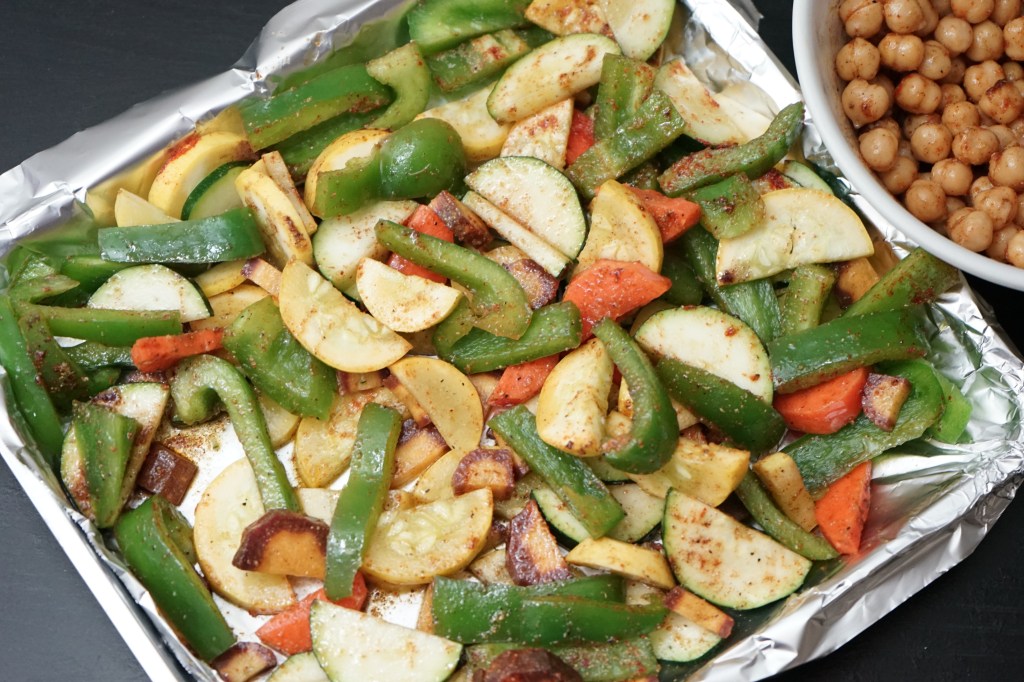
    Vegetables

    • Onions – 1 large, thinly sliced
    • Tomato – 1 large, diced
    • Green Chillies – 2, finely chopped (Optional)
    • Baby Spinach – 2 cups

    Spices & Herbs

    • Jeera (Cumin Seeds) – 1 tsp
    • Ginger – 2 tsp, grated
    • Garlic – 2 tsp, crushed
    • Haldi (Turmeric Powder) – 1 tsp
    • Red Chilli Powder – 2 tsp (Halve it if using Green Chillies)
    • Chole Masala – 1 tbsp
    • Salt – As per taste

    Oils

    • Cooking Oil – 1-2 tbsp

    Ingredient notes

    • I always keep a couple of canned Chole at home for a quick meal. If you have additional time, feel free to soak 1 cup of Chole overnight. Then, cook them in the pressure cooker for 3-4 whistles
    • I use Everest Chole Masala. There are several other brands. Alternatively, a simple Garam Masala will also work

    Method

    1. In a pan, add cooking oil
    2. Once the oil has heated up, add the jeera
    3. Once the jeera splutters, add the sliced onions, ginger and garlic. Fry them until the onions turn translucent and rawness of the ginger and garlic has cooked away
    4. Add haldi, red chilli powder, salt and continue to fry for 1-2 minutes
    5. Add diced tomatoes. Cook for 3-5 minutes until the mixture has completly cooked. The way to know this is that the mixture cooks to a point where it looks like a paste with a layer of oil around it released
    6. At this point, add the Chole, Chole Masala and 1-2 cups. Close the lid and cook for 5 minutes
    7. Open the lid, mash some of the Chole pieces to thicken the sauce, close the lid and cook for an additional 5 minutes
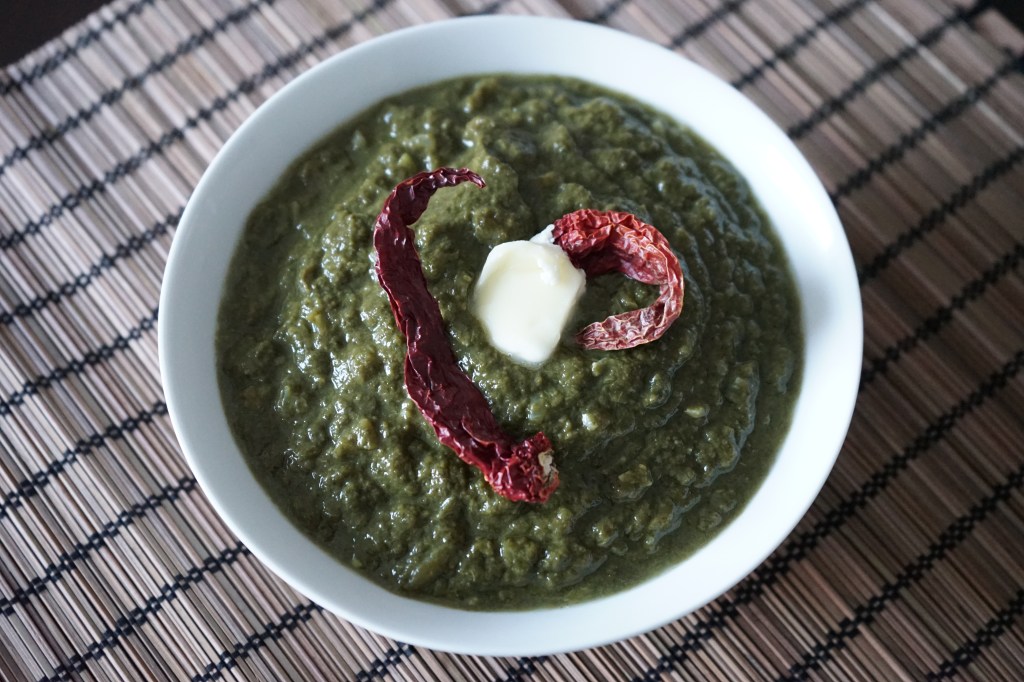
    8. Turn off the heat. Add the spinach and close the lid for 1-2 minutes
    9. Mix well and serve piping hot with rice or rotis. To make it even more decadent, add a dollop of Greek yoghurt on on the Chole 🙂

    You can also follow me on Instagram to be up-to-date with what is cooking my kitchen. If you like this recipe, do rate it and share your comments below. Don’t forget to post your version on Instagram using #foodformyloveblog.

  • Sarson Ka Saag

    Saag is a Hindi term for a dish prepared with leafy green vegetables (yes, I am back with my love for yet another leafy green vegetable). This time, it is with Mustard Greens or known as Sarson in Hindi. This beautiful dish originates from the Northern Indian state of Punjab and is a staple during the cold winter months. Every household is known to have its own recipe, just like any other traditional family favorite.


    Mustard Greens have always intrigued me. They look similar to Kale but are much more delicate with their frilly, ruffled look. Unlike the Kale or Spinach, Mustard Greens have a sharp, peppery flavor which mellows after cooking but is still distinct. To further cut through the peppery flavor, these greens are cooked with a combination of other greens (Spinach in this case). Mustard Greens are packed with a variety of nutrients such as antioxidants, iron and calcium (just like its other green counterparts). And yes, mustard seeds come from the mustard plant! But that story is for another day.


    The preparation of Sarson ka Saag has always intimidated me because to me it has always been a special, authentic Punjabi dish. And I did not want to try it and ruin the glorious dish that it is. But, with some research, some inspiration, my mum’s help and a slow step-by-step approach, the end result was an uber delicious and creamy Sarson ka Saag. My husband loves Palak Paneer and I am quite sure that he will love this saag too. And he can eat a larger variety of leafy greens. It is a win-win for both of us 🙂 While this dish is typically served with Makai Ki Roti (Rotis made out of Maize Flour), we decided to stick to simple rotis, just to relish the first time preparation of the Sarson Ka Saag.

    Prep time10 minutes
    Cook time30 minutes
    Serves4

    Ingredients

    Vegetables and Greens

    • Mustard Greens – 1 bunch, roughly chopped
    • Spinach – 1 bunch, roughly chopped
    • Onions – 1 medium, finely chopped

    Spices and Herbs

    • Garlic – 2 tbsp, finely chopped
    • Ginger – 2 tbsp, finely chopped
    • Green Chillies – 2 tbsp, finely chopped/crushed
    • Salt – As per taste

    Other

    • Chickpea Flour – 2-3 tbsp

    Oils

    • Mustard Oil – 3-4 tbsp

    Food safety tip: Leafy green vegetables are notorious for bacterial contamination because of how and where they are grown, of course. So, make absolutely sure that every leaf is thoroughly washed by holding it under cold water for 30 seconds. If you placed the uncleaned leafs on a cutting board or in an empty container, make sure to wash them before re-using them.


    Ingredient notes

    • Typically Maize Flour is used as a thickening agent. But since I did not have that readily available, I used Chickpea Flour and it worked just fine
    • Although any other cooking oil can be used, Mustard Oil adds a distinct, authentic flavor to the dish
    • Mustard greens are either available as bunch at Indian grocery stores or they are available as packed, washed and ready-to-eat greens at other US grocery stores such as Kroger, Publix or Whole foods
    • Bathua (Scientific Name: Chenopodium Album) is another green leafy vegetable that is cultivated in Northern India and is an integral part of traiditonal Sarson ka Saag. But I skipped it in this recipe because it is not readily available in the US

    Method

    1. Place the roughly chopped greens in an Instant Pot or pressure cooker. Cook the greens for 5 whistles on a pressure cooker. If using an Instant Pot, you can cook the greens for 5-7 minutes on high pressure mode
    2. Once it is cooked, churn the greens either using a hand blender or another blender. The consistency is your choice, I like mine to be slightly chunky and not completely smooth
    3. In a pan, heat mustard oil
    4. To the heated mustard oil, add chopped garlic and ginger. Fry these until they have browned well
    5. Then add onions and green chillies and fry again until the onions turn translucent
    6. To this, add the churned greens, salt and mix well
    7. Add the chickpea flour, mix well to make sure there are no lumps
    8. Close the lid and simmer the saag on medium heat for 15 minutes
    9. Transfer to a serving bowl. Garnish with a dollop of butter and red chillies and serve with hot rotis

    You can also follow me on Instagram to be up-to-date with what is cooking my kitchen. If you like this recipe, do rate it and share your comments below. Don’t forget to post your version on Instagram using #foodformyloveblog.

  • Spinach-Walnut Pesto Spaghetti

    Who doesn’t love Spaghetti? And who doesn’t love Pesto? Of course, we all do. But, did you know Pesto can be a sneaky way to incorporate leafy green vegetables into your diet?


    Pesto can be purchased in a jar from the grocery store, but there is nothing better than homemade pesto that is fresher and has leafy green vegetables in it, just like this Spinach-Walnut Pesto. All I did was tweaked the original recipe by replacing the Basil with Spinach and the Pine Nuts with Walnuts. What does this do? It makes the Pesto healthier and provides the combined nutrients of Spinach and Walnuts such as Vitamins A and C, minerals such as Calcium, Magnesium and Folate, Protein and Omega -3-fatty acids.

    In my household, this Pesto will work great because some type of pasta is a staple at least once a week. The Pesto takes only 10 minutes to prepare and stays in the refrigerator for at up to 7 days. The best part is that the leafy greens can be rotated on a weekly basis. For example, Kale also works great for this Pesto. Here, I have prepared a Spaghetti with the Pesto and added some Red Bell Peppers for some color and crunch.


    Prep time15 minutes
    Cook time15 minutes
    Serves2

    Ingredients

    Pasta

    • Whole Grain Spaghetti – 2 hand fulls of your favorite brand

    Vegetables

    • Spinach – 1.5 cups, tightly packed
    • Red Bell Pepper – 1, julienned

    Spices and Herbs

    • Garlic – 2 cloves, crushed (1 tbsp powder)
    • Salt – As per taste
    • Pepper – 1 tsp
    • Red Chilli Flakes – For granish

    Dairy

    • Ground Parmesan Cheese – 1/8 cup

    Oils

    • Olive Oil – 1/4 cup

    Food safety tips

    – Make sure to wash the leaves for 30 seconds under cold running water while gently rubbing the leaves to release any trapped dirt

    – If using packaged greens, and the if the package indicates “Triple Washed” or “Ready to Eat”, there is no need to wash the greens again

    – Separate leafy greens from raw meat or poultry products and use separate cutting boards for each to prevent bacterial cross contamination

    – Discard leafy greens within 2 hours of chopping or cooking. Always buy leafy greens that are kept at a chilled temperature to prevent bacterial growth


    Ingredient notes

    • If vegan, replace the Parmesan Cheese with Nutritional Yeast (which can provide the salty, cheesy flavor). Alternatively, use Salted Cashews (Remember to eliminate the Walnuts in this case) to provide the same thickness and saltiness.
    • Kale (Tuscan or Standard Curly Kale) can be used instead of Spinach
    • Toasting the Walnuts add a great depth of flavor to the Pesto

    Method

    1. In a pot, add water, spaghetti and a pinch of salt and cook according to the package instructions
    2. In a blender, add spinach, garlic, walnuts and parmesan cheese (if using). Blend until all the ingredients are finely chopped
    3. Slowly add olive oil and only blend to mix. Alternatively, the olive oil can be whisked with the mixture by hand. Set the prepared pesto aside
    4. In a pan, add a drizzle of oil and add the red bell peppers. Sprinkle some salt and allow it to cook, but let the crunch remain
    5. Add the cooked spaghetti to the pan and a few 2-3 tbsps of the prepared pesto. To this, add 1-2 tbsps of the cooked spaghetti water. Toss the pasta and let it come together for 1-2 minutes
    6. Transfer to serving dish. Garnish with red chilli flakes. Bon Appetit 🙂

    Serving Suggestions

    • Use the pesto for breakfast by spreading it on a toast and topping with some arugula and cherry tomatoes. Scrambled eggs or tofu would be a great addition
    • Toss some roasted vegetables with the pesto and serve it on a bed of mixed greens for a warm salad
    • Spread the pesto on a warm tortilla, top with some sauteed vegetables and make yourself a fajita (Italian-Mexican fusion 🙂 )

    You can also follow me on Instagram to be up-to-date with what is cooking my kitchen. If you like this recipe, do rate it and share your comments below. Don’t forget to post your version on Instagram using #foodformyloveblog.

  • Mediterranean Chickpea Fajitas

    This recipe is fusion in all its glory. Perfectly seasoned, colorful and delicious, oh and did I mention, healthy?


    Fajitas are a great “meatless” Monday (for those who eat meat) option. It is one of the best ways to get your dose of vegetables, all at once. Any choice of colorful, seasonal vegetables work great. But, just vegetables are never enough, not for me at least. It is not quite as filling. So, adding a plant-based protein such as Mushrooms, Tofu, or Chickpeas (in this case) adds a healthy twist to these fajitas.


    Any flavor goes well with vegetables on a Fajita. But these are Mediterranean flavored, because that seems to be my obsession this week. Alter the spice as you desire , roast up the vegetables for that charred flavor and load them on a Corn tortilla. The best part of all is a cooling, refreshing, 5 minute, on the spot, Tzatziki sauce for a topping.


    Although this takes more than 30 minutes to prepare, I could call this a quick weeknight meal, only if the veggies are pre-prepared. This is absolutely do-able to roast a whole batch of the veggies over the weekend when you have a little more time (which is what I get my husband to do when we are in long-distance so he can eat a ton of veggies, hassle-free 🙂 ). When you are ready to eat, just warm up your tortillas, load it up with veggies and top it off with the cooling Tzatziki sauce and you are good to go. It is strange that I am posting this recipe in the winter, but I am thinking of the upcoming spring and summer picnics that will see these Fajitas 🙂

    Prep time20 minutes
    Cook time45-50 minutes
    Serves2-3

    Ingredients

    Vegetables

    • Zucchini – 2, sliced into semi-circles (This recipe uses 1 green and 1 yellow squash)
    • Orange Carrot – 1 medium, sliced into semi-circles
    • Purple Carrot – 1 medium, sliced into semi-circles
    • Bell Peppers – 1 large, sliced
    • Cucumber – 1/2, finely chopped

    Legumes

    • Chickpeas – 1 can or 1 1/2 cups, cooked

    Spices and Herbs

    • Garlic Powder – 1 tbsp
    • Cinnamon Powder – 1 tsp
    • Cumin Powder – 1 tsp
    • Coriander Powder – 1 tsp
    • Red Chilli Powder – 1 1/2 tsps
    • Salt – As per taste
    • Lemon Juice – 1 tbsp
    • Lemon Zest – 1 tsp
    • Dill – 2 tbsp

    Dairy


    • Plain Greek Yoghurt – 1/2 cup

    Oils

    • Olive Oil – 3-4 tbsps

    Breads

    • Corn Tortillas – As many as you would like to eat 🙂

    Ingredient notes

    • Any combination of vegetables can be used
    • Any other legume such as kidney beans or black beans work well
    • Any plant-based protein source such as Tofu or Mushroom will also work well
    • I have used a Persian Cucumber in this recipe

    Method

    1. Pre-heat oven to 400F (Apprx. 200C)
    2. In a large mixing bowl, add all the vegetables, chickpeas, and olive oil. Then add, 1/2 tbsp garlic powder, chilli, cumin, coriander and cinnamon powders and mix well until every piece is coated well. Add salt and mix again
    3. Line a baking tray with aluminium foil or parchment paper. Add the coated mixture to the tray, spreading it out into a single layer for even roasting. Place the tray in the oven and roast for 40-45 minutes (time depends on the oven model and capacity)
    4. In the meanwhile, prepare the Tzatziki sauce. In a bowl, add the yoghurt, /12 tbsp garlic powder, salt, lemon juice and lemon zest. Whisk it together. Add the chopped cucumbers and dill and mix again. Chill the sauce in the refrigerator until ready to use
    5. As the roasting is about to end, warm up corn tortillas and place on a plate
    6. Once the vegetables are roasted and out of oven, load them up on the tortillas. Top with some Tzatziki sauce and enjoy the fajitas

    Cooking Suggestion

    • If you don’t have an oven at home, the coated vegetables can be sauteed on a pan, just for a little longer than an oven so that they char well
    • The chickpeas can also be roasted on a pan by stirring until they becomes slightly crisp on the outside

    You can also follow me on Instagram to be up-to-date with what is cooking my kitchen. If you like this recipe, do rate it and share your comments below. Don’t forget to post your version on Instagram using #foodformyloveblog.

  • Quinoa and Moong Dal Khichdi

    Khichdi, a dish from the Indian subcontinent, is made with rice and lentils. In the south of India, it is called Pongal. It is wholesome, mildly spiced and is easy to digest. Khichdi has a creamy porridge like consistency. It is a comfort food to some, a staple for others and a dish prepared on religious occasions in some cases.

    For me, it is most definitely comfort food. Growing up, Sunday nights used to be and continue to be Khichdi nights. Just the incredible aroma of the ghee roasted ginger and onions is enough to get me salivating. These days, when I am out of vegetables in my pantry or cannot think of what to cook, dear old khichdi comes to my rescue, and it never disappoints. In fact, when my husband comes home after a long day or work and workout, he throws everything in a pot while he freshens up. From start to finish, this is a meal under 30 minutes.

    Khichdi has evolved and many variations are seen today. The variations are based on flavor differences across the many Indian states, spices and most recently, a variation in lentils and grains used for the preparation.


    As someone who is not much of a rice eater, I have replaced the rice with quinoa, a more nutritious grain, and it beautifully complements the moong dal (petite yellow lentils), which are traditionally used in khichidis. It is a one-pot meal perfect for a quick weeknight dinner or a weekend lunch.

    Prep time10 minutes
    Cook time15 minutes
    Serves2

    Ingredients

    Grains and Lentils

    • Quinoa – 1 cup
    • Moong Dal (Petite Yellow Lentils) – 1.5 cups

    Vegetables

    • Onions – 1 medium, finely chopped
    • Mixed vegetables of choice (Optional) – 1 cup, chopped

    Spices & Herbs

    • Ginger – 2 tbsp, crushed
    • Jeera (Cumin Seeds) – 2 tsps
    • Green Chillies – 5-6, finely chopped (Feel free to add more or less depending on your spice tolerance)
    • Hing (Asafoetida) – 1/4 tsp
    • Salt – As per taste
    • Haldi Powder (Turmeric) – 1 tsp (Optional)
    • Cilantro – A few sprigs, finely chopped (For garnish)

    Oils

    • Ghee (Plain) – 2 tbsp (Recommended for great flavor)

    Method

    1. Set the Instant Pot to Saute mode.
    2. Add ghee and jeera.
    3. Once the jeera splutters, add the chopped ginger and onions. Saute until the onions are translucent
    4. Add the green chilies and saute for 1 minute
    5. Add the quinoa, yellow moong dal and water
    6. Add salt and mix well
    7. Cancel the saute mode. Turn on the pressure cook mode and set the timer to 15 minutes under high pressure. Close the lid and make sure the vent is closed
    8. After the cooking time is complete, manually release the vent and open the lid
    9. If the khichdi is thick, feel free to add some water to loosen it up. Completely your choice. Don’t worry if it is too mushy, that is the right consistency for a Khichdi
    10. Transfer to a serving bowl. Garnish with cilantro and cashews and serve piping hot

    Cooking and serving suggestions

    • A pressure cooker can be used for the recipe too. The cook time will be about 5-6 whistles
    • If using the stove-top method, soak the moong dal for 30 minutes and then follow-up the above method. It will greatly reduce the cook time
    • The Khichdi is best served with a a drizzle more of ghee on the top and with a side of yoghurt or pickle
    • If vegan, eliminate the ghee and use regular cooking oil
    • The petite yellow lentils can be replaced with sprouted mung beans, black lentils or other lentils of your choice

    You can also follow me on Instagram to be up-to-date with what is cooking my kitchen. If you like this recipe, do rate it and share your comments below. Don’t forget to post your version on Instagram using #foodformyloveblog.

  • Masala Bhaat

    This dish holds a special place in my heart because it is from my childhood. It is a specialty of a close family friend who is Maharashtrian. She introduced me and my mum to her secret masala (spice mixture) that was used in this dish – Goda Masala. Whenever we met, she would prepare this dish and the house would simply smell magical. While I don’t get to eat her version anymore (because we live in different countries and we have not met in years), she does transport a whole load of the masala for me and mum.

    Goda masala is a unique masala from the Indian state of Maharashtra. It has a very distinguishable flavor and aroma. Its uniqueness comes from the use of very rare spices such as cassia buds and lichen. Every household is known to have their own variation and personal touch to the masala. While it has a very pungent aroma, it is not “hot”. The masala typically has standalone use in a dish due to its overpowering flavor. The version of masala that I use is from India and is not available here in the US (Maybe I will do a giveaway some day 🙂 ). In the meanwhile, other brands of this masala are readily available on Amazon or at an Indian grocery store.

    This dish makes for a perfect, one-pot weeknight meal and leftovers can be used for lunch boxes. Some basic spices, the secret masala, rice and a bag of frozen mixed vegetables are all you need. Go all out and use fresh vegetables if you have the time.


    Prep time10 minutes
    Cook time20 minutes
    Serves2

    Ingredients

    Vegetables

    • Mixed Vegetables – 2 cups, frozen (Or 2 cups worth of any combination of vegetables)
    • Baby Potatoes – 8-10, halved
    • Onion – 1 medium, finely chopped

    Spices & Herbs

    • Dhania Powder (Coriander) – 1/2 tbsp
    • Goda Masala – 2 tbsp
    • Tej Patta (Bay Leaf) – 1
    • Dalchini Powder (Cinnamon) – 1/2 tsp
    • Laung (Cloves) – 3-4
    • Elaichi (Cardamom) – 2 pods or 1/2 tsp of the powder
    • Green Chillies – 3-4, finely chopped
    • Ginger – 1/2 tbsp, crushed
    • Garlic – 1/2 tbsp crushed
    • Salt – As per taste
    • Fresh Dhania (Cilantro) – A few sprigs for garnish and spice paste

    Oils

    • Cooking Oil – 2 tbsp

    Grains

    • Rice – 1 1/2 cups (washed and soaked)

    Method

    1. In a blender, add cilantro, green chillis, ginger and garlic (with a splash of water) to make an aromatic green paste. Keep this aside for use later
    2. Turn on the Instant Pot to “sauté” mode. If using a pressure cooker, heat it up on medium heat
    3. Add 2 tbsp of oil. To this, add the bay leaves, cinnamon, cardamom and cloves. Fry for 30-45 seconds until the bay leaves start to sizzle
    4. Add onions and sauté until they are translucent
    5. All the baby potatoes, vegetables and sauté for 1-2 minutes
    6. Add the soaked rice and mix for 1 minute
    7. Add the blended green paste. Mix well for an additional 1-2 minutes
    8. Add coriander powder, goda masala and mix for 1-2 minutes
    9. Add the required water (approx. 3 cups of water of 1 ½ cups of rice), and then add salt as per taste
    10. Close the Instant Pot lid. Use the pressure cooker mode with a cook time of a 12-13 minutes. If using a pressure cooker, close the lid, place the pressure weight on the lid. Cook for 4-5 whistles
    11. Once the cooking is complete, manually release the pressure from the Instant Pot. If using a pressure cooker, wait for the cool down and then remove the pressure weight.
    12. Serve the masala bhaat on a plate. Garnish with lemon juice, fresh cilantro and dried coconut. Enjoy with a side of raita (spiced yogurt) or pickle

    Cooking Suggestions

    • This recipe can work just as well with other grains such as quinoa or cous cous (for those who want to avoid rice)

    You can also follow me on Instagram to be up-to-date with what is cooking my kitchen. If you like this recipe, do rate it and share your comments below. Don’t forget to post your version on Instagram using #foodformyloveblog.

  • Leek and Green Beans Subzi

    Leeks are an interesting vegetable. They are white and green and look like scallions, but are not. They are like a gourmet onion. They don’t have the pungency of an onion, but have a delicate onion flavor, and a sweet one at that. They add a subtle flavor to recipes without overpowering other flavors.


    Here are some pointers about purchasing leeks:

    • Clean white bulbs without any spots or blemishes are the freshest leeks
    • Firm, dark green leafs that are not wilted are also an indication of the freshness of leeks

    Cleaning and preparation of leeks is also important to be aware of. Leeks are grown in trench like settings deep in the soil. Once they are ready, they are pulled out of the soil. So, how should you clean them?

    • Rinse the entire leek from top to bottom under running water
    • Once you cut it up, place the cut pieces in a container cold water. This will let the soil and other debris to loosen and settle to the bottom of the container
    • Using your hands, pick out the cut pieces from the container and place into a colander, and re-rinse under running water
    • Pat dry with paper towel

    Leeks cannot be eaten raw, because they will have a harsh flavor. Starting from white portion of the leeks, following the light green portion and up until the dark green leafy portion can be consumed. The dark green leafs are tough and are difficult to consume straight. They can be cooked for a long time to soften and used in fillings or in soups, or it can be simply be used to flavor homemade broths.

    Leeks can be prepared in many different ways. They can sliced vertically into juliennes or can be sliced into ringlets. Because of their mild onion flavor, leeks work great as an onion replacement and in many different vegetable combinations. They can be sauteed or pureed.


    This “green” subzi has leeks and green beans, but is ripe for customization with vegetables and seasonings. The subzi is a simple saute with my choice of simple seasonings and be served with hot, fresh rotis.


    Prep time15 minutes
    Cook time15 minutes
    Serves2

    Ingredients

    Vegetables

    • Leeks – 2, sliced into ringlets
    • Green Beans – Fresh or frozen, 1.5 cups

    Spices & Herbs

    • Fresh Ginger – 1 tbsp, chopped
    • Cumin Seeds (Jeera) – 1/2 tbsp
    • Salt – As per taste
    • Haldi (Turmeric Powder) – 1 tsp
    • Kashmiri Red Chilli Powder – 1.5 tsp (For a milder spice, use Paprika powder)
    • Dhania (Corainder Powder) – 1 tsp
    • Tandoori Masala (Optional) – 1/2 tsp
    • Kasuri Methi (Dried Fenugreek Leaves) – A handful to sprinkle

    Oils

    • Cooking Oil – 1-2 tbsp

    Method

    1. In a pan, add oil and and jeera. Let the jeera splutter
    2. Add the chopped ginger and saute for 30 seconds
    3. Add the green beans and saute until they have cooked all but a little
    4. Add salt, haldi, red chilli powder and coriander powder. Mix. Add a sprinkle of water to de-glaze the pan
    5. Add the leek ringlets, mix and cook (with lid covered) for 3-4 minutes. Make sure the ringlets are not a mush, but have become tender
    6. Add tandoori masala and kasuri methi. Mix well and cook (with the lid open) for an additional 1-2 minutes
    7. Take the pan off the heat. Serve the subzi with fresh, hot rotis

    You can also follow me on Instagram to be up-to-date with what is cooking my kitchen. If you like this recipe, do rate it and share your comments below. Don’t forget to post your version on Instagram using #foodformyloveblog.