Blog

  • Double Decker Paneer Tikka Sandwich

    There is just something about sandwiches made by street side vendors in India. The incredible combinations, the lip-smacking masalas and the cheesy-ness of the sandwiches, they are all simply drool worthy. While I have not eaten many of them myself in the recent days, I have seen several videos on social media of food vloggers posting the street style sandwiches. So I have taken inspiration from them to create this delicious sandwich.

    I chose paneer for this sandwich because vegetables by themselves did not appeal to me. There had to be a protein or something heavy as a part of the sandwich. What is paneer if it is not paneer tikka! So I took it up a notch and decide to make paneer tikka and build a double decker sandiwch.

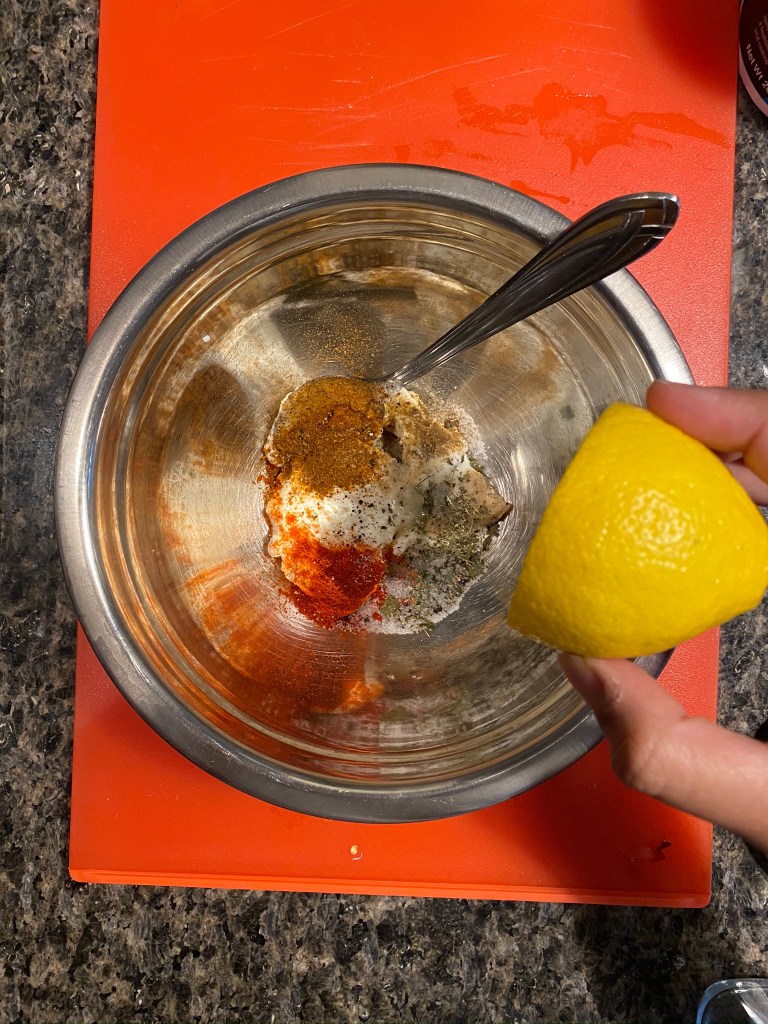
    Honestly, the paneer tikka recipe was as random as it could get. I just picked up masalas I could reach in the pantry and made a marination out of it and then grilled the paneer to perfection.


    While the paneer tikka carries a great flavor on its own, the second layer of the sandwich needed flavor. That’s where the sandwich masala comes in handy, which I chose to prepare from scratch. Again, this masala varies so greatly between households and different vendors, just go for the flavors that appeal to you.

    I think the best part of a sandwich is the sauce or the chutney that is on the bread slices. Typically, you will see a mint or cilantro chutney (which is what I have used) or a red chilli chutney. But the first one works better because that is typically served with Indian grilled items. The flavors just work so well.


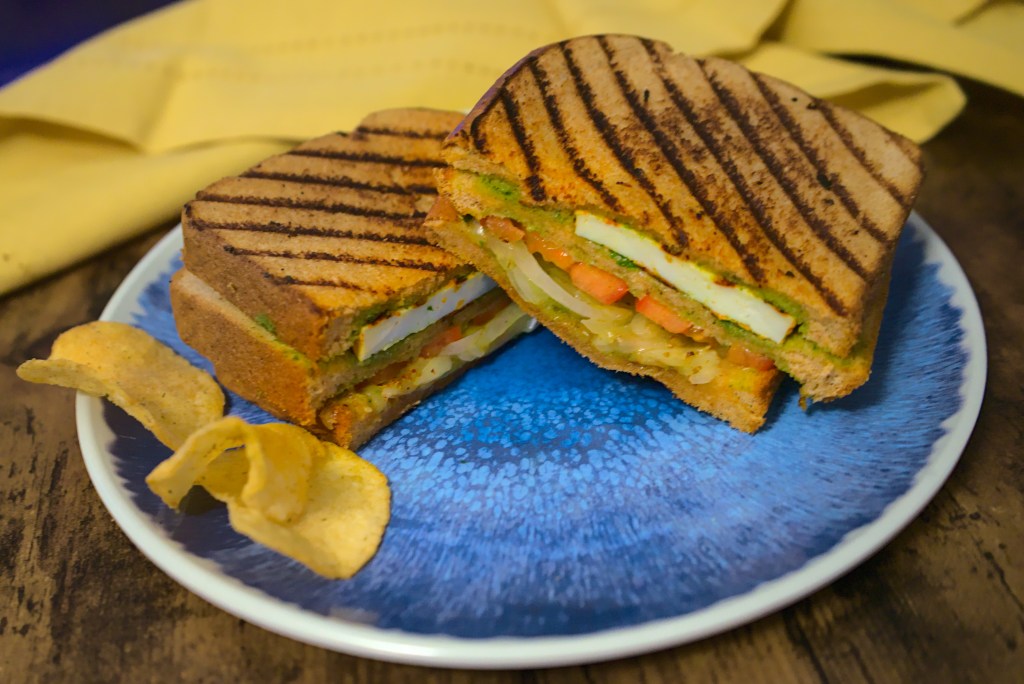
    While this could easily be a snack style sandwich, I and the hubby (who is die-hard paneer lover) enjoyed it for dinner. All in all, a lightly crisped buttery bread with softened vegetables and gooey cheese is a delectable treat for any day.

    Prep time60 mins
    Cook time20 minutes
    Serves2

    Ingredients

    Paneer Tikka

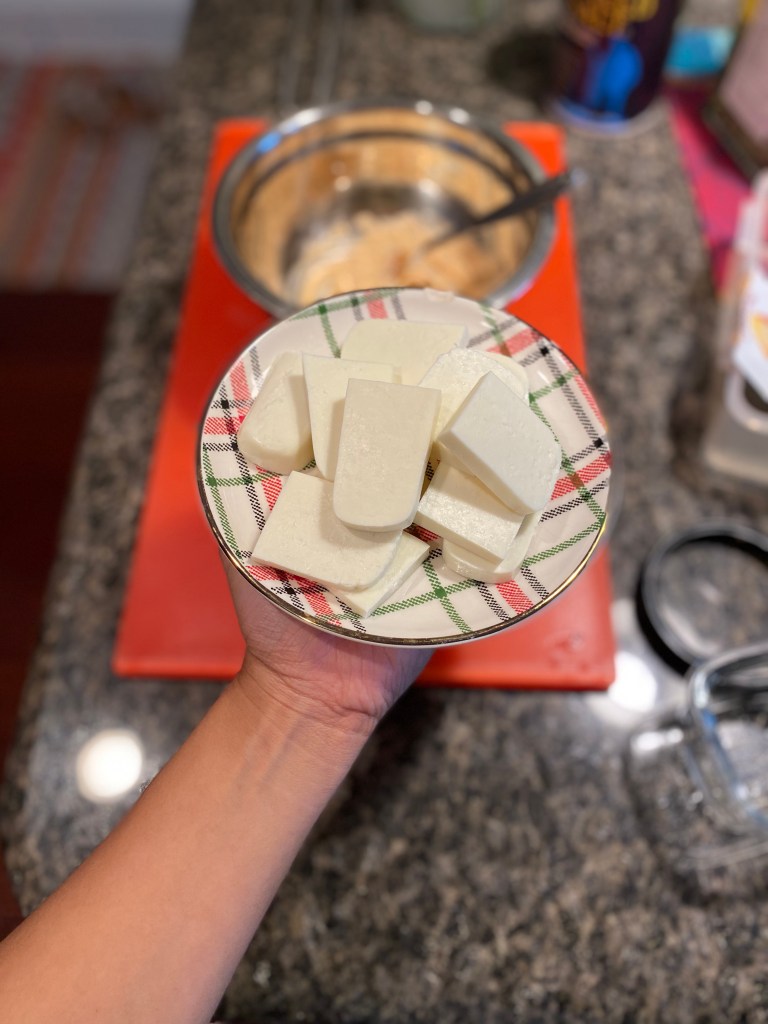
    • Paneer – 6 pieces, sliced into 3″x2″ size
    • Greek Yoghurt – 1/2 cup
    • Ginger-Garlic Paste – 1 tbsp
    • Red Chili Powder – 1 tsp (Or adjust as per taste)
    • Cumin-Coriander Powder – 1 tsp
    • Garam Masala – 1 tsp
    • Kasuri Methi – 1 tbsp, crushed
    • Black Pepper – 1/2 tsp
    • Lemon Juice – 1 tbsp
    • Salt – As per taste

    Sandwich Masala

    • Cumin Seeds – 1 tsp
    • Fennel Seeds – 1 tsp
    • Cinnamon – 1/4 tsp
    • Mango (Amchur) Powder – 1/2 tsp
    • Red Chili Powder – 1 tsp

    Green Chutney

    • Cilantro – 1/2 cup, tightly packed
    • Mint Leaves – 1/2 cup, tightly packed
    • Green Chilies – 2-3
    • Garlic – 1 clove
    • Lemon Juice – 1/2 tsp
    • Salt – As per taste

    Other Ingredients

    • Sandwich bread of choice – 6 slices (3 for each sandwich)
    • Butter – As needed
    • Oil for grilling
    • Cheese of choice – As needed
    • Onion – 1 small, thinly sliced
    • Tomato – 1 small, thinly sliced

    Method

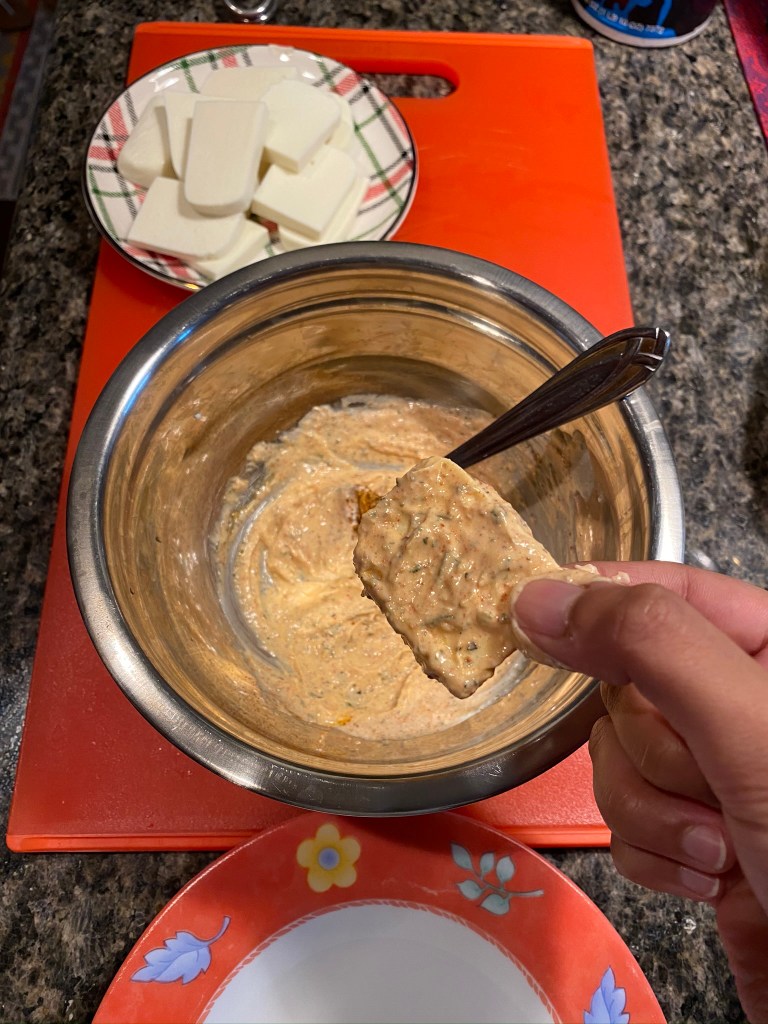
    1. Mix all the marinade ingredients together. Coat the paneer slices in the marinade and refrigerate for 60 minutes
    2. In the meanwhile, prepare the green chutney by adding all ingredients to a blender. Taste and adjust salt as needed. Set aside
    3. Also prepare the sandwich masala by adding all ingredients to a spice blender. The masala should be a fine powder. Set this aside
    4. After 60 minutes, heat a grill pan and brush some oil on the pan. Carefully place the marinated slices on the pan. Grill the slices on medium heat for 2-3 minutes (each side) until light grill marks appear on both sides. Take them off the grill and place on a paper-towel lined plate
    5. To prepare the sandwich, place 2 slices of bread on a flat surface and apply butter on each, followed by the green chutney on each. Then, place 3 paneer tikka pieces on one of the bread slices. Cover with the other bread slice. This is the 1st layer of the sandiwch
    6. For the second layer, apply butter, followed by green chutney on the top of the first layer. On this, place sliced tomatoes and onions. Generously sprinkle sandwich masala. Generously add cheese. Then, place another slice of bread on a flat surface and apply butter, followed by green chutney. Place this over the vegetable and cheese layer. Then, butter the top of this slice. This completes the 2nd layer of the sandwich
    7. Place the buttered side of the sandwich on a grill pan on medium heat. Cook for 2-3 minutes until light grill marks appear. Repeat on the other side
    8. Transfer to a plate, cut in half and enjoy with a side of ketchup or dunk it in the remaining green chutney

    You can also follow me on Instagram to be up-to-date with what is cooking my kitchen. If you like this recipe, do share your comments below. Don’t forget to post your version on Instagram using #foodformyloveblog.

  • Stuffed Dates

    Having grown up in the Middle East in Kuwait, Dates were a regular in our kitchen. They are healthy and oh so delicious. And frankly, they can be eaten straight or used in recipes in so many different ways.

    Dates, although they are high in carbohydrates (mainly sugars i.e. glucose and fructose), they are:

    • An incredible source of fiber
    • A source of vitamin A and folate (A B vitamin)
    • A source of minerals such as calcium and magnesium

    So, these other benefits offset the high sugar content. Particularly, the high fiber content actually prevents a sugar spike and provides a slow and sustained release of energy. Which is why, I use this as an amazing pre-work out snack, which is what this recipe is.

    Dates are perfect for snacking, and stuffing! So whether you need a pre-workout snack, a snack to get you through the afternoon slump or you want to jazz up your appetizer spread for your date night or next party, Dates are there for there you.

    Make it tasty, make it fun, make this your snack πŸ™‚


    Prep time5 minutes
    Cook timeN/A
    Serves2

    Ingredients

    Dried Fruit

    • Mejdool Dates – 4 (pitted)

    Nuts

    • Pistachios – 4 tbsp, chopped
    • Coconut Flakes – 4 tbsp (sweetened or unsweetened)

    Method

    1. In a bowl, mix the chopped pistachios and coconut flakes
    2. Stuff the dates
    3. Enjoy! πŸ™‚

    Alternative stuffing combos

    • Almond butter and coconut flakes
    • Goat cheese and a sprinkle of paprika
    • Salted caramel and chocolate chips
    • Goat cheese and pistachips

    You can also follow me on Instagram to be up-to-date with what is cooking my kitchen. If you like this recipe, do share your comments below. Don’t forget to post your version on Instagram using #foodformyloveblog.

  • Dates-Coffee Shake

    If there is coffee in something, my hubby and I are there, actually, my hubby would sprint there. He drinks a lot of coffee and pretty much enjoys anything with coffee in it. So this recipe worked out great for him because of that, and for me because it has some amazingly healthy ingredients. Now, that is what I call a win-win.

    At the beginning of 2020 when I was preparing for a half marathon, I went for a practice run one morning. After a 9 mile run, I was absolutely starving and needed something extremely filling and healthy . So my hubby took me to a smoothie place where he got me a Date-Coffee smoothie and it was instant revival of energy. It was so refreshing, so filling and so incredibly delicious.

    I replicated the recipe at home, with some minor tweaks that resulted in a perfect and refreshing evening summer snack for the hubby and it also made it to our summer breakfast rotation. Like Joey from the TV show “Friends” says: “What’s not to like? Dates..goood. Coffee..goood. Almond butter..goooooood” πŸ™‚


    Prep time5 minutes
    Cook timeN/A
    Serves1

    Ingredients

    Dried Fruit

    • Mejdool Dates – 3, pitted

    Nuts and Seeds

    • Almond Butter – 1 tbsp (I used Justin’s Almond Butter, 1/2 a sachet)
    • Chia Seeds – 1 tbsp

    Dairy

    • Almond Milk – 1 cup (I used Silk Almond Milk)

    Other

    • Coffee Powder – 1/2 tbsp + 1 tsp (for garnish)

    Method

    1. To a blending jar, all the ingredients
    2. Add some crushed ice (if desired)
    3. Blend until the smoothie is thick and frothy
    4. Pour into a glass, garnish with coffee powder and enjoy! πŸ™‚

    You can also follow me on Instagram to be up-to-date with what is cooking my kitchen. If you like this recipe, do share your comments below. Don’t forget to post your version on Instagram using #foodformyloveblog.

  • Masala Puri

    Street food culture exists everywhere around the world, and each culture has its own street food delicacies. The most popular Indian street food is chaat. For those who don’t know, chaat is not a dish in itself, but a group of savory dishes that are sweet, spicy, tangy, crunchy, all at once.

    Across India, there are a variety of chaats, each with their own flavors and twists. One such chaat from the southern Indian state of Bangalore is Masala Puri. Although this chaat is like none other, it is still quite similar to a Ragda Patties or Aloo Chole Chaat. The dish is a flavor explosion and textural delight in the mouth. Starting with the earthy flavors of cinnamon and clove, followed by the freshness of the mint and cilantro and ending with the crunch of the toppings. This dish is an experience in itself.


    For me, this dish even more special because it has special memories associated with it. My favorite place to eat Masala Puri was at a chaat joint called Ice Thunder. It was located in a bustling market in Bangalore. As a kid, everytime I visited India, shopping at that market was a must. And eating at Ice Thunder was a ritual after the shopping, it was not to be missed. My grandpa would walk me through the markets as my mum would shop and eventually when I would get cranky, we would all go and enjoy a plate of Masala Puri. Food memories are what drive me to re-create many of the dishes that I post.

    This dish seems complicated the way I am explaining it. But, it is straightforward if you are patient and follow instructions πŸ™‚ There are no special ingredients needed, just everything you have in your pantry, except the papdi/puri (not sure how many people store papdi at home regularly).

    Do try this recipe. It will not disappoint.

    Prep time15 minutes
    Cook time25 minutes
    Serves2-4

    Ingredients

    Masala Paste

    • Onion – 1 small, finely chopped
    • Tomato – 1 small, finely chopped
    • Cilantro – 1/4 cup, finely chopped
    • Mint – 1/4 cup, finely chopped
    • Green Chilies – 2
    • Clove – 2
    • Cinnamon – 1 small stick or 1/2 tsp ground
    • Cardamom – 2 pods or 1/4 tsp ground
    • Salt – As per taste

    Vegetables

    • Potato – 2 small
    • Green Peas – 1 cup (Fresh of frozen)

    Toppings

    • Onion – 1/4 cup, finely shopped
    • Tomato – 1/4 cup, finely chopped
    • Carrot – 1/4 cup, grated
    • Cilantro – 1/4 cup, finely chopped
    • Dates/Tamarind chutney – A few teaspoons
    • Sev – A handful
    • Papdi/Puri – A handful for each serving

    Ingredient notes

    • The original recipe calls for dried white peas (safed matar) that are soaked and pressure cooked. But the recipe works just as well as fresh or frozen green peas
    • Sev is basically an Indian snack item made of Chickpea flour, which resembles noodles, except these are cut into tiny pieces. Sev is easily available at any Indian grocery store or it is easily available online on Amazon

    Method

    1. Boil potatoes and peas. If using the Instant Pot, place the peas and potatoes in the pot, close the lid, set the vent to closed mode and select the pressure cook option with the timer set to 10 minutes. If using a regular pressure cooker, pressure cooker for 2 whistles
    2. In the meanwhile, prepare the masala paste. For this, add oil to a pan. Once it has hot, add the cinnamon, cloves, green chilies and onions. Saute until the onions are translucent. At this point, add tomatoes and cardamom. Saute until the the mixture is completely cooked. Take it off the heat and set it aside to cool
    3. Add the masala paste mixture to a blending jar. To this jar, add the cilantro and mint. Add a splash of water and blend into a smooth paste
    4. Add the paste back to the pan, add salt and bring it a gentle boil. At this point, add the boiled potatoes and peas. Now, using a masher or the back of a wooden spoon, carefully mash the potatoes and peas. Try not to mash them completely, leave a few chunks
    5. Now add water for the desired consistency and boil for 3-5 minutes. Then take it off the heat and set it aside
    6. To prepare a serving of masala puri
      1. Crush some papdi or puri and place it at the bottom
      2. Spoon a generous amount of the masala puri sauce
      3. Top with chopped onions, tomatoes, carrots and cilantro
      4. Add a few swirls of dates/tamarind chutney
      5. Garnish with sev
    7. Enjoy the hot and spicy masala puri πŸ™‚

    You can also follow me on Instagram to be up-to-date with what is cooking my kitchen. If you like this recipe, do share your comments below. Don’t forget to post your version on Instagram using #foodformyloveblog.

  • Maghmour

    I consider myself a global citizen, especially from a food standpoint. Having lived in and traveled to many countries, food has always been an integral part.

    I grew up in the Middle East, in Kuwait, where I had friends from many different nationalities. And I grew up eating Kuwaiti, Egyptian, Lebanese and many other types of food. To my surprise always, the vegetarian dishes in these cuisines are incredibly delicious.

    One such Lebanese curry is the Maghmour. With my initial research, I found this dish to be quite familiar. I racked my brains to remember where I had tried this and realized that I had tried this at a cute little Middle Eastern restaurant on the campus of Purdue University, where I did my undergrad. For an undergrad away from home for the first time, eating such familiar food (other than Indian food) was comforting. So, I am attempting to replicate the recipe with my own take on it.

    This is a stew like curry that has Eggplants and Chickpeas that is simmered in an incredibly simple and flavorful sauce. Although it is a one-pot meal, it requires a little pre-work to prepare the eggplant. But the end result it absolutely worth it. Barring the pre-work with the Eggplant (which takes about 25 minutes), the dish comes together in 30-35 minutes. The stew like curry can be served with pita bread, couscous or rice.


    For Eggplant lovers like me and my hubby, who want to try something outside of the many Indian style Eggplant recipes, this curry is a great change. It makes for a warm meal like a hug.

    Prep time40 minutes
    Cook time30 minutes
    Serves2-3

    Ingredients

    Vegetables

    • Eggplant – 1 large, cut into 1″ cubes
    • Onion – 1 large, diced
    • Tomato – 2 large, diced

    Spices, Flavors and Herbs

    • Garlic – 3 cloves, finely chopped
    • Mint – 2 tbsp, finely chopped
    • Red Chili Powder – 2 tsp
    • Cinnamon Powder – 1/2 tsp
    • Nutmeg – 1/4 tsp
    • Salt to taste
    • Tomato Paste – 1/4 cup

    Beans

    • Chickpeas – 1 can, drained and washed

    Oils

    • Olive Oil – 3-4 tbsp
    • Cooking Oil – 2-3 tbsp

    Method

    1. Pre-heat oven to 375F
    2. Wash 1 large eggplant and cut it into 1″ cubes. Place on a baking tray, drizzle with olive oil and bake for 30 minutes. Broil for the last 10 minutes. Keep an eye on the eggplant as you want a slight char, not burnt eggplant
    3. In the meanwhile, add oil to a pot and heat it
    4. Once the oil is hot, add the onions and cook for 5-10 minutes until they are slightly browned and beginning to caramelize
    5. Add garlic and saute for 1 minute, followed by chopped mint and saute for 1 minute
    6. Add tomatoes and cook them until they are mushy. Then, add tomato paste and mix with the onion-tomato mixture. Add a splash of water to de-glaze the pot
    7. Add all the spices and mix. Add a splash of water to de-glaze the pot. Cook for 1-2 minutes
    8. Add the chickpeas and eggplant. Add water, stir and simmer for 15-20 minutes on medium-high heat, stirring occasionally
    9. Top the eggplant with mint or parsley with onion slices and serve (Optional – You can top it with a dollop of yoghurt)

    You can also follow me on Instagram to be up-to-date with what is cooking my kitchen. If you like this recipe, do share your comments below. Don’t forget to post your version on Instagram using #foodformyloveblog.

  • Bengali Style Pumpkin (Kumro Torkari)

    Pumpkin is one of my favorite vegetables. Its sweetness lends itself to both dessert and savory dishes. And it cooks quickly. And, if I get to eat my favorite vegetable in the form of a different cuisine, regional Indian cuisine in this case, it is definitely something I would explore. So, I tried this quick subzi recipe of a Bengali (Eastern Indian State) style dry Pumpkin curry (also called Kumro Torkari) that is flavored with one of my new favorites spices, Panch Phoran, also an Eastern Indian spice blend.


    Quick side bar on the Panch Phoran. Panch means five and Phoran means spice. This is a 5 spice blend from Eastern India and is used in Bengali, Nepali and Bangladeshi cuisine. The blend contains:

    • Kalonji (Nigella Seeds)
    • Methi (Fenugreek Seeds)
    • Jeera (Cumin Seeds)
    • Sarson (Mustard Seeds)
    • Saunf (Fennel Seeds)

    Each of the above spices has a strong and distinct flavor and they all amalgamate to create a unique flavor for the spice blend. In order for this unique flavor to be diffused through the food, it is always fried in oil or ghee in order for the essential oils of the spices to be released.


    Kumro Torkari (Kumro is Pumpkin and Torkari is subzi/vegetable) is a quick and easy side for rotis or for dal-chawal. It uses a minimal spices and yet is so flavorful. It is the perfect balance of sweet and spicy. Traditionally, this recipe calls for using Pumpkin with skin, but I chose to peel it off.

    Prep time5 minutes
    Cook time20 minutes
    Serves2

    Ingredients

    Vegetables

    • Pumpkin – 2 cups, diced

    Spices, Flavors and Herbs

    • Dried Red Chili – 2
    • Panch Phoran – 1 tbsp
    • Red Chili Powder – 1 tsp
    • Dhania (Coriander) Powder – 1/2 tsp
    • Jeera (Cumin) Powder – 1/2 tsp
    • Salt – As per taste
    • Cilantro – A handful for garnish

    Oils

    • Cooking Oil – 2 tbsp (Mustard Oil is recommended, but is optional)

    Method

    1. Add oil to a pan and heat it
    2. Once the oil has heated, add the panch phoran and dried red chili. Let the spice blend fry in the oil for 30 seconds to 1 minute until the aromas are released
    3. At this point, add the diced pumpkin to the pan. Coat it with the oil and spice blend. Cook it with the lid closed for 10 minutes on medium-high heat and for another 5 minutes with the lid off on medium-high heat (This prevents the pumpkin from turning into a mush and will hold its shape)
    4. After this, add all the masalas and salt. Add a splash of water to de-glaze the pan, mix well and cook for an addition 3-5 minutes. Check constantly to ensure pumpkin pieces are tender. Using a spoon, cut a piece of pumpkin. If it is an easy and clean cut, the pumpkin pieces are cooked through and are not mushy. At this point, take the subzi off the heat
    5. Garnish with cilantro and serve with rotis or dal-chawal

    You can also follow me on Instagram to be up-to-date with what is cooking my kitchen. If you like this recipe, do share your comments below. Don’t forget to post your version on Instagram using #foodformyloveblog.

  • Pineapple Gojju

    The smell of sweet jaggery, tangy tamarind and roasted sesame. That is the smell that I used to wake up to many mornings. That smell was my mum making gojju. What is it you ask?

    The simplest explanation for gojju is that it is a curry that uses a masala paste prepared using roasted and ground spices together with a vegetable of choice. It is a sweet, spicy and tangy curry that is usually eaten as a side with rice and rasam or is eaten with rice itself. Gojjus are a delicacy in the southern Indian state of Karnataka, which is where I come from.

    Gojjus are made with a variety of vegetables such as Bell Peppers, Okra, Tomato, Plantain, Eggplant and Pumpkin, which is one my favorites. But an even more favorite one is a Pineapple gojju. Having grown up outside India, my my only source of gojju would be my mum. But often times, when we visited India and attended pujas (religious ceremonies) or weddings, I noticed that a Pineapple gojju was a constant on the plantain leaf food menu. Turns out, this gojju is extremely popular for festive and celebratory meals. I loved it so much that I had to have it on my wedding menu πŸ™‚


    I used to think that making gojju is difficult, because eating my mum’s gojju was a magical experience which I believed I could not replicate. While that is almost true, this first attempt at making this Pineapple gojju was quite successful. My husband is from Andhra (another southern Indian state) and gojjus are not a delicacy there. So neither was he familiar with it and nor did he like it. But this, he gorged on it. So, I am going to give myself a pat on the back and share the recipe with you all.

    To make this gojju, you will need a couple of specific ingredients (if you are not an Indian household, you want to head over to the Indian grocery store or shop at Amazon). As far as the Pineapple, fresh or canned, either of them work. I encourage you to try it because it is a great accompaniment not only with rice, but can also be enjoyed with rotis.

    Prep time10 minues
    Cook time15 minutes
    Serves2

    Ingredients

    Fruits

    • Pineapple – 1 cup, chopped (fresh and ripe or canned)

    For the masala paste

    • Chana Dal (Split Baby Chickpeas) – 1 tbsp
    • White Sesame Seeds – 1 tbsp
    • Fenugreek Seeds – 1 tbsp

    Other

    • Green Chillies – 3, slit lengthwise
    • Tamarind paste – 1 tsp (juice or concentrate can also be used)
    • Jaggery Powder – 1 tbsp
    • Salt – As per taste
    • Dry Coconut – 1/4 cup
    • Turmeric Powder – 1 tsp


    Method

    1. In a pan, add the ingredients for the masala paste and dry roast it until it turns lightly brown. Set aside in a bowl or on a plate to cool
    2. In the same pan, add oil and mustard seeds. Once the mustard seeds crackle, add the slit green chillies and fry for 30 seconds. Remove only the fried green chillies and set them aside
    3. To make the masala paste, add the roasted ingredients to a blending jar. To this jar, add dry coconut, fried green chillies and some water. Blend into a smooth paste
    4. Heat the same pan with the crackled mustard seeds. To this, add the chopped pineapple and saute for 1-2 minutes
    5. Add salt and turmeric powder and mix. Continue to sautee until the pineapple is cooked, but mushy
    6. At this point, add the masala paste and mix well. To this, the tamarind paste, water for the desired consistency and let the gojju simmer for 3-5 minutes
    7. Before taking it off the heat, add jaggery powder and mix well
    8. Transfer to a serving bowl. Enjoy the gojju with rice, as a side with rice and rasam or even with rotis

    You can also follow me on Instagram to be up-to-date with what is cooking my kitchen. If you like this recipe, do share your comments below. Don’t forget to post your version on Instagram using #foodformyloveblog.

  • World Food Safety Day

    The first ever World Food Safety Day was celebrated on June 7, 2019. The purpose of marking this international day was to draw attention to food safety issues and prevention of food-borne illnesses. It was meant to bring the food safety professional community, the industry, the government and consumers all together as a reminder on the importance of food safety.

    As a food safety professional, my thoughts on world food safety day are quite strong, emotional and comes from a good place in me. This is because I am not sure if the concept of food safety is as well understood by consumers. Clearly there is an entire professional community, industry and section of the government working to ensure that the food that reaches consumers is safe. But, consumers’ understanding of food safety remains a challenge. And that is a problem, because food safety is everyone’s business.

    I say this from personal experience. Very often, when I explain little things to my family and friends that could make food preparation or consumption unsafe, I get brushed off as paranoid. This is a personal challenge for me as a food safety professional because I can do my daily job to contribute to the safety of the food supply chain, but if I can’t protect my family and friends, it is a problem.

    Educating people about food safety is something I take very seriously, no matter how many times I get brushed off. Yes, science may not be of interest of everyone, but there are lot of things that only science can explain. Food-borne illness is one of them. Every time you get a stomach infection and you wonder why, it is because of a food item that was prepared or consumed in an unsafe manner. And that can be explained by the growth of micro-organisms in the food that made you sick.

    So, today, on world food safety day, I would like to share to share some of the practices that I follow everyday and strongly encourage everyone to follow. Knowledge is prevention and prevention is better than reaction.

    Shopping


    • When shopping, use separate bags for fruits and vegetables, especially meat/poultry. This will help avoid cross-contamination in the cart, during checkout and even during storage in your refrigerator
    • Have a cooler with ice packs in your car, especially for hot days. This will ensure that fruits, vegetables and meat/poultry will be stored at safe temperatures on your way home from the grocery store
    • If purchasing pre-cut fruits, vegetables, salads etc. make sure they are placed in the refrigerated isle and/or on ice

    Cleaning


    • Clean (and dry) chopping boards and knives after each use. Disinfect chopping boards at least once a week
      • Disinfection tips:
        • To disinfect wooden chopping boards, sprinkle a generous amount of Kosher Salt on the board. Take half a lemon, squeeze the juice, and use the rind of the lemon to rub the board with the salt and lemon juice mixture. Rinse and dry. This will leave your chopping board smelling fresh
        • While both the above ingredients have anti-microbial properties, they may not be strong enough. An unscented bleach (about 1 tbsp) can also be used to disinfect the wooden chopping board (after washing it with soap and hot water)
        • Vinegar is another well-known household disinfectant that is natural and effective at disinfecting surfaces
    • Wash, wash, wash your hands with soap and water before beginning meal prep. This is the most obvious and easiest step, yet the most forgotten or taken lightly. Also remember to wash your hands after handling raw meat/poultry before handling any fruits, vegetables or cooked food
    • Clean fruits and vegetables under running water prior to use. DO NOT use bleach or soap to clean the fruits and vegetables. Soap and bleach are not intended for ingestion
      • Cleaning tip:
        • To wash leafy greens, separate the leafs from the stems and place the leafs in a pot of cold water for 5 minutes. This will allow dirt and particles to settle to the bottom of the pot
        • Discard the water and re-rinse the leafs under running water for 1-2 minutes to allow any stuck on dirt to wash off. For leaves with crevices, scrub the surface of the leaves to remove any hidden dirt

    Storage


    • Store fruits, vegetables and raw/meat and poultry separately
    • Store raw meat/poultry in a bag/wrap on the bottom shelf of the refrigerator
    • Store cooked food away from raw products
    • For safe storage, the temperature of the refrigerator should be at or below 40F (Refrigeration slows bacterial growth)

    Cooking


    • Cook meat and poultry thoroughly. Use a temperature gauge to ensure the food has reached a safe internal temperature
      • A safe internal temperature is the temperature at which harmful bacteria will be inactivated so that they cannot grow or multiply. A useful chart on safe internal temperatures published by the United States government can be found here
    • Marinades or sauces that are used on raw meat/poultry should not be used on cooked food
    • For summertime grilling, when picking up grilled meat off the barbecue, don’t place it on the same plate that held the raw meat (unless it has been washed)
    • When preparing to bake a cookie or a cake, do not taste the raw dough or batter. While it may be tempting to do so, there may be bacteria lurking in the raw eggs or flour in the dough and batter that can you sick

    If you are wondering why it is important to follow the above practices, it is because you cannot see, taste or smell bacteria that cause foodborne illnesses. Furthermore, foodborne illnesses can also occur due to the development of toxins from mold and bacteria in foods, which is also not easy to detect.

    As a food safety professional, I can tell you that there are several people who work day and night to ensure that the food that reaches consumers is safe. But, it is also the consumer’s responsibility to learn to recognize hazards and follow appropriate measures to mitigate the risk of foodborne illnesses. I encourage you to be mindful of food safety. I urge you to educate your little ones about the steps necessary to eat safe and healthy food and I request you to pass on the message to your family and friends. Let’s build a food safety culture together.


    If you have questions or comments on any topic related to food safety, do share them below.

  • Tex-Mex Breakfast Bowl

    If you have read a few of my posts, you will see me mention that I love brunch, especially on the weekends. I also enjoy food in a bowl format, something that incorporates different food components, textures and nutrition. With that in mind, this Tex-Mex Breakfast Bowl came together with some of my favorite and go-to ingredients.


    From a nutritional standpoint, this bowl hits the spot. There is Quinoa and Black Beans checking the box for protein. There are Sweet Potatoes checking the box for complex carbohydrates and there is Avocado checking the box for good fat. The Bell Peppers add a beautiful crunch, color and vitamins. So all in all, a colorful, hearty and healthy brunch bowl πŸ™‚


    The ingredients seem like a lot in number, but what needs to be done with them so ridiculously simple. They can all cook simultaneously, so just a few minutes need to be spent preparing the ingredients and putting the bowl together.

    Prep time10 minutes
    Cook time20 minutes
    Serves2

    Ingredients

    Beans

    • Black Beans – 1 can (15oz) [Approx. 2 cups]

    Grains

    • Quinoa – 2 cups, uncooked

    Vegetables

    • Sweet Potatoes – 1.5 cups, cubes
    • Bell Peppers – 1 cup, chopped (I used multi-colored ones, feel free to use whatever is available)
    • Onions – 1 cup, diced + 1/4 cup finely chopped
    • Tomatoes – 1 cup, diced

    Spices, Flavors and Herbs

    • Cilantro – A handful
    • Garlic – 2 tbsps, finely chopped
    • Coriander Powder – 2 tsp
    • Cumin Powder – 2 tsp
    • Jalapeno – 1, sliced
    • Red Chilli Powder – 2 tsp (Alternatively, Red Chilli Flakes or Paprika can also be used)
    • Salt – As per taste

    Fruit

    • Avocado – 1, sliced
    • Lemon – 1, Cut into 4 quarters

    Oils

    • Cooking Oil – 4 tbsp

    Method

    1. Cook the quinoa using the package instructions.
    2. In the meanwhile, cook the sweet potatoes. For this, heat 2 tbsp of oil in a pan. To this, add 1 tbsp of chopped garlic. Once the garlic starts to brown, add the cubed sweet potatoes. Add salt, 1 tsp each of coriander and cumin powder and 1 tsp of red chilli powder. Cook for 5-7 minutes until the sweet potatoes are tender and can be easily halved (not mashed) with the edge of a wooden spoon. Set these aside
    3. In the same pan, add 2 more tbsp of oil. To this, add diced onions and the remaining 1 tbsp of chopped garlic. Cook the onions and garlic. Next, add the chopped peppers and black beans. To this add salt, 1 tsp each of coriander and cumin powder and 1 tsp of red chilli powder. Cook this mixture for approx. 5 minutes until all the flavors have amalgamated. The goal is to maintain the texture of the peppers and the beans, and not to have them mashed. Set this aside
    4. To prepare the mild salsa, in a bowl, add the finely chopped onions, cilantro and diced tomatoes. To this add salt and a squeeze of 1 quarter of a lemon
    5. Time to prepare the bowl with layers. At the base, place some cooked, fluffed quinoa. On top of this, add some black bean and pepper mixture. On this, add some sweet potatoes. Top this with some salsa, sliced avocado, sliced jalapenos and a squeeze of lemon juice. Enjoy the scrumptious bowl πŸ™‚

    Serving Suggestion

    • For extra protein, add in some scrambled eggs

    You can also follow me on Instagram to be up-to-date with what is cooking my kitchen. If you like this recipe, do share your comments below. Don’t forget to post your version on Instagram using #foodformyloveblog.

  • Mysore Style Churmuri

    In India, evening chai (tea)/coffee and snacks are a must. And one such snack item is chaat. There are a gazillion types of chaats across India but very few are commonly known and consumed, such as Pani Puri, Dahi Papdi Chaat, Bhel Puri, etc. Being here in the US, we don’t have the luxury of street food and chaats. And neither do chips and cookies make the cut for a satisfying evening snack. So, we have to turn to homemade snacks.

    So, if you are like me and are looking for an easy evening snack and different than the usual, this one is for you. This chaat is a true taste of the southern Indian state of Karnataka, particularly from a city called Mysore.


    Mysore is very, very, very close to my heart. Not only is it the city where I was born, but it is the city where my mother was born and raised. So we have double the memories in this city. And some of the best memories are related to food, aren’t they? Churmuri is one such memory.

    Churmuri (Also known as Jhalmuri or Bhel Puri) is a snack made out of puffed rice. The additives are the ones that vary across India and give it their distinct flavor. While the common ones are tomatoes, carrots, green chillies and peanuts, some regions use different types of chutneys for added flavor. But this one uses a special blend of powders namely Puliyogre (Tamarind Rice) Powder and Chutney Powder. These powders originate in South India and the Mysore variation of these powders is what makes this Churmuri Mysore style.

    This Churmuri is truly unlike anything you will find anywhere else. My mum used to enjoy this Churmuri every single day after college. It used to be served by a particular street cart vendor who was the only one who was permitted to be on the premises of my mother’s all girls college. Such an interesting story and such a delicious memory.


    Try it and you not be disappointed. The specific powders that I mentioned above are readily available at Indian grocery stores. I use the ones that my mum and my grandmother’s sister make for me. More delicious memories πŸ™‚

    Prep time15 minutes
    Cook timeN/A
    Serves2

    Ingredients

    Base

    • Puffed Rice – 2 cups

    Vegetables

    • Carrots – 1 small, shredded
    • Onions – 1 small, finely chopped
    • Cucumber – 1 small, finely chopped

    Spices, Flavors and Herbs

    • Cilantro – A handful
    • Green Chillies – 2-3, finely chopped
    • Puliyogre Powder – 1/4 tsp
    • Chutney Powder – 1/4 tsp

    Nuts and Seeds

    • Roasted Peanuts – 1/4 cup

    Method

    1. In a mixing bowl, add the puffed rice and a drizzle of oil. Mix this well to coat the puffed rice
    2. To the bowl, add all the vegetables and spices. Mix very well
    3. Mix in the roasted peanuts right before serving

    Serving Suggestion

    • In India, Churmuri is typically served in cone shaped containers, usually made out of any available paper. But they are also served in paper plates/bowls or even more eco-friendly versions like bamboo or leaf. To mimic the true experience, you can use any available rectangular shaped paper and roll it into a cone. Just use some parchment or wax paper, also rolled into a cone shape, as a liner. Spoon in the Churmuri to this and enjoy πŸ™‚

    You can also follow me on Instagram to be up-to-date with what is cooking my kitchen. If you like this recipe, do share your comments below. Don’t forget to post your version on Instagram using #foodformyloveblog.